

The accounting module is not enabled by default. Contact our team or reach out via the in-app chat to have it enabled on your workspace.
Before you start
Make sure you have:- The accounting module enabled on your workspace (see above)
- Billing activity to account for (invoices, payments, credit notes), current or upcoming
- The accounting standard your books follow (IFRS, US GAAP, UK GAAP, French GAAP, or another local GAAP)
- A decision on whether you will sync entries to an external accounting tool, such as Xero, QuickBooks, Pennylane, NetSuite, Exact Online, or Rillet
Permissions
Three permissions, granted to a role in Settings > Team, control access to the accounting module. See Users & permissions for how to create a role.View accounting and sync rules also gates accounting exports: without it, general ledger, income statement, balance sheet, and revenue recognition files are neither visible nor downloadable from Exports.
Setup flow
1. Create your ledger
A ledger is one self-contained set of books, with its own chart of accounts, rules, and journal entries. Most companies start with a single ledger mirroring the official books they report on. Go to Accounting and click Create ledger.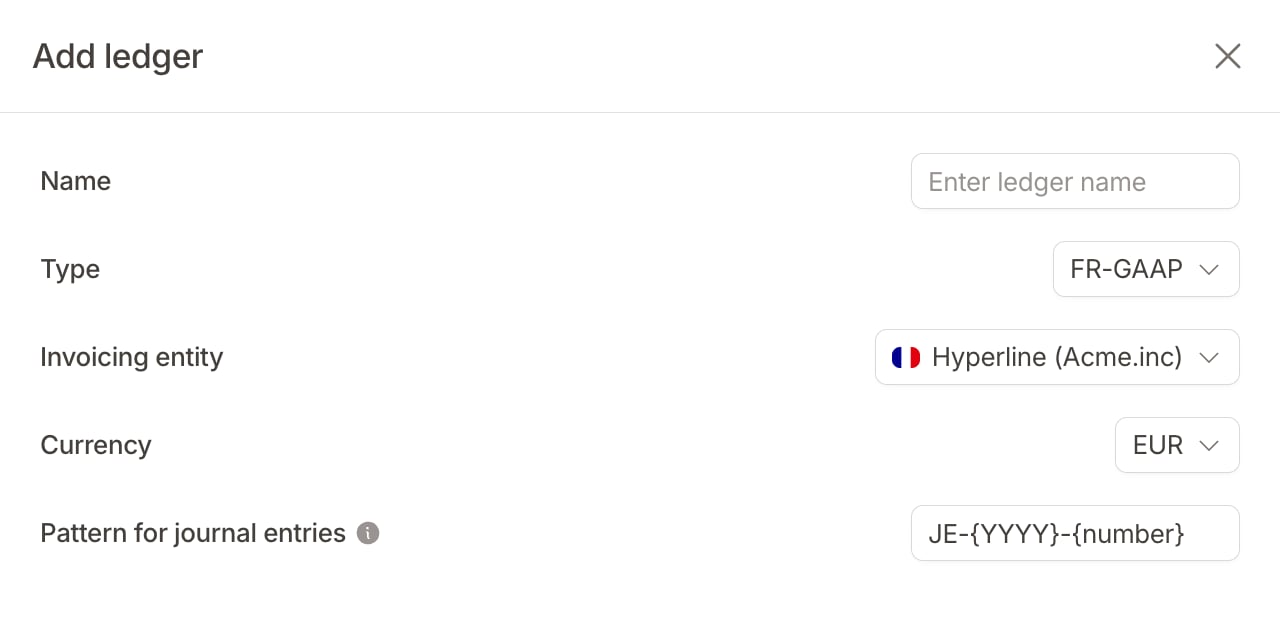
- Name: a label to identify the ledger (e.g. “Statutory IFRS”)
- Type: the accounting standard, which determines the starting chart of accounts and rules
- Invoicing entity: the entity this ledger is attached to
- Currency: the functional currency, the single currency this ledger keeps its books in. Invoices in other currencies are converted using the exchange rate at invoice time
- Pattern for journal entries: the numbering format for journal entries (e.g.
JE-{YYYY}-{number}). The pattern accepts{number}(required, the sequential counter),{YYYY},{MM}, and{DD}
Leave the
Management, Consolidation, and Audit adjustment types for later. They serve advanced setups such as tracking annual and monthly recurring revenue or group-level eliminations. The consolidation and audit types ship without default rules. See Ledgers for the full list.2. Review your accounts and rules
Setting up a chart of accounts and mapping every billing event to the right accounts is usually the tedious part. Hyperline does it for you, based on the ledger type you selected:- A chart of accounts matching the selected standard, such as ASC 606 revenue accounts for US GAAP
- A complete set of accounting rules mapping each billing event (invoice posted, invoice settled, credit note created) to the right accounts
Syncing to an external accounting tool? Instead of using the default accounts, you can pull the chart of accounts directly from your provider so account codes match exactly.
3. Watch entries post
From here on, you never write these entries by hand. Hyperline applies your rules each time an invoice is finalized, a payment settles, a credit note is issued, or usage is consumed on a usage-based product. It then posts the matching debits and credits. You can browse them in three places:- Accounting > Journal: every entry in the ledger as a flat list, with filters for status, account, entry date, and rule
- Accounting > Ledger: entries seen per account, for a selected quarter
- The Accounting section on any invoice: the entries and recognition schedules for that specific invoice
4. Verify a first invoice
Once a first invoice has been issued, open the invoice page and scroll down to its Accounting section. Accounts receivable should equal the total owed, revenue (or deferred revenue) the net amount, and the tax line the tax. If those match, every future invoice will post the same way. To understand exactly which debits and credits Hyperline posts for each event, see how entries are computed.Next steps
Customize your rules
Scope rules to specific products, customers, or currencies, and understand priorities.
Adjust revenue recognition
Your accounting rules drive recognition. Adjust how revenue is deferred and recognized: over time, at a point in time, or based on usage.
Understand entry mechanics
See the exact debits and credits posted for each billing event.
Connect your accounting tool
Push invoices to Xero, QuickBooks, Pennylane, NetSuite, and more. Once connected, you can also pull the provider’s chart of accounts into your ledger.
Is something still unclear? Don’t hesitate to reach out to our team via the in-app chat if you need additional support.