

Connect to your database
To get started, go to the data loaders page in Hyperline, create a new connection and select Snowflake in the dropdown list.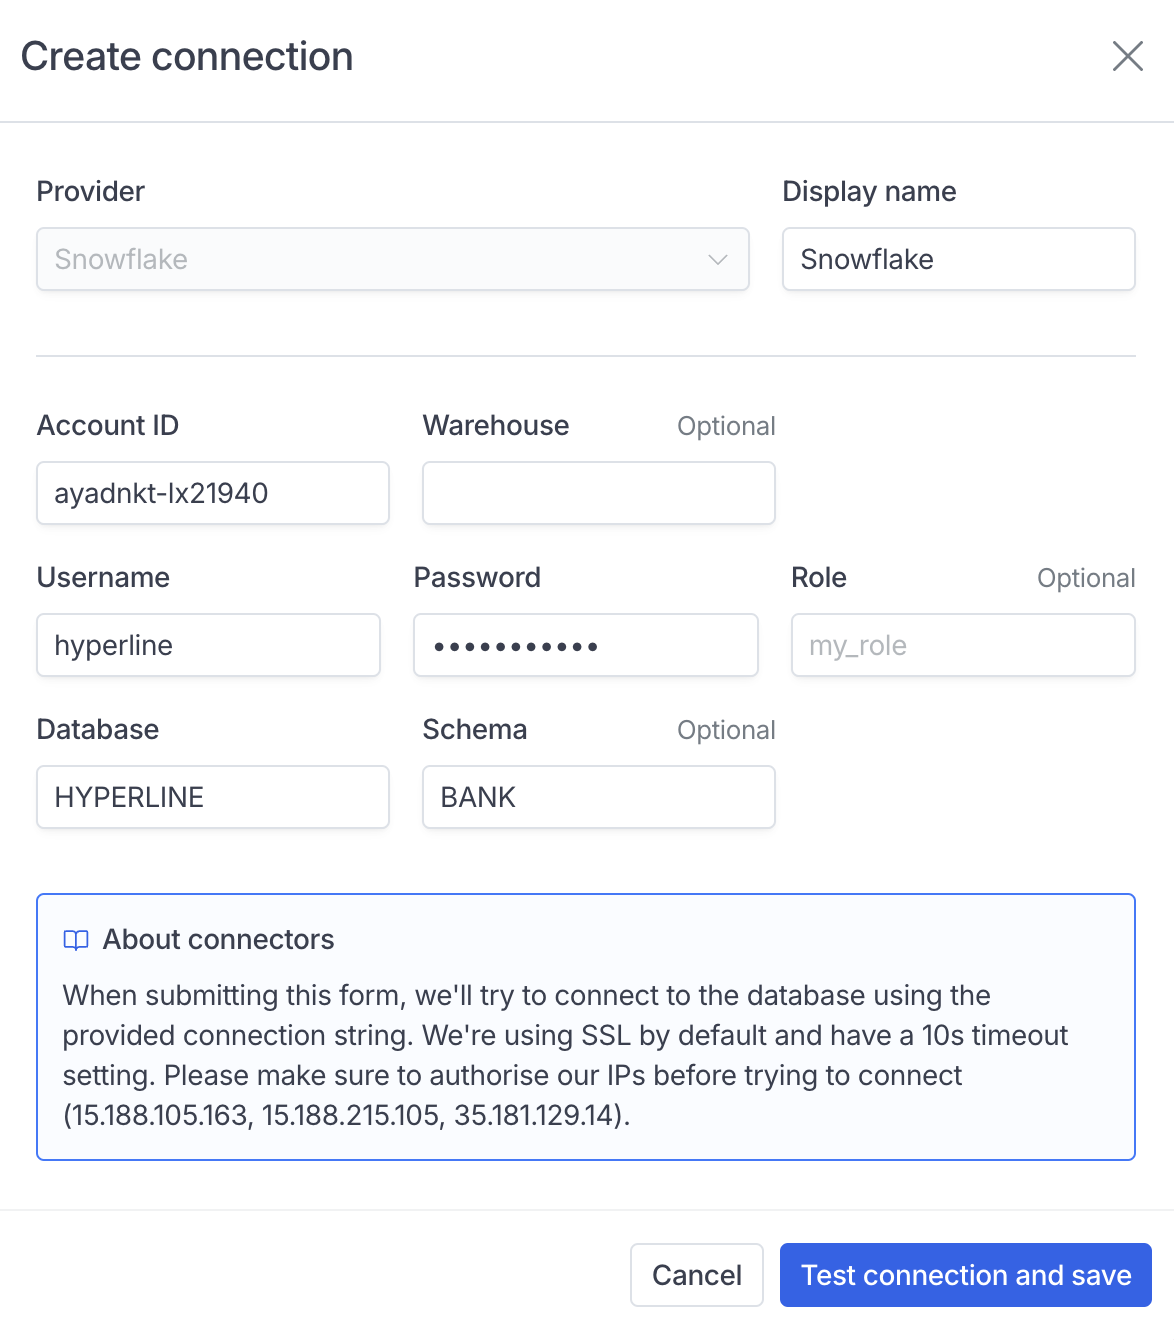
Authentication
Hyperline supports two authentication modes for Snowflake, selectable from the Authentication dropdown in the connection form:- Password: authenticate with the Snowflake user’s password.
- Key pair (RSA): authenticate with an RSA private key that is registered on the Snowflake user.
Password authentication
Select Password and enter the user’s password in the Password field.Key pair (RSA) authentication
Select Key pair (RSA) and provide:- Private key: the RSA private key registered on the Snowflake user, in PEM format. Paste the full key including the
-----BEGIN PRIVATE KEY-----and-----END PRIVATE KEY-----lines (or the encrypted equivalent). - Private key passphrase (optional): the passphrase protecting the private key, if it is encrypted. Leave empty for unencrypted keys.
Load your data
Snowflake is a standard SQL loader, so you only need to write a Snowflake-compatible SQL query. Hyperline runs it as the role or user you used to connect to the database. As always, make sure to includeid, customerId and timestamp fields with the correct casing.