Assign subscriptions to customers in Hyperline manually or via templates, with options for trials, contracts, billing cycles, and activation strategies.
Creating subscriptions is a central capability in Hyperline. In this article, we will explore the various options available to assign them to your customers, from simple to more complex needs.Before starting a subscription, you must configure the products you wish to bill and, optionally, create templates to streamline the subscription assignment process, using reusable package configurations.
Though products are configured at the account level, you can customize every option at the customer level, allowing you to adjust them according to specific needs on a per-case basis without impacting your overall configuration.
Configuring a subscription in Hyperline only takes a few clicks. However, we also provide the flexibility to customize subscriptions on a per-customer basis, offering you greater versatility and agility.
1
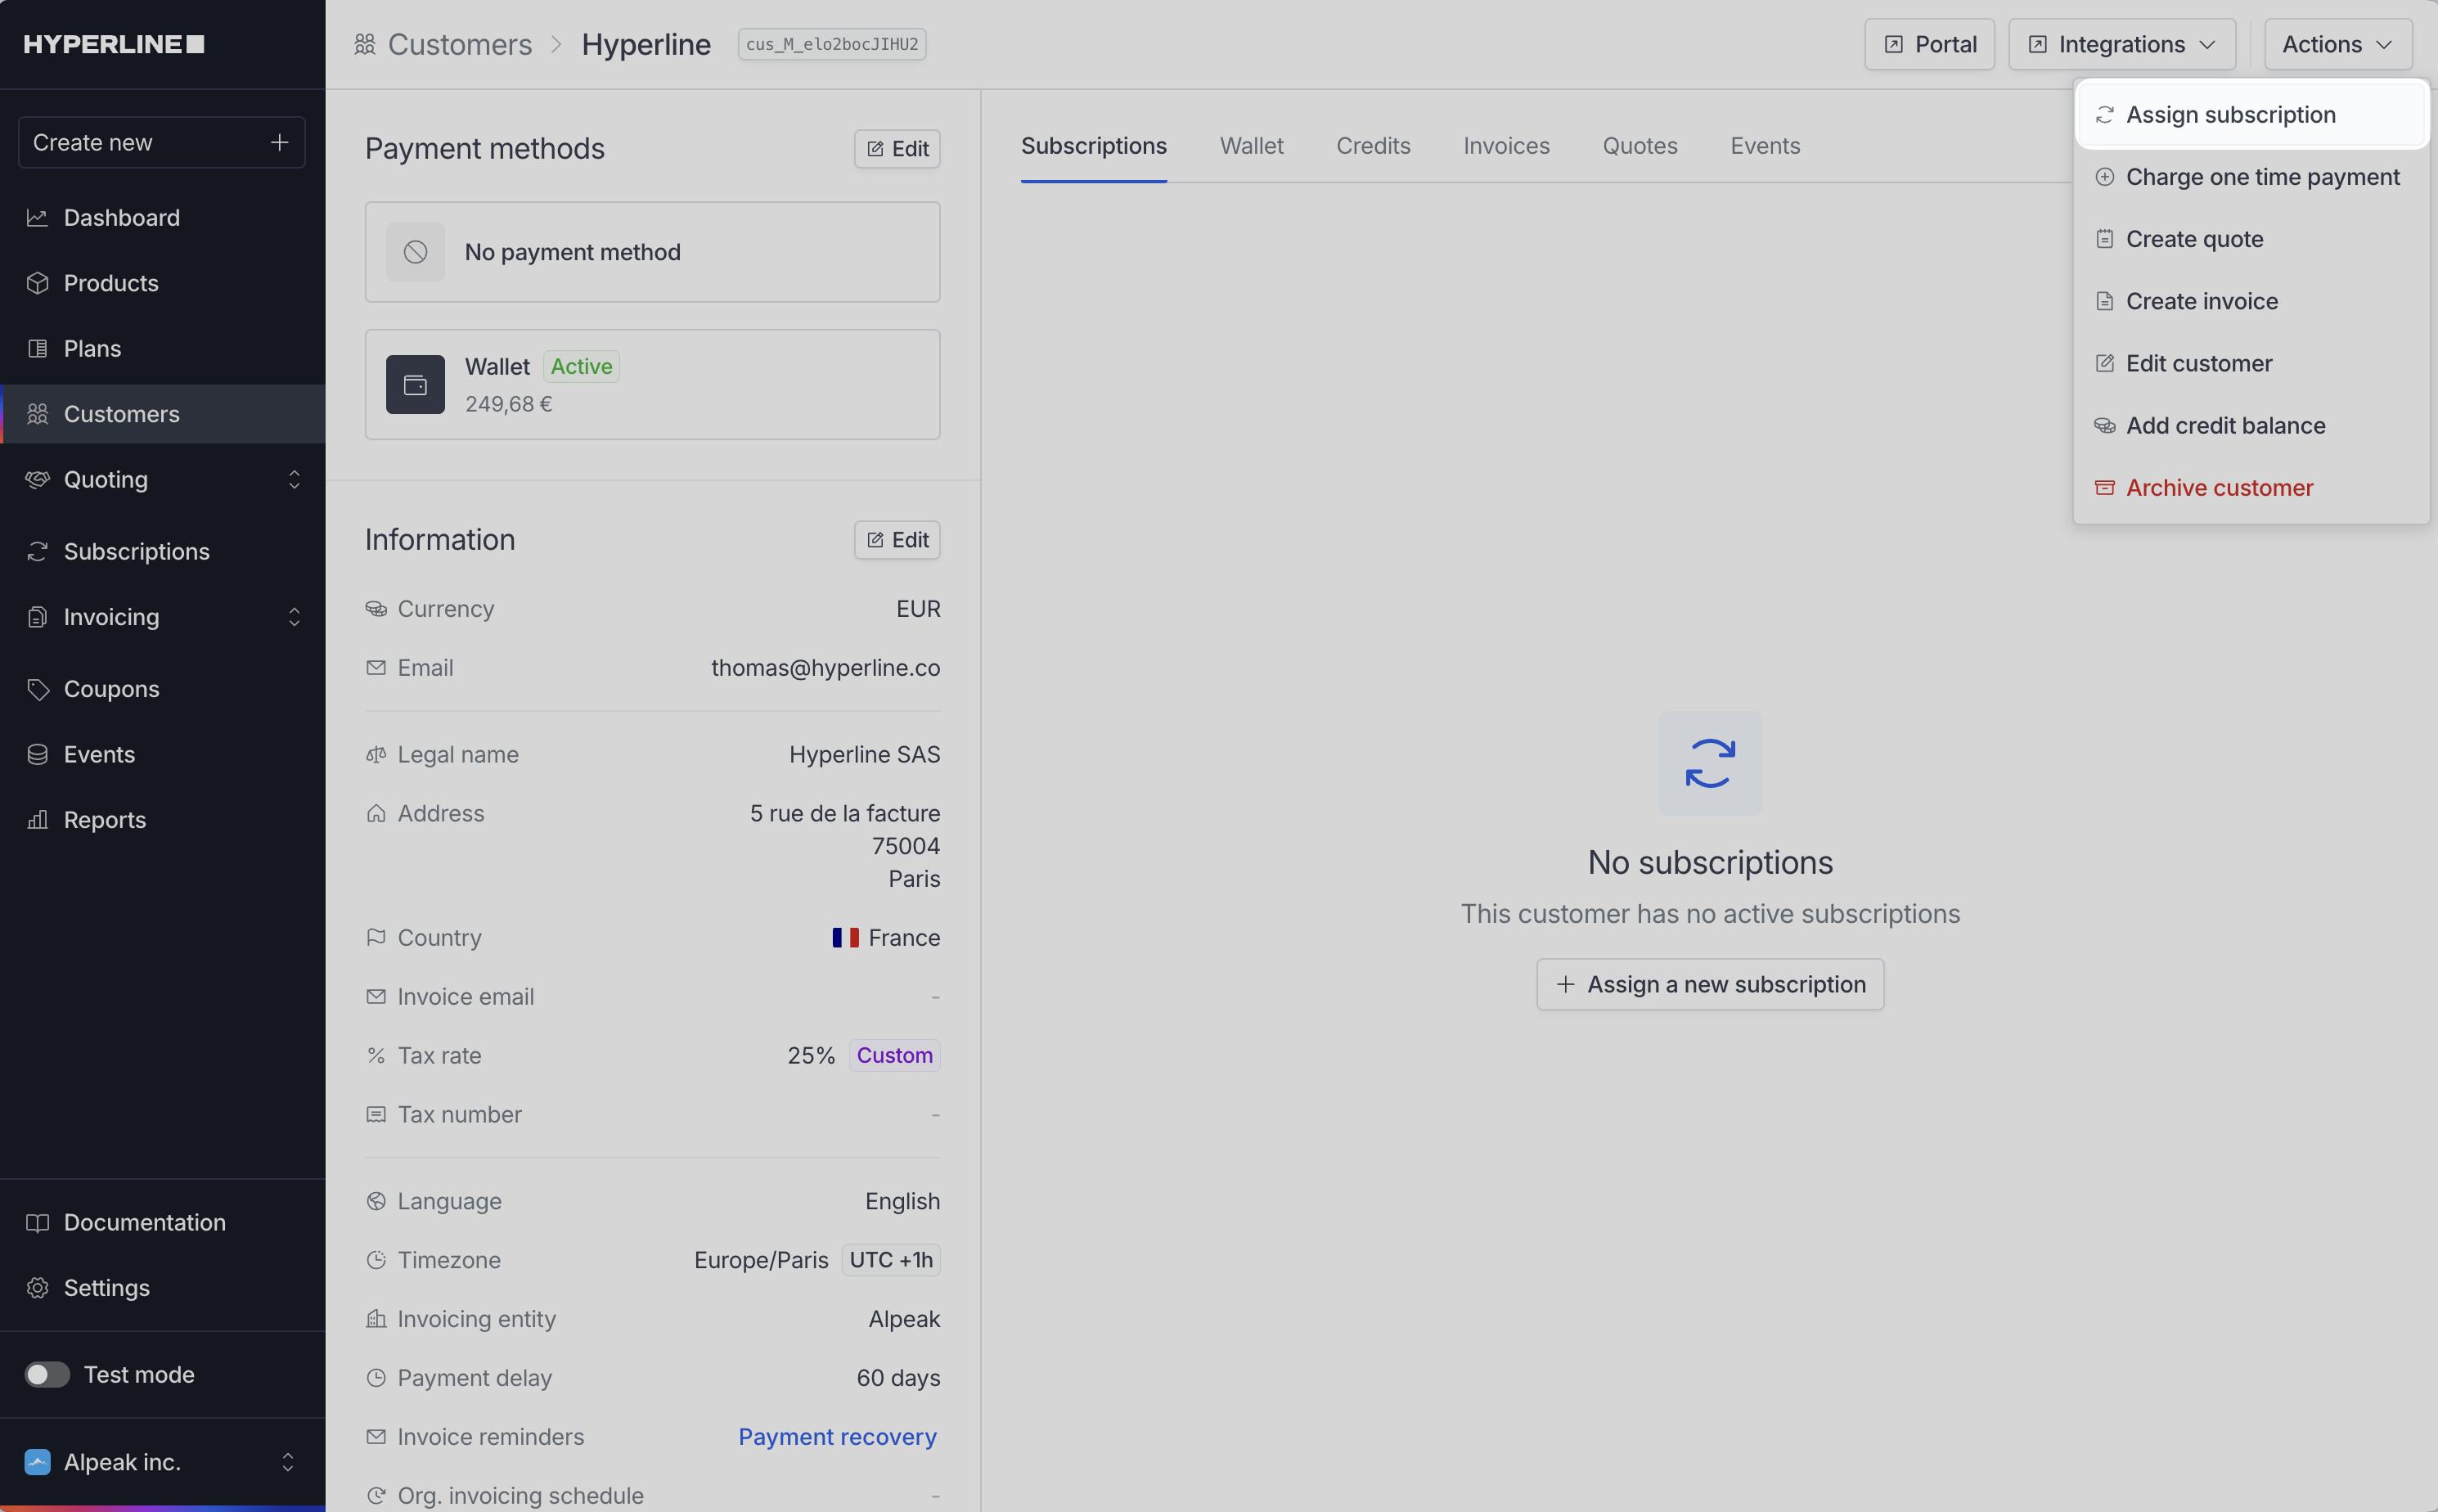
From a customer page, click Actions then Assign new subscription
You can also create new subscriptions from the subscription list page. In this case, you will have to select the customer.
2
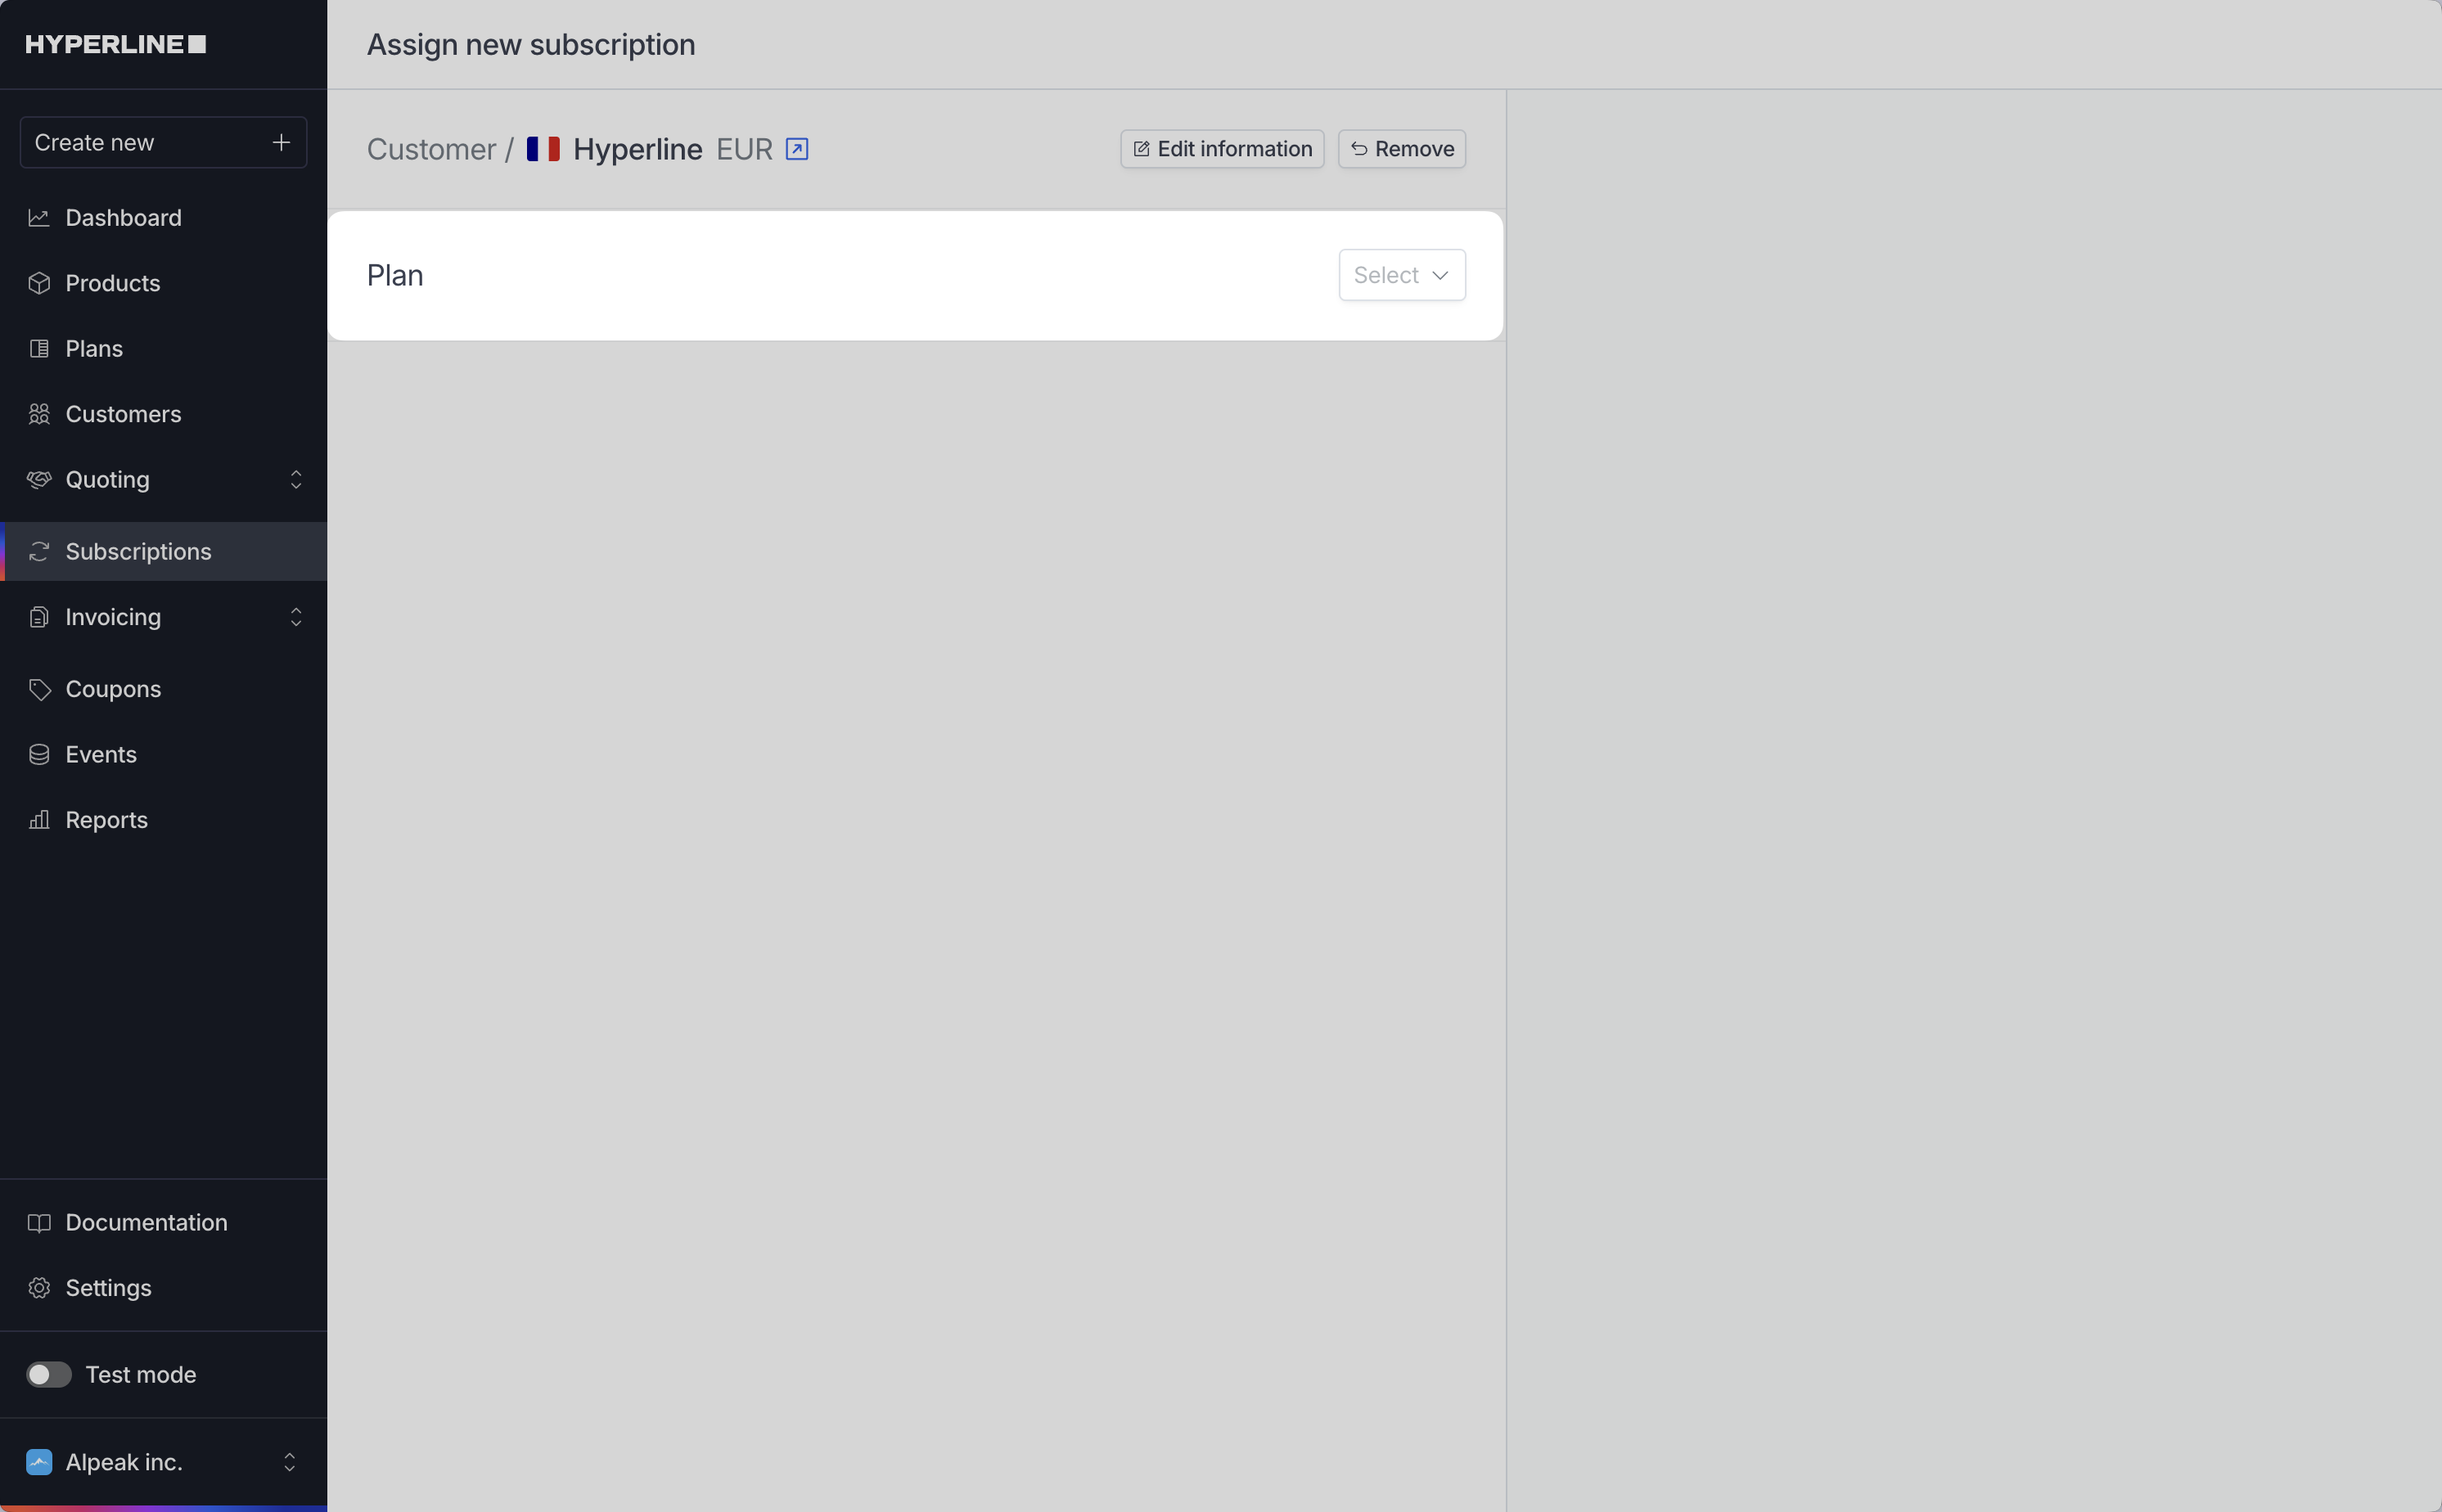
Optionally, select a pre-configured template
You can start a subscription either from a pre-configured template or configure your subscription manually from scratch.
3
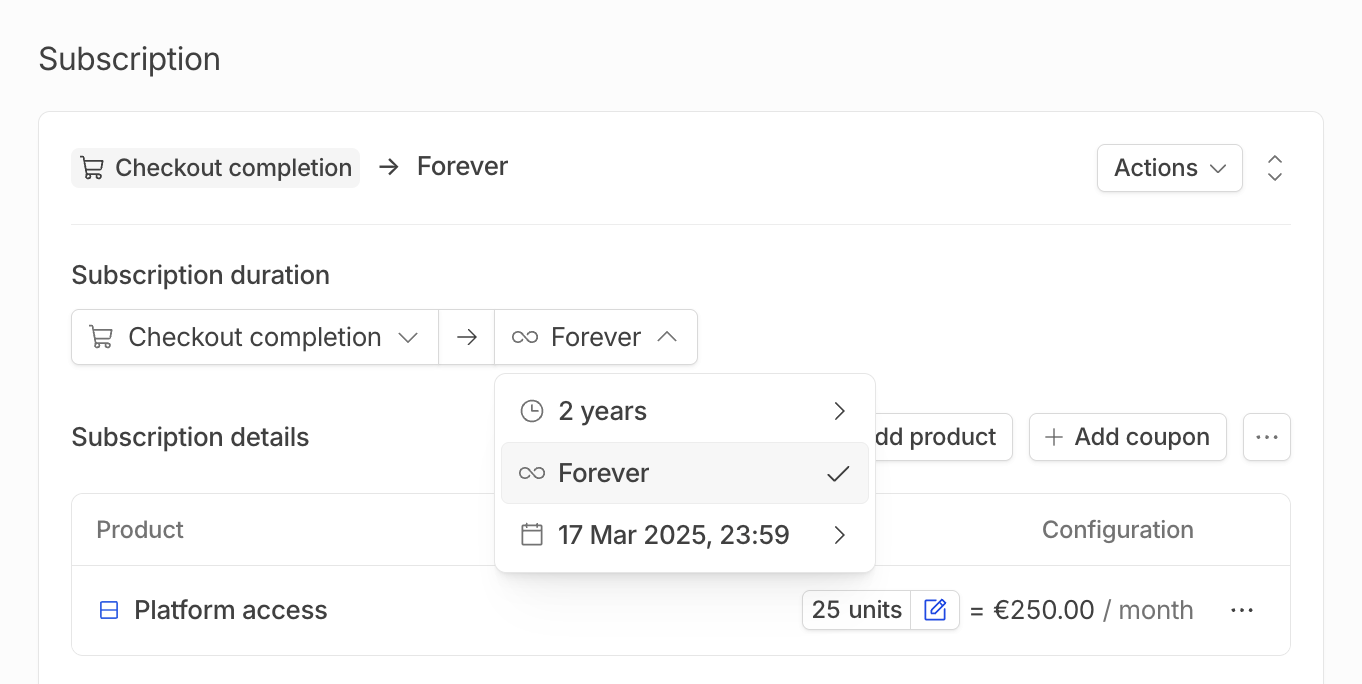
Select subscription duration
Subscription start
In the past, if you want to backport a subscription that has already started but not in Hyperline, or you want to bill a customer in arrears—any past period that’s due will be billed.
Immediately, the default value
In the future, if you want to schedule a subscription for the future
On checkout completion, once the checkout will be completed by your customer
Subscription alignmentSubscriptions follow a predictable renewal pattern based on their start date:
If a subscription begins at the standard start of a billing period (e.g., the 1st of the month for monthly plans or the 1st of the year for annual plans), it aligns automatically, and each new period starts on the same fixed date.
If a subscription starts on any other day, it renews on the same calendar day in the next period (e.g., a subscription starting on March 15th renews on April 15th for a monthly plan).
4
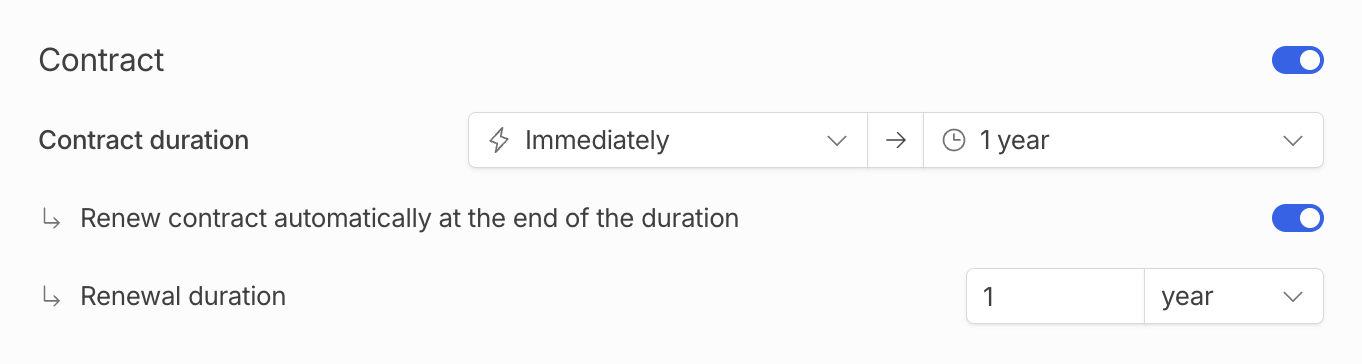
Manage contract configuration
In the contract configuration, we allow you to configure a contract duration by activating the toggle.
Contract duration replaces the notion of commitment that has been deprecated. More information here
5
Add products to the subscription
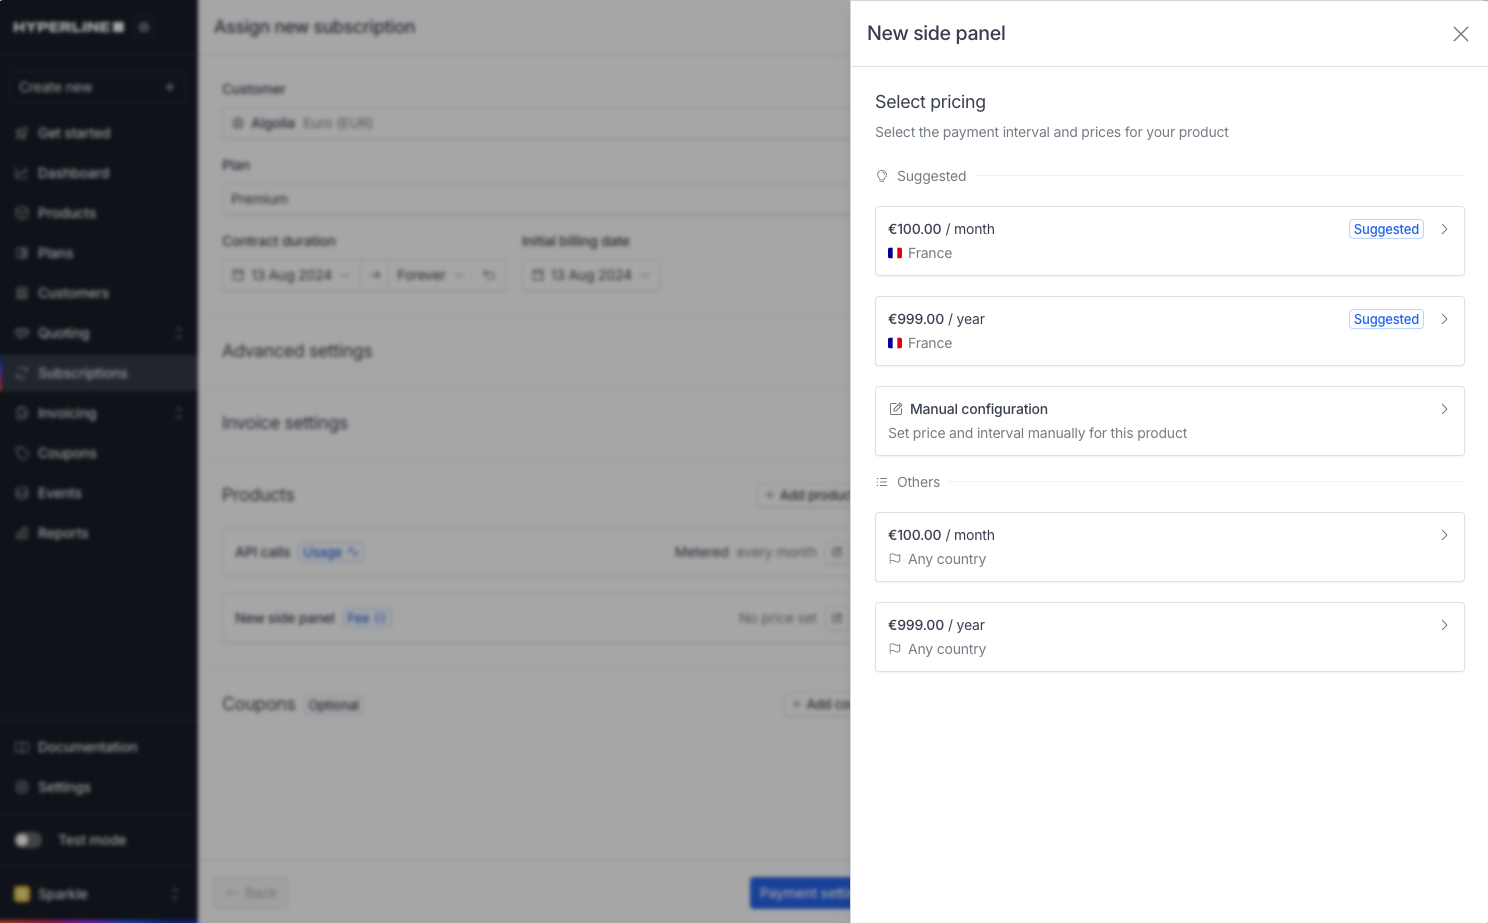
When adding products outside of a template, after selecting the product, you will be presented with the list of prices that are set in your product catalog. It’s divided in a few sections:
Select the price and billing interval for the given product or select "Manual Configuration"
Suggested: will list the best pricing according to various parameters of the subscription: The customer’s country, their currency, the commitment duration.
Others: will list the rest of the prices available for the product.
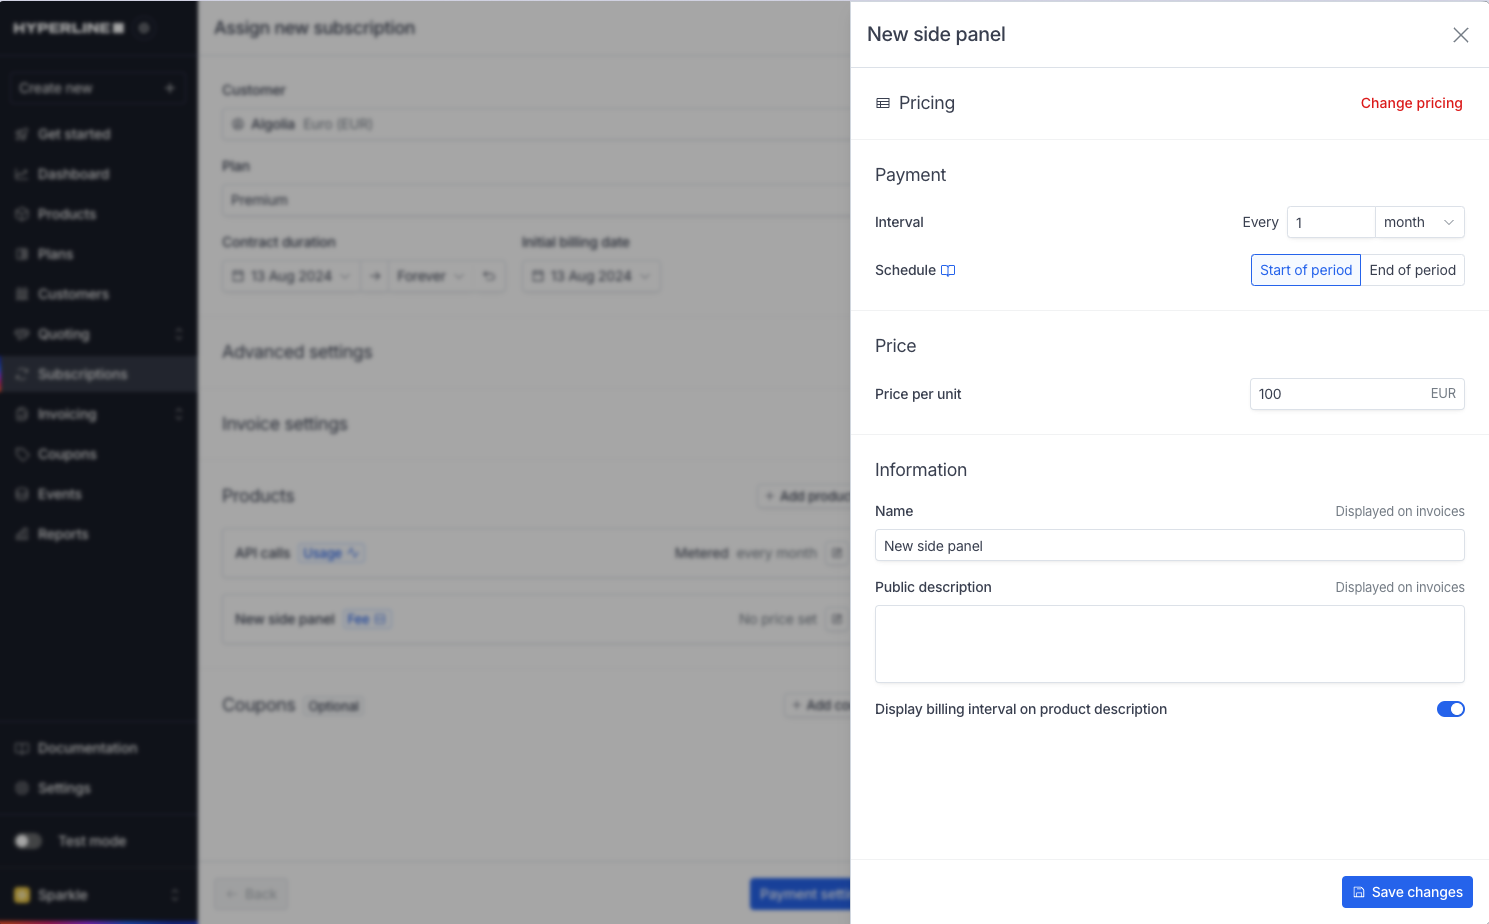
Manual configuration: If no matches are found or you don’t find the right price, you can select “Manual configuration” and you can get to the next step where you will be able to enter the price and frequency by yourself.
Once the pricing configuration is selected, you can edit the product details. When editing a product configuration, it will not impact your catalog and only have effect on the subscription you’re currently creating. This gives you the flexibility to set customer-specific pricing.
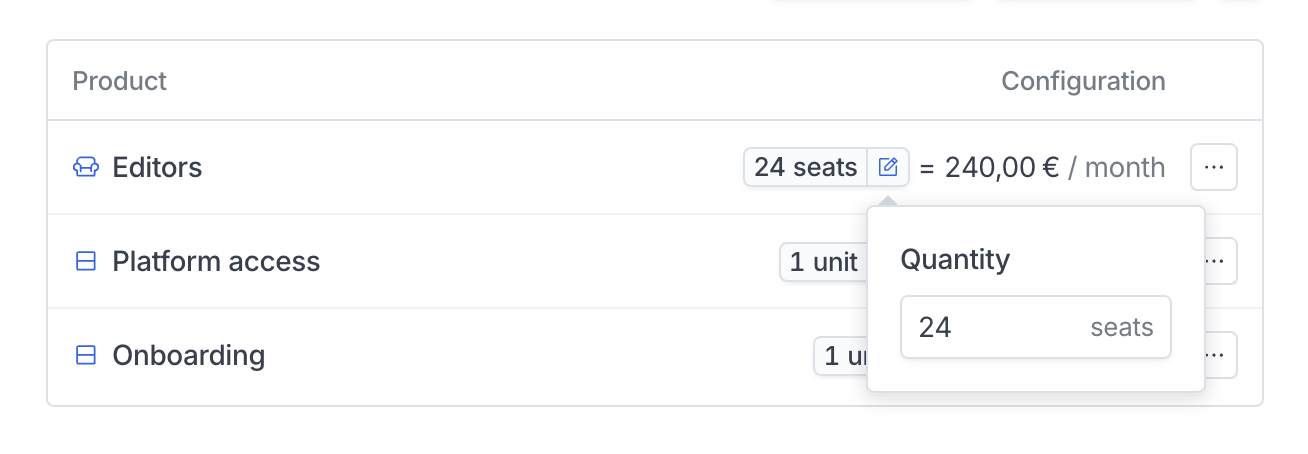
You can adjust the quantity directly from the main subscription view, making it easy to customize a subscription especially when starting from a pre-configured template.
6
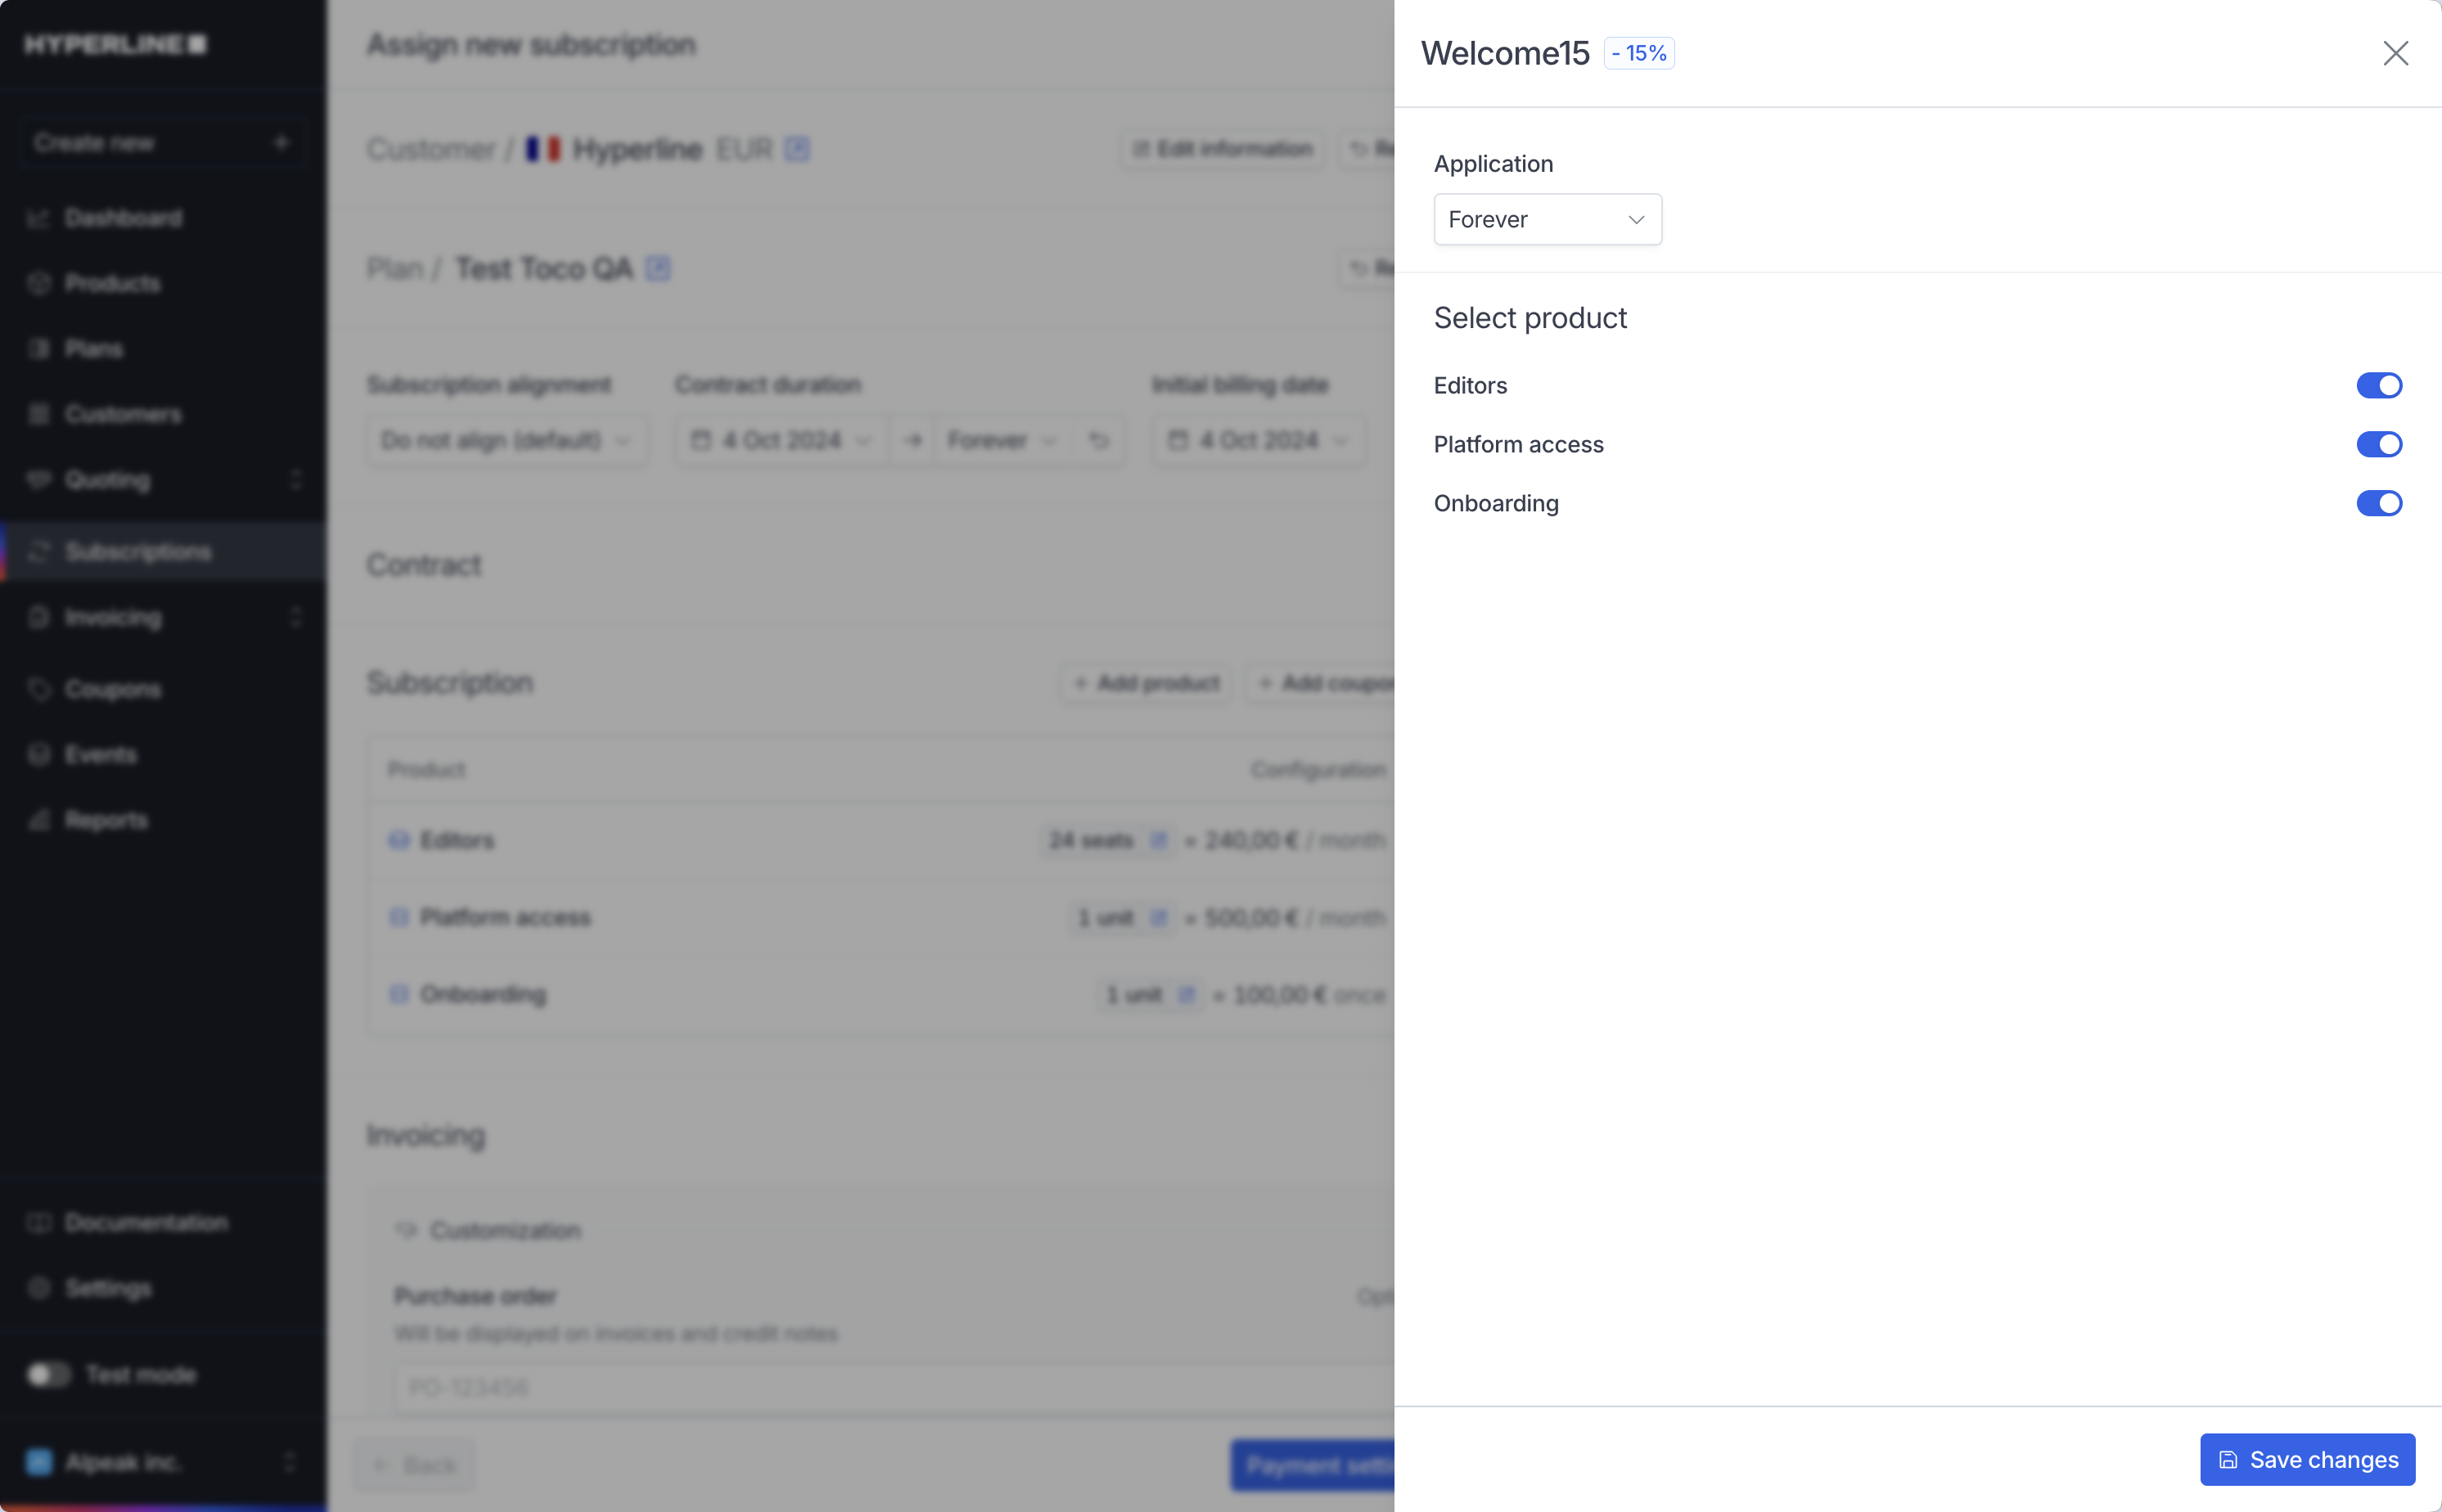
Optionally, add coupons
You also have the ability to assign coupons to your subscription. These coupons can be a fixed amount in the customers’ currency, or a percentage of the product price. They can apply to specific or all products.
You can either create single use coupon to apply on this subscription only, or one that you have previously set up in your catalog
Once you selected a coupon, you will be able to select:
The application date: choose whether the coupon will be applied once, forever or for a custom period (referring to the period during which invoices will be generated)
The eligible products: choose All products to apply the coupon to every product, or Specific products to select individual products
7
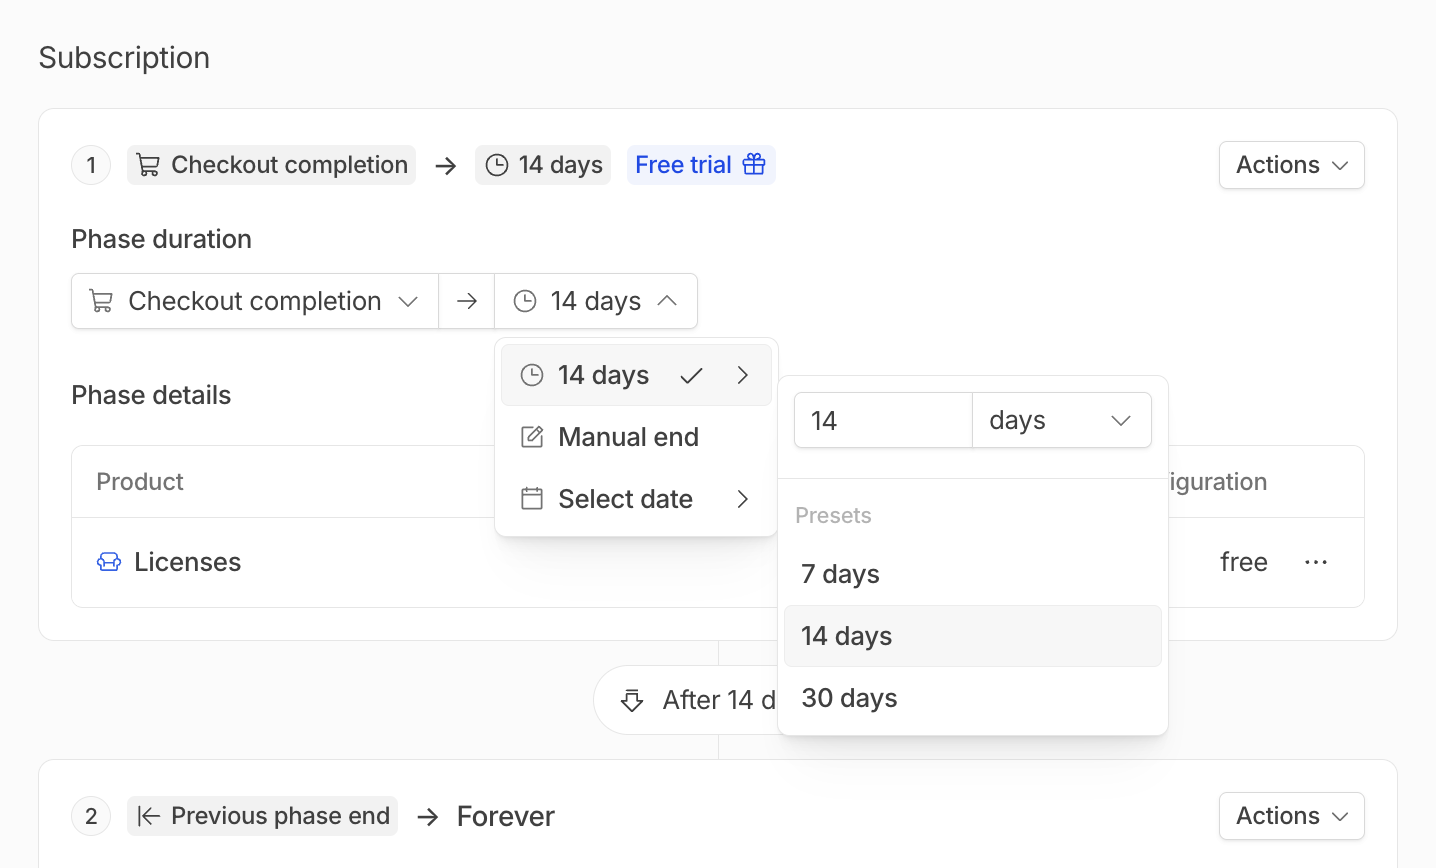
Optionally, add a free trial
Adding a free trial allows you to start a subscription without charging the customer until a specified period has passed. In Hyperline, a free trial creates a new phase that duplicates the first phase, but with all products set to free.
To add a free trial, the first phase must include at least one product.
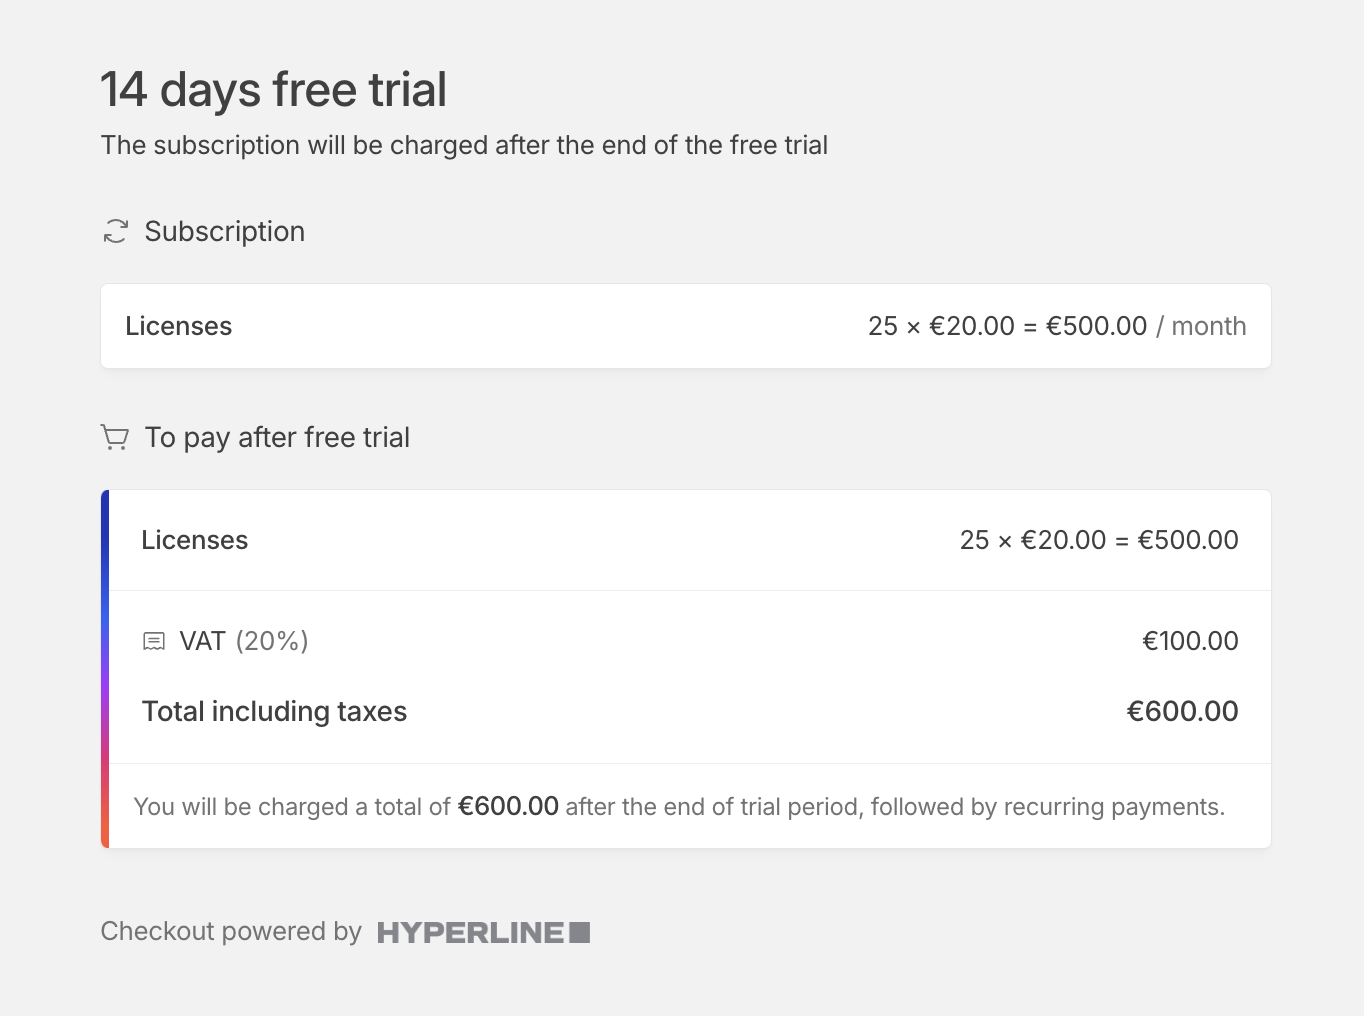
The free trial is set to 14 days by default. It can be ended after a custom duration like 14 days or 1 month, at a fixed date or with a manual end. The free trial can be terminated earlier on with mark phase as finished.
The free trial details will appear on the checkout page if the subscription is configured to start after checkout completion.
8
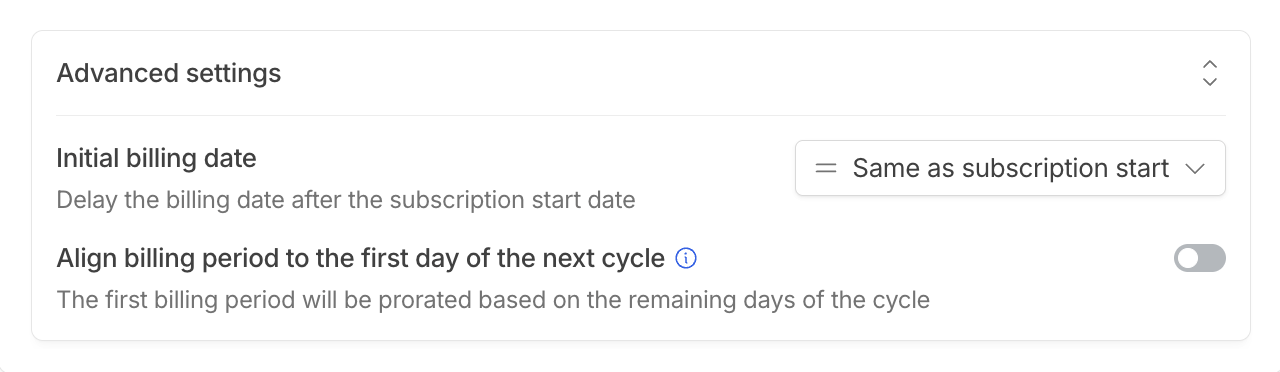
Advanced settings
Initial billing date
The initial billing date is when the billing period will start. It defaults to the subscription’s start date, as set in the subscription duration selector. If the subscription starts on a specific date, the billing date can be set to a custom day (which is always after the subscription start date).
Align billing period to the first day of the next cycle
Toggling the option on will make sure that the next billing period is aligned on the first day of the next billing cycle. You can configure this option to be toggled on by default under Settings > Subscriptions.For example, the subscription will charge the first billing period from the start date (e.g., January 14, 2025) until the end of the current cycle (e.g., January 31, 2025, when the product is billed every month). From the next cycle onward, billing will follow the regular interval (e.g., monthly, from February 1, 2025, to February 28, 2025), ensuring alignment with the standard billing schedule.
9
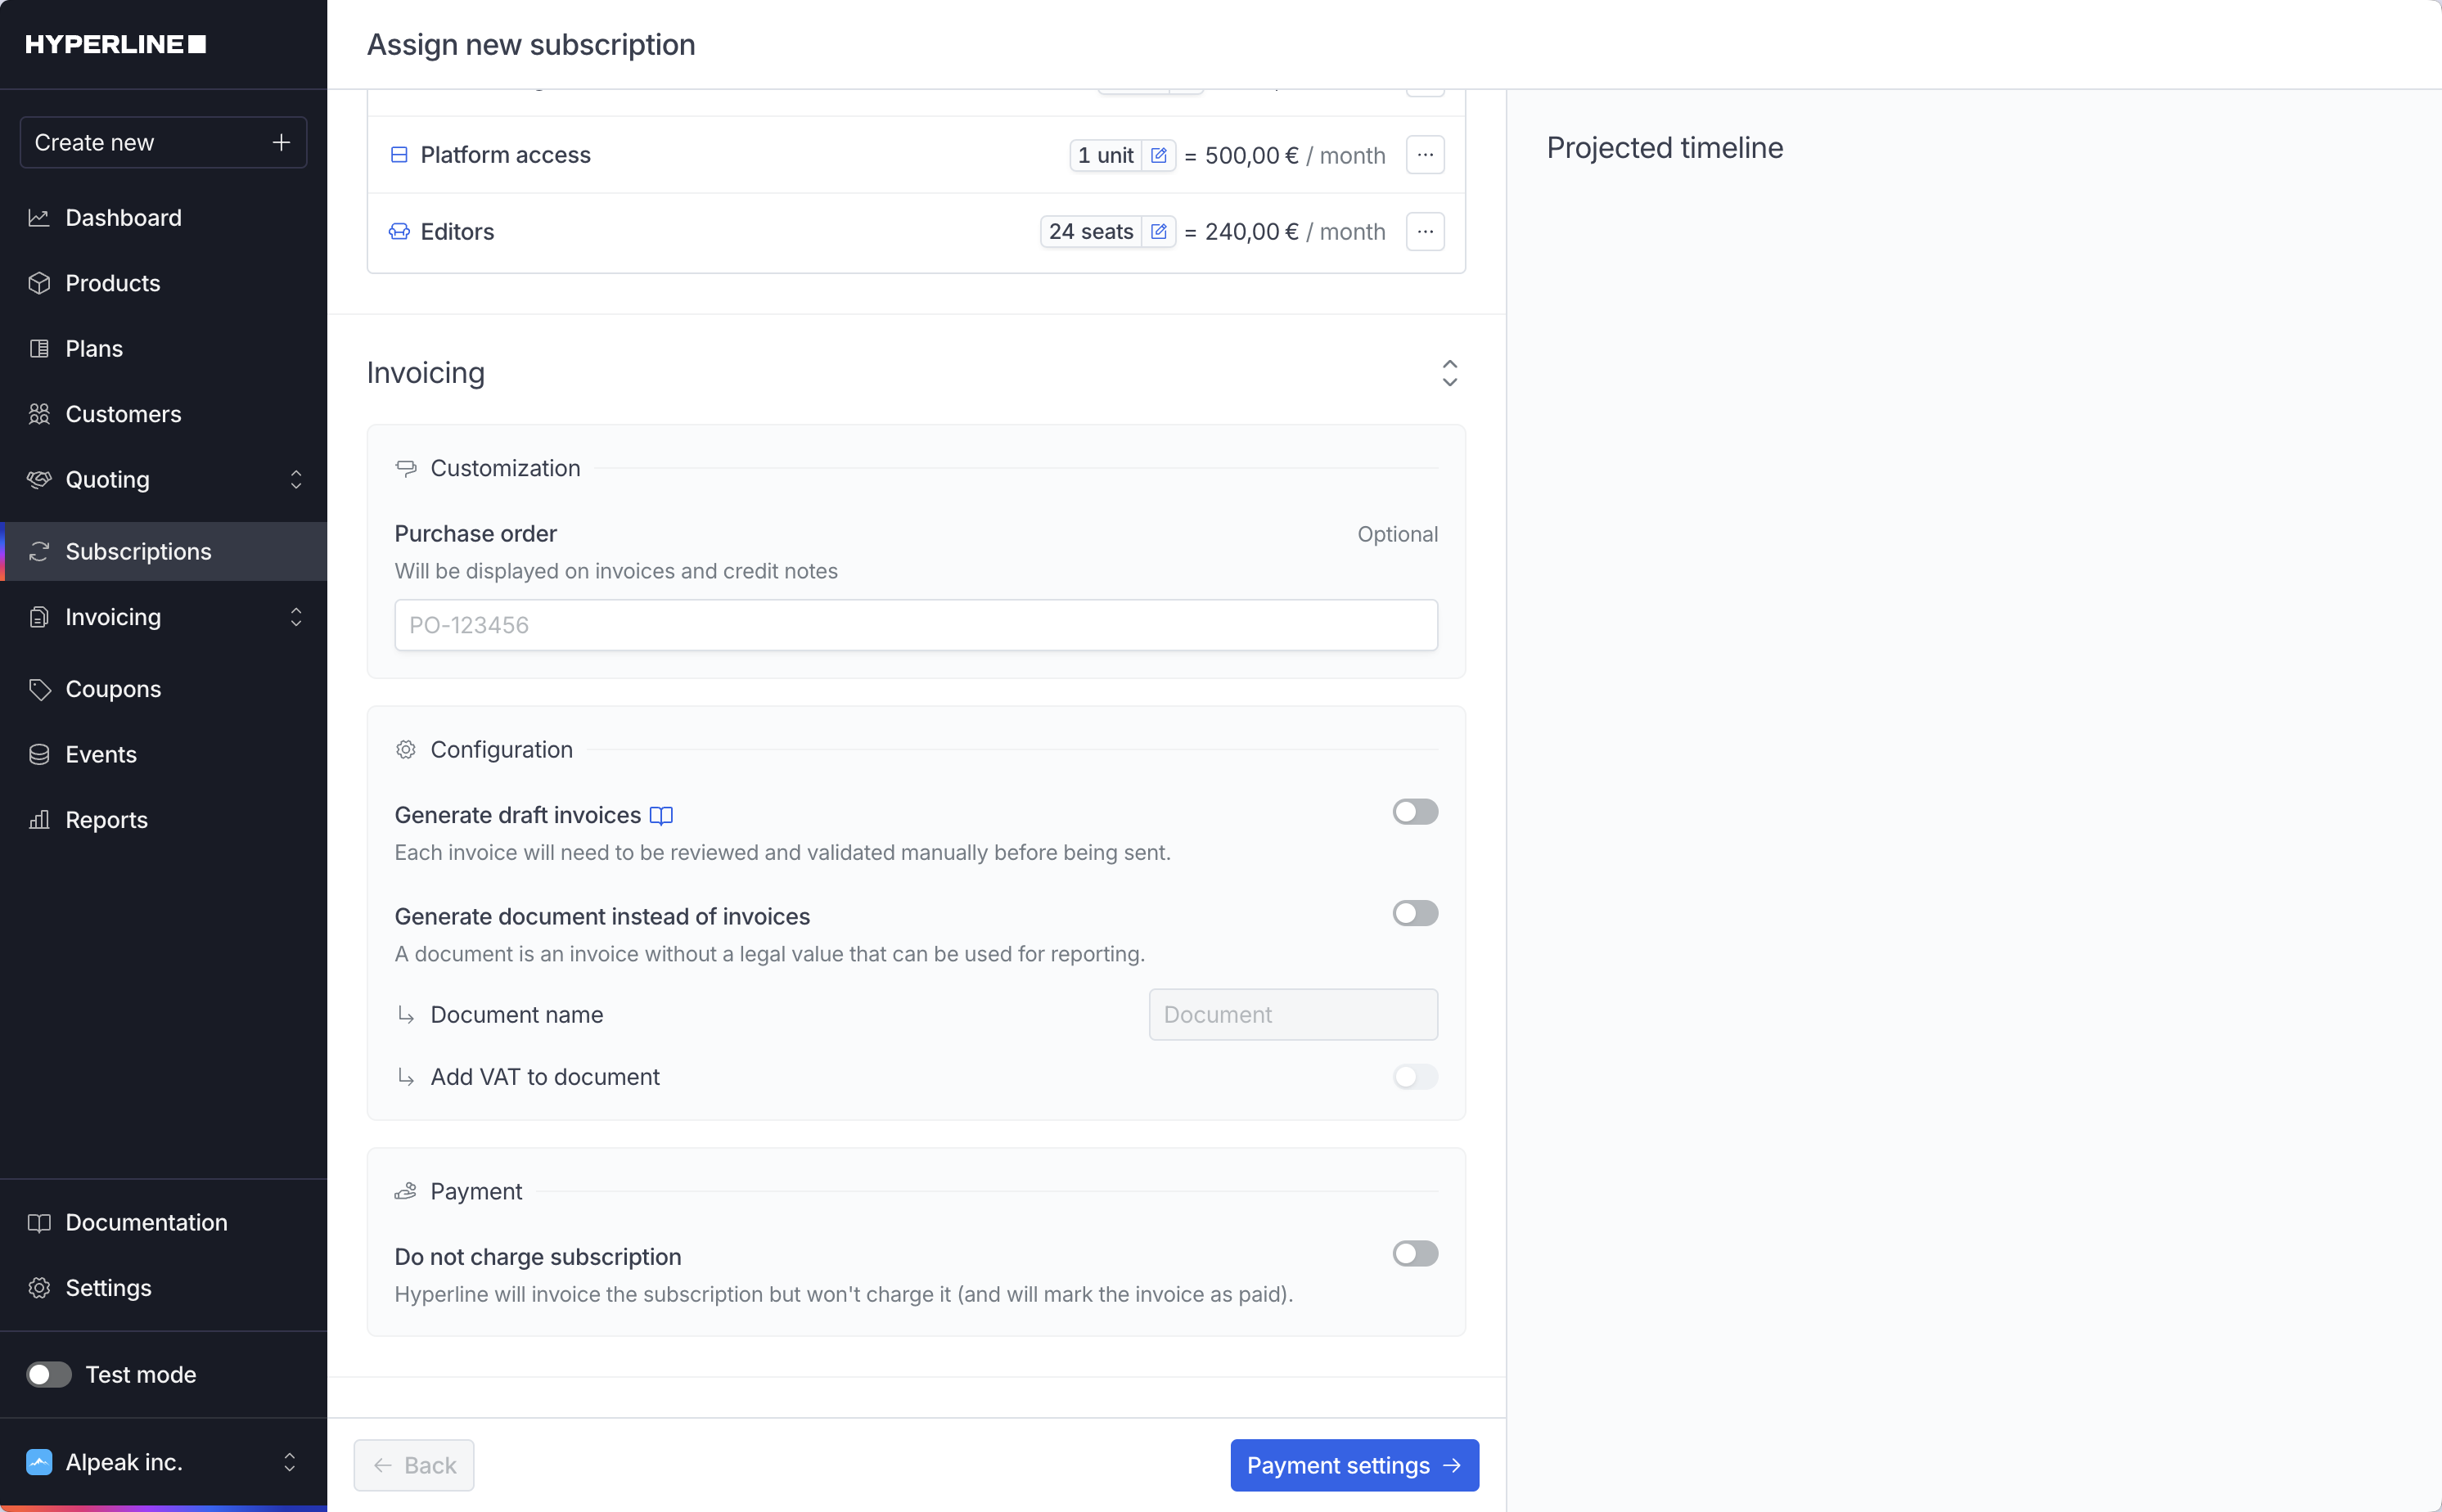
Manage invoicing settings
Purchase orderAdd a text element that will be present on the header of every invoice emitted by this subscription.Generate draft invoicesThe draft invoices feature allows you to review an invoice before it’s sent. It’s handy if you have to double-check what’s sent to your customer, or when you’re first trying out the platform. When an invoice is generated, it will be set as a draft that you can edit, finalize and then send to your customer.
The customer-level Force draft invoices setting overrides this option. When it is enabled on the customer, every invoice is created as a draft regardless of what is configured here.
Generate documents instead of invoicesWhen Hyperline generates documents instead of invoices, the documents have no legal value compared to invoices and can be used for reporting. You can choose to add VAT to the document or not and set a custom name for the document.Do not charge subscriptionThe invoices will be created and the invoice will be marked as paid, however, the platform won’t charge for the invoices. It’s handy for adding subscriptions to your reporting when payment is handled elsewhere.
After clicking on the next button Payment settings, you’ll need to configure how you want the subscription to start and your customer to pay it. You can also configure invoicing options as an optional step.
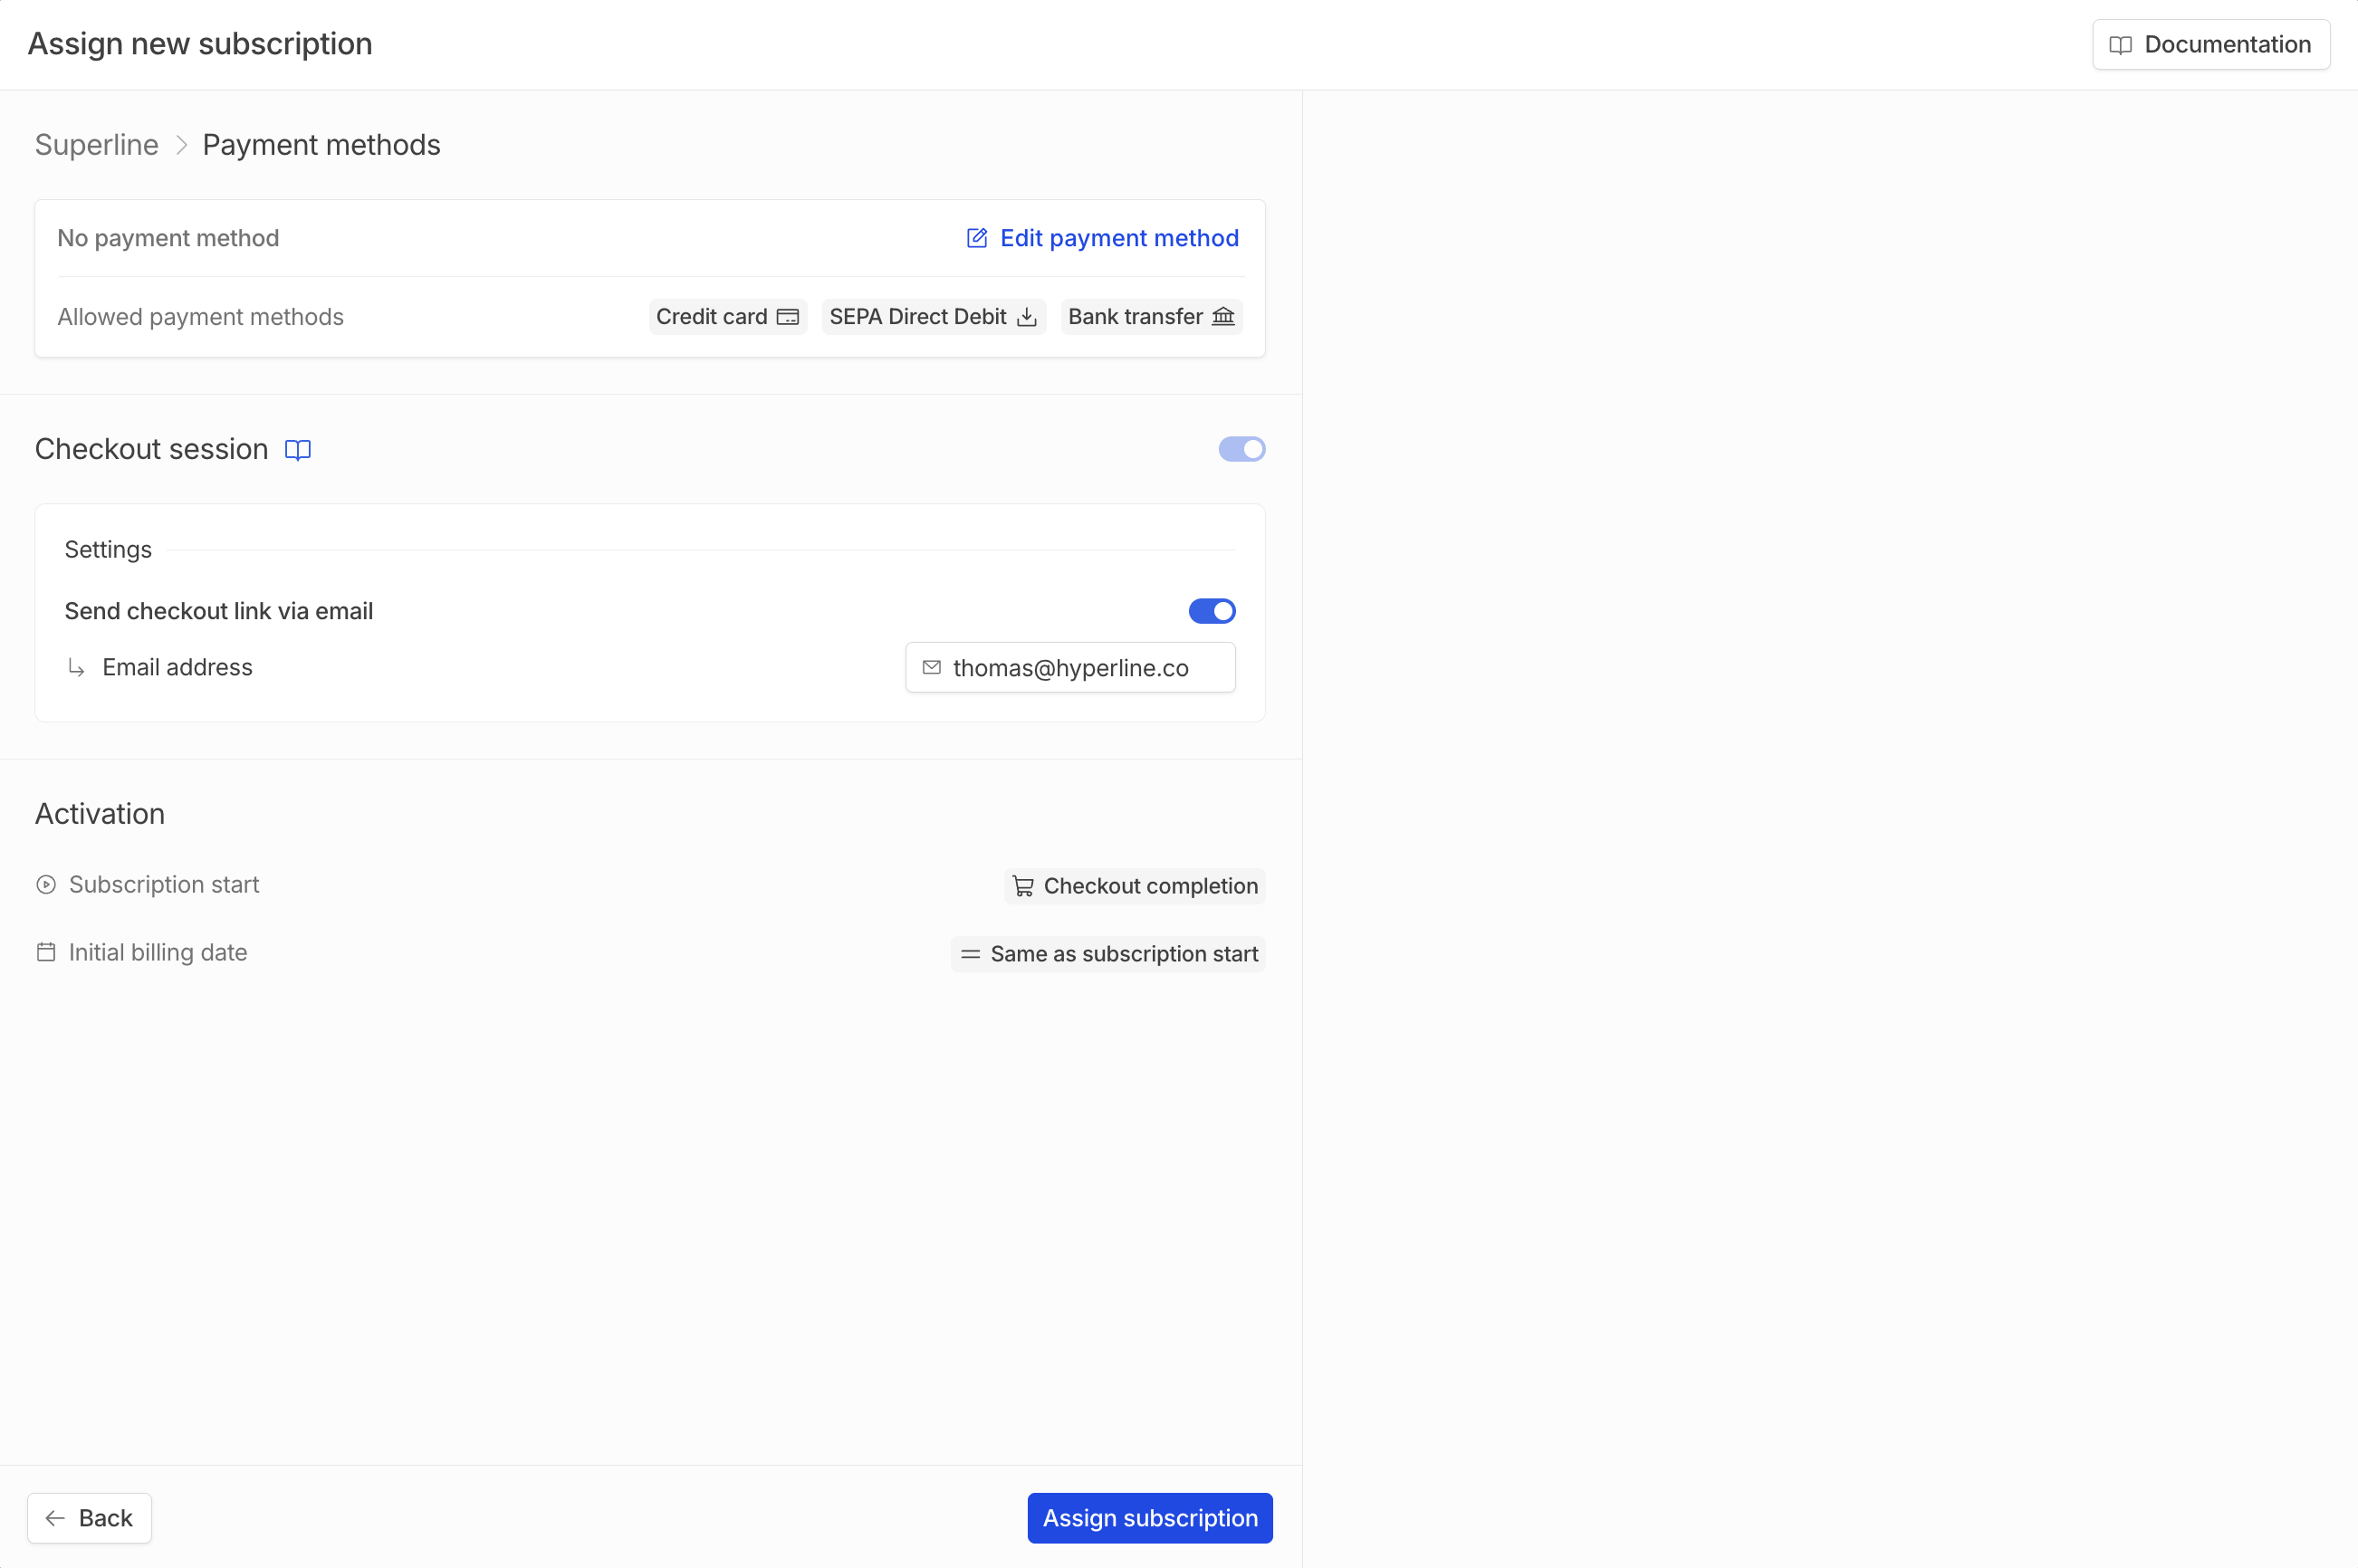
In this section, you are shown the default payment method (the one that will be used for charging the invoices), and the allowed payment methods (the ones the customer can add during checkout and on their portal).You can edit the customer’s default payment method and toggle on or off the allowed ones. These changes will be applied on the customer level.
Require payment method for activation
Under Settings > Subscriptions, the Require payment method toggle (off by default) enforces that a customer has a usable payment method before a new subscription can start billing. Turn it on when you want to prevent activating subscriptions that cannot be collected on.When the setting is enabled:
Manual assignment — creating a new subscription assignment for a customer without an acceptable payment method is blocked. A callout appears at the top of the assignment form linking directly to the customer’s payment method settings so you can add one before assigning.
Quote signature — if a customer signs a quote but does not have an acceptable payment method, the quote is marked as signed but subscription activation is paused. The quote surfaces a Quote activation paused callout, and activation resumes automatically once the customer provides an acceptable payment method. In the API, this state is exposed as error_type: activation_missing_payment_method on the quote.
A customer is considered to have an acceptable payment method when any of the following is true:
Their default payment method type is bank transfer, automated bank transfer, or external collection — these are always considered satisfactory because they do not depend on a stored instrument.
Their default payment method is any other type (card, direct debit, and so on) and its state is active.
This check only applies to new subscription assignments. Updates to existing subscriptions, quote creation and editing, and subscription templates are not affected.
Hyperline provides a hosted checkout page for your customers, allowing them to enter their billing details (contact information, address) and add the payment method they wish to use for recurring subscription payments.This page is for single use and is provided at the beginning of the subscription process to allow your customer to complete the act of subscribing to your service.
The use of this page is optional, and can be disabled by toggling off Generate checkout session in the global settings under the Subscriptions section.
Additionally, we provide you a way to add an email address so Hyperline can automatically send the related checkout page link to your customer, without any action from your side.
The subscription activation is now managed within the previous step, now being aligned with the subscription start strategy (quote signature, checkout completion, manually or at a set date).
When everything is set and ready to go, you can click Assign subscription. If the customer is going to be charged immediately, you will be reminded with a message that will prevent you from charging unintentionally.
In this example, we create a new subscription with two products paid every month for the customer cus_3PYD5R2q5NFK5E, with a starting date on December 12, 2025 and activated automatically at the start date. The product prices will be automatically determined based on the prices configured in the product catalog for the corresponding currency, interval, etc.
When creating a subscription, you can override the price for a specific product with a custom amount. Note that this operation is only allowed for flat_fee products.If we take back our previous example and adjust it: