Context
You run an AI platform that offers access to multiple LLM models with different capabilities and costs. Rather than billing per token for each model separately, you want to sell credit packs that customers can spend across all models — with more powerful models consuming more credits per usage. Your platform offers three model tiers:
A customer with 10,000 credits could use them flexibly: heavy usage of the budget model, occasional use of the premium model, or any combination.
Prerequisites
Before you begin, make sure you have:- Access to your Hyperline account (we recommend using test mode for this setup)
- An API key to send usage events
- A clear understanding of the models you want to bill and their relative cost ratios
When signed up and landed on Hyperline, you can use the test mode to experiment before going live.
Steps
1. Send usage events via the API
Every time a customer uses one of your models, your backend should send a billable event to Hyperline with the model name and the number of tokens consumed.customer_id: the Hyperline customer ID (orexternal_idif you’ve mapped your internal IDs)event_type: a consistent name for your token usage events (e.g.,llm_token_usage)properties.model: the model identifier used for the requestproperties.tokens: the total number of tokens consumed (input + output)
Learn more about event ingestion in our send usage data guide.
2. Create one aggregator per model
Each model tier needs its own aggregator so that Hyperline can track consumption separately and apply a different credit weight to each. Go to Usage > Aggregators and create three aggregators:
All three aggregators listen to the same
llm_token_usage event type but use a filter on the model property to isolate each model’s consumption. The Sum operation on tokens gives you the total number of tokens consumed per model.
Example 💡
When a customer sends 3 requests to
nova-pro consuming 1,200, 800, and 2,000 tokens respectively, the nova-pro tokens aggregator reports a total of 4,000 tokens for that period.3. Create a credit product with weighted aggregators
Now create a credit product that ties all three aggregators together with their respective weights.1
Create a new credit product
Go to Products, click New product, and select Credit.
2
Configure the aggregators and weights
In the Aggregators section, add the three aggregators you just created and set the weight for each:
The weight determines how many credits are consumed per unit of usage. With these weights, 1,000 tokens on
nova-ultra consumes 15 credits, while the same 1,000 tokens on nova-fast consumes only 1 credit.3
Set up bundle pricing
In the Prices section, configure your credit packs. For example:
These bundles will be available for purchase via the customer portal and auto-topup.
4
Save the product
Click Save to add the credit product to your catalog.
For more details on multi-aggregator credit products, see the credits overview.
4. Set up a credit balance on a customer
With your credit product ready, enable a credit balance on a customer.1
Navigate to the customer's Credits tab
Go to Customers, select a customer, and click the Credits tab.
2
Add a credit balance
Click Add credit balance and select the credit product you created.Configure the initial settings:
- Starting balance: the number of credits to grant immediately (e.g., 10,000)
- Warning limit: the threshold at which a low-balance warning appears on the customer portal (e.g., 1,000 credits)
5. Add the credit product to a subscription
To automate credit replenishment and invoicing, add the credit product to a subscription.1
Create or update a subscription
From the customer’s page, click Actions > Assign new subscription, or open an existing subscription.
2
Add the credit product
Click Add product, select your credit product, and choose a bundle pricing tier.
3
Configure auto-topup (optional)
To ensure your customer never runs out of credits, configure auto-topup on their credit balance:
- Threshold: when the balance drops below this number, auto-topup triggers (e.g., 500 credits)
- Amount: how many credits to add (e.g., 10,000)
- Pricing: select a bundle price or set a custom amount
6. Monitor consumption
Once the customer starts using your models, you can track credit consumption from the customer’s Credits tab. The credits chart shows balance evolution over time. Use the date range and granularity controls (day, week, month) to analyze consumption patterns.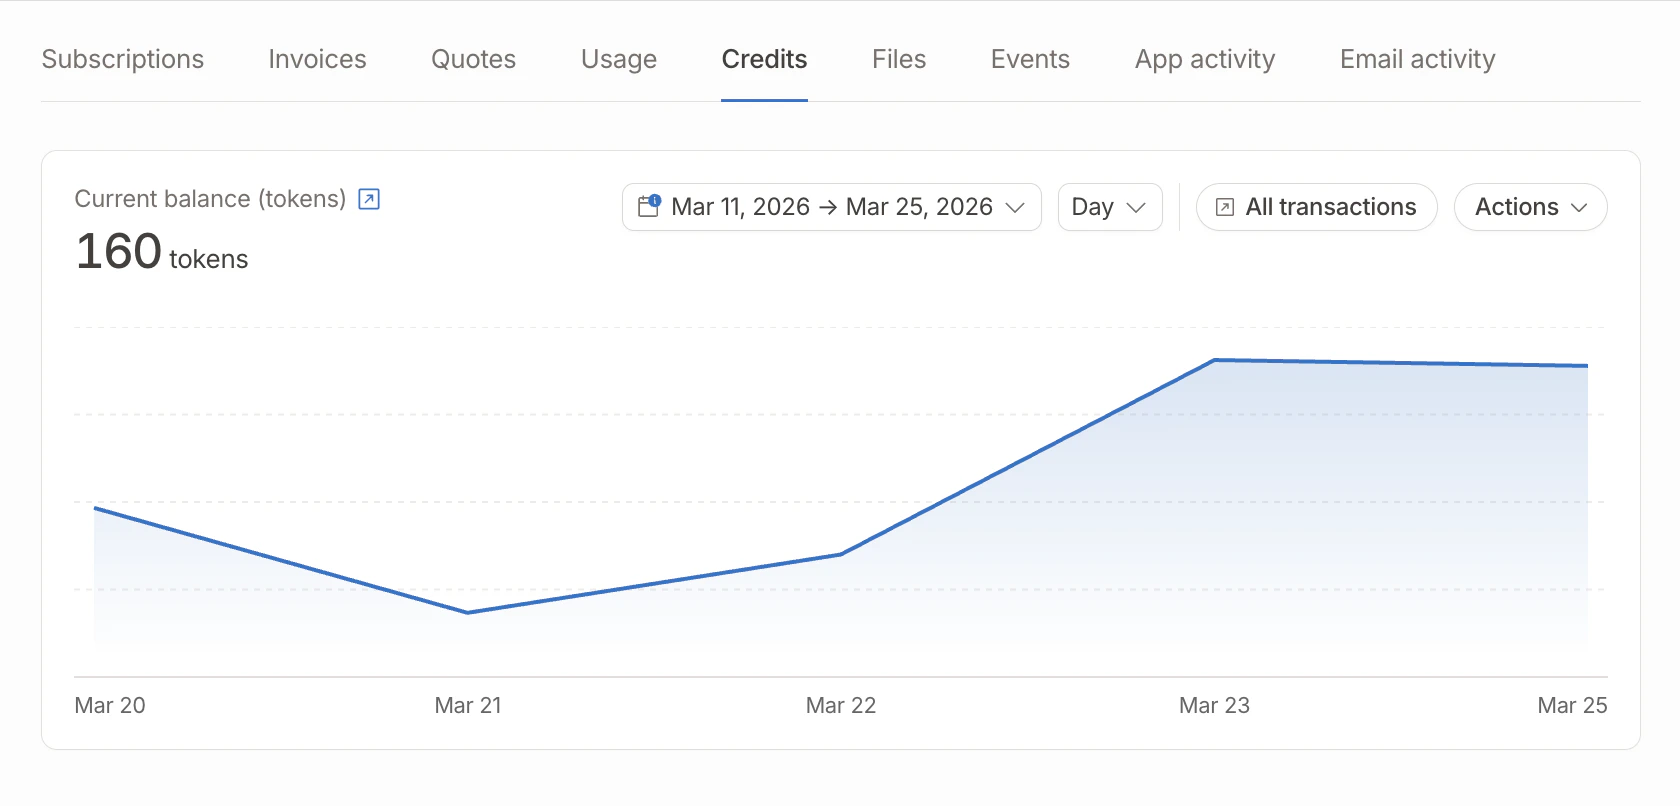
Example 💡
A customer starts the month with 10,000 credits. They make:
- 2,000
nova-fastcalls averaging 1,000 tokens each → 2,000 x 1 = 2,000 credits - 300
nova-procalls averaging 1,500 tokens each → 450 x 4 = 1,800 credits - 50
nova-ultracalls averaging 2,000 tokens each → 100 x 15 = 1,500 credits
Next steps
Credits overview
Learn more about credit products and configuration options
Credit expiration
Configure credits to expire after a set period or at the end of each billing cycle
Customer portal
Let customers view their balance and purchase credits from the portal
Credits API
Manage credits programmatically via the API
Is something still unclear? Don’t hesitate to reach out to our team via the in-app chat if you need additional support.