> ## Documentation Index
> Fetch the complete documentation index at: https://docs.hyperline.co/llms.txt
> Use this file to discover all available pages before exploring further.
# Users & permissions
> Invite team members and set permissions to collaborate on Hyperline
You can invite an unlimited number of team members to access your Hyperline account. We offer flexible roles and permissions through access control (ACL), allowing you to configure the appropriate access levels for each member of your account.
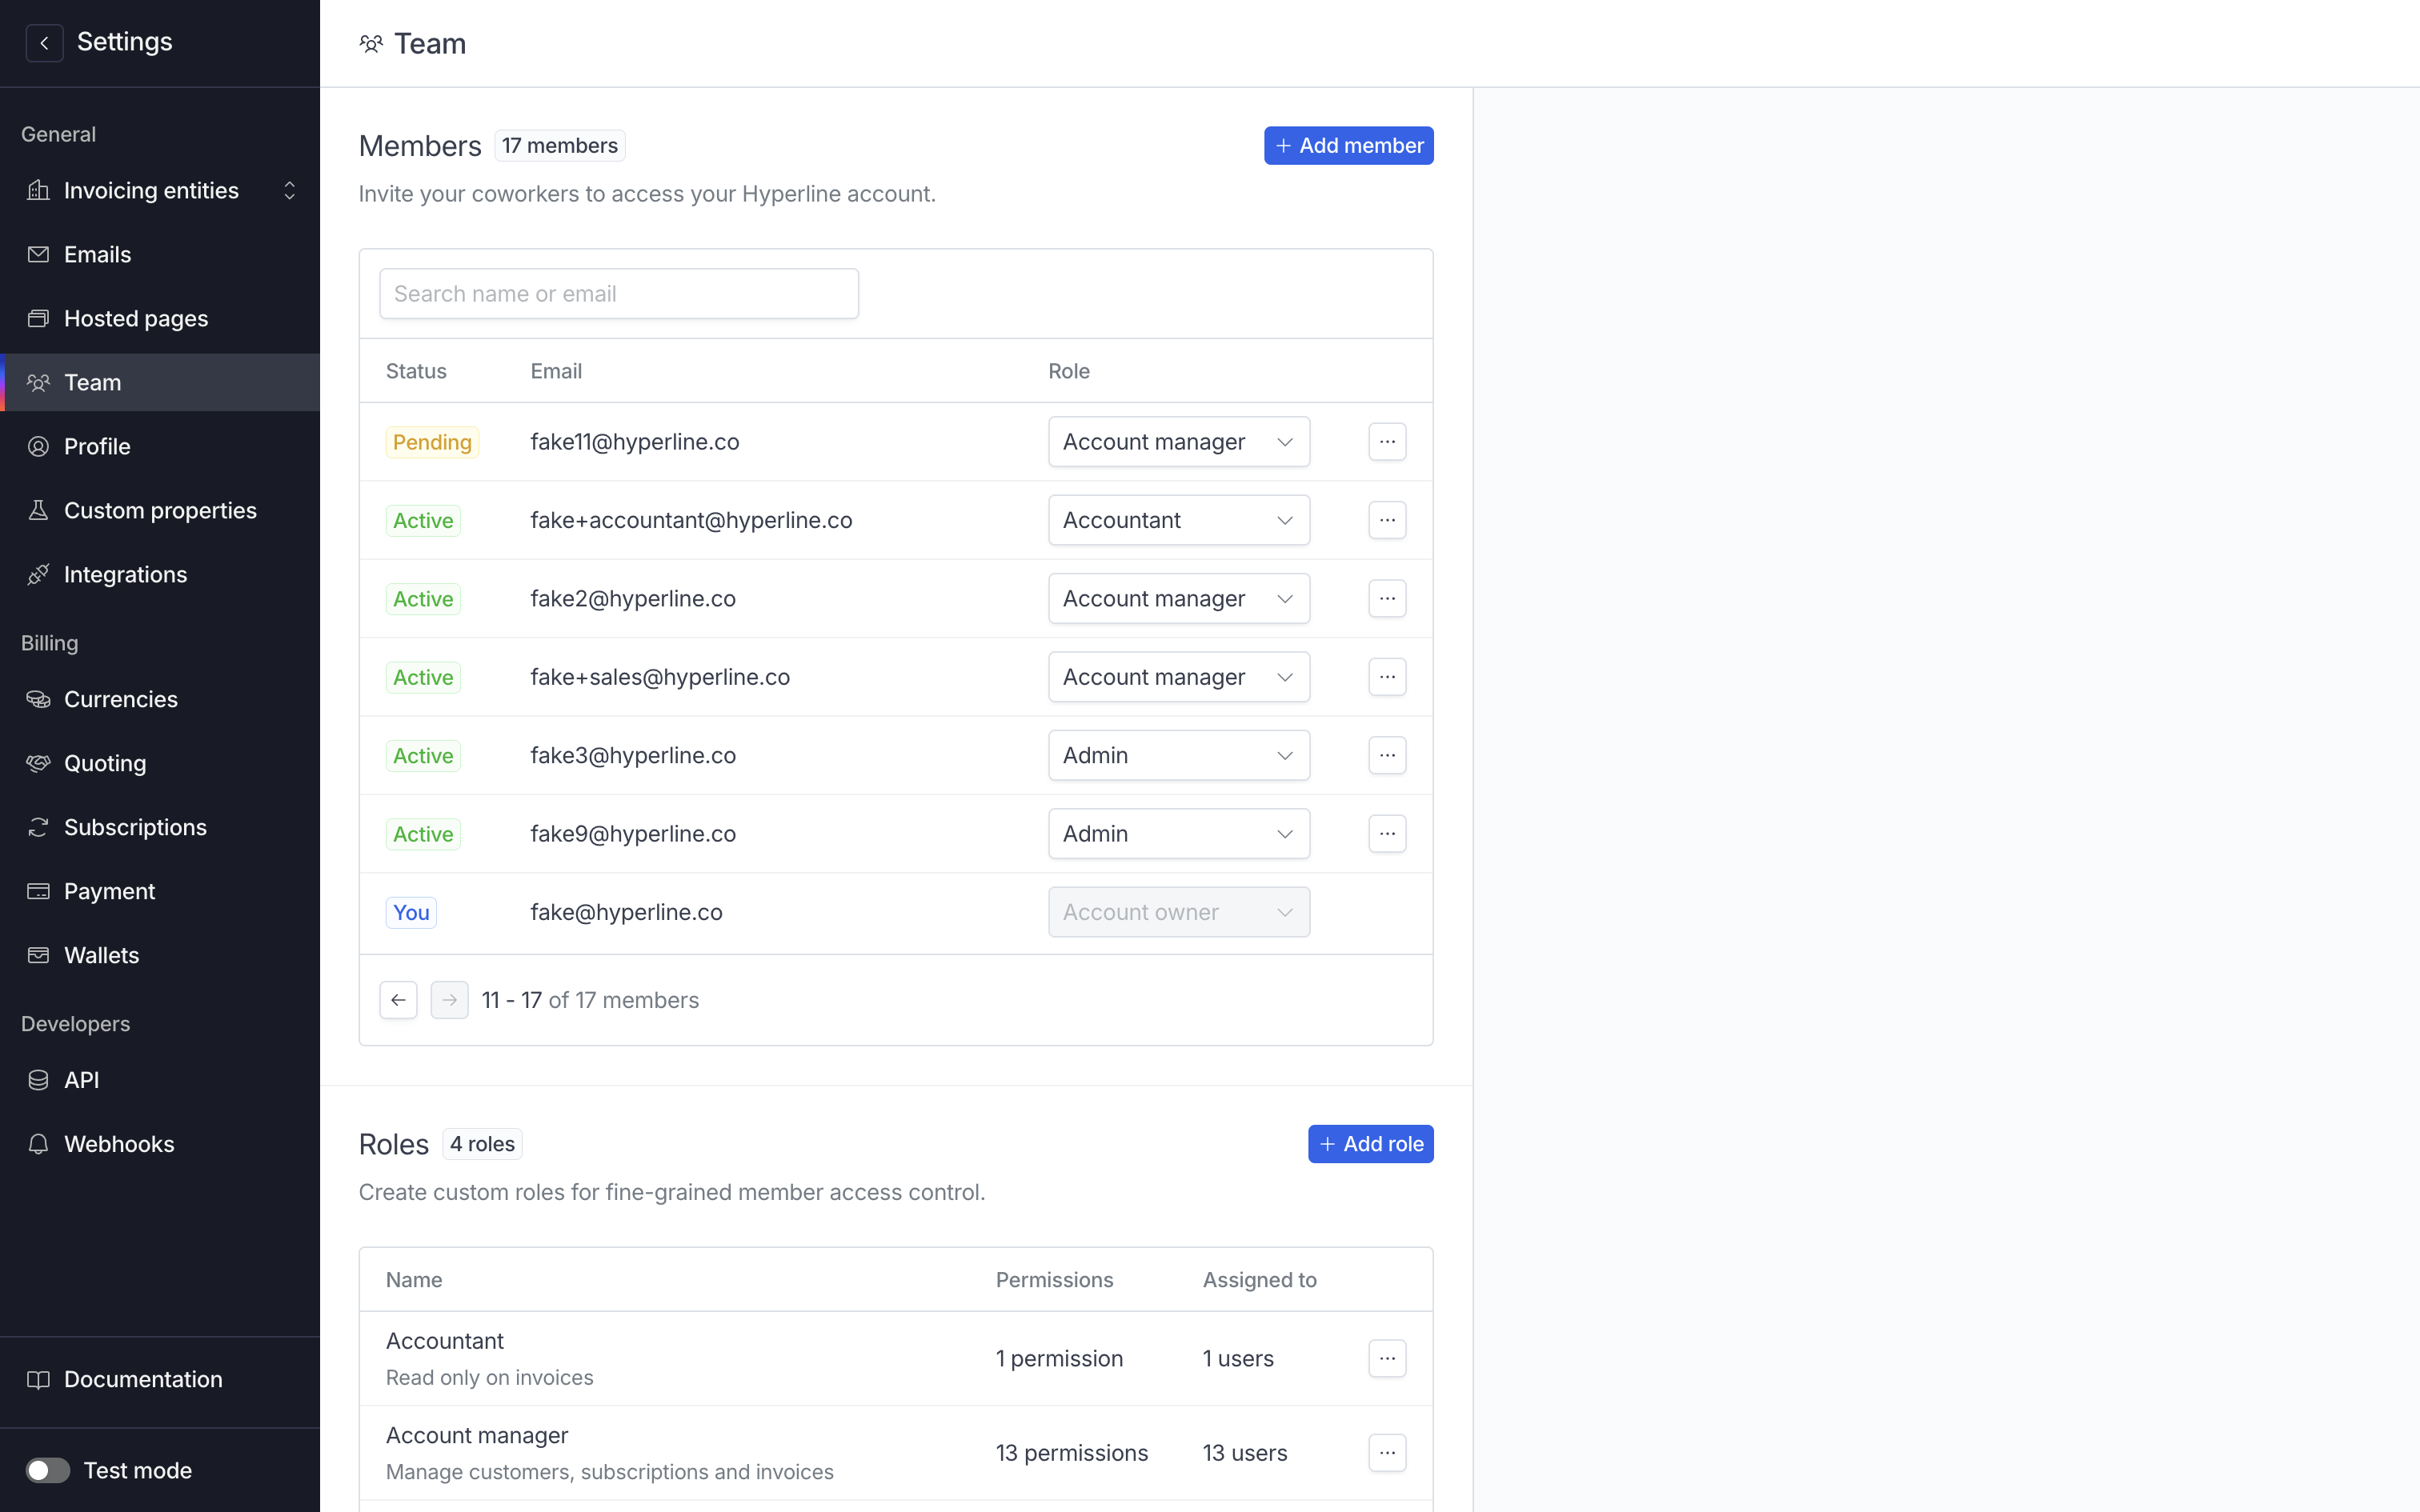 ## Invite members
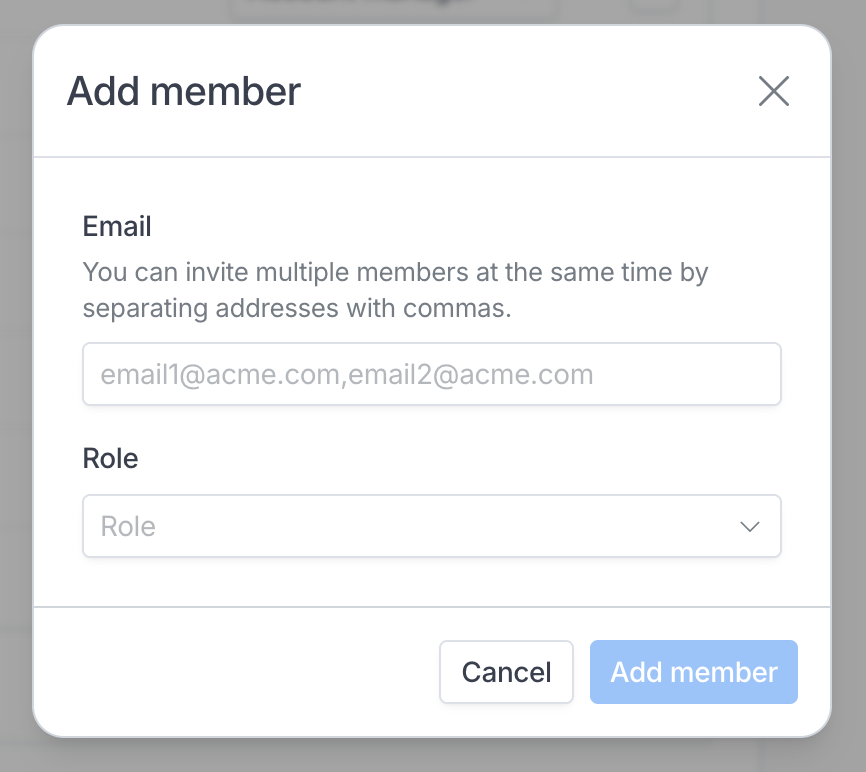
To invite multiple members at the same time, you can specify multiple emails separated with commas in the 'Email' field.
## Invite members
To invite multiple members at the same time, you can specify multiple emails separated with commas in the 'Email' field.
 Your new members will have to accept the invite sent to their email address to be able to access Hyperline.
If the member is already part of another Hyperline account, they will be able
to [switch from one to another easily](./multiple-accounts) using the same
login credentials.
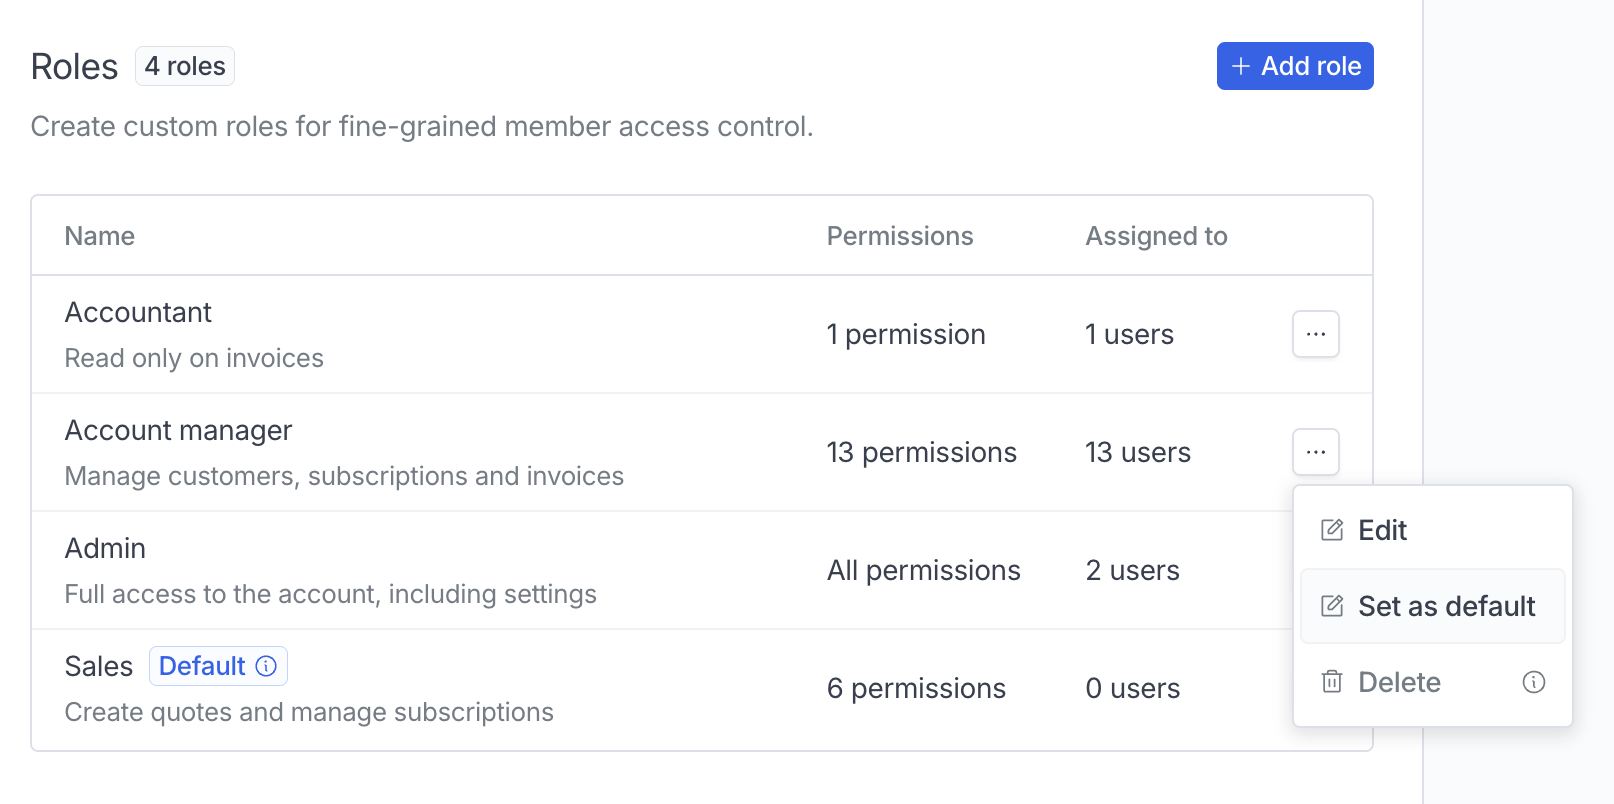
## Manage roles
You can create custom roles with specific permissions to provide fine-grained access for members based on your needs.
Your new members will have to accept the invite sent to their email address to be able to access Hyperline.
If the member is already part of another Hyperline account, they will be able
to [switch from one to another easily](./multiple-accounts) using the same
login credentials.
## Manage roles
You can create custom roles with specific permissions to provide fine-grained access for members based on your needs.
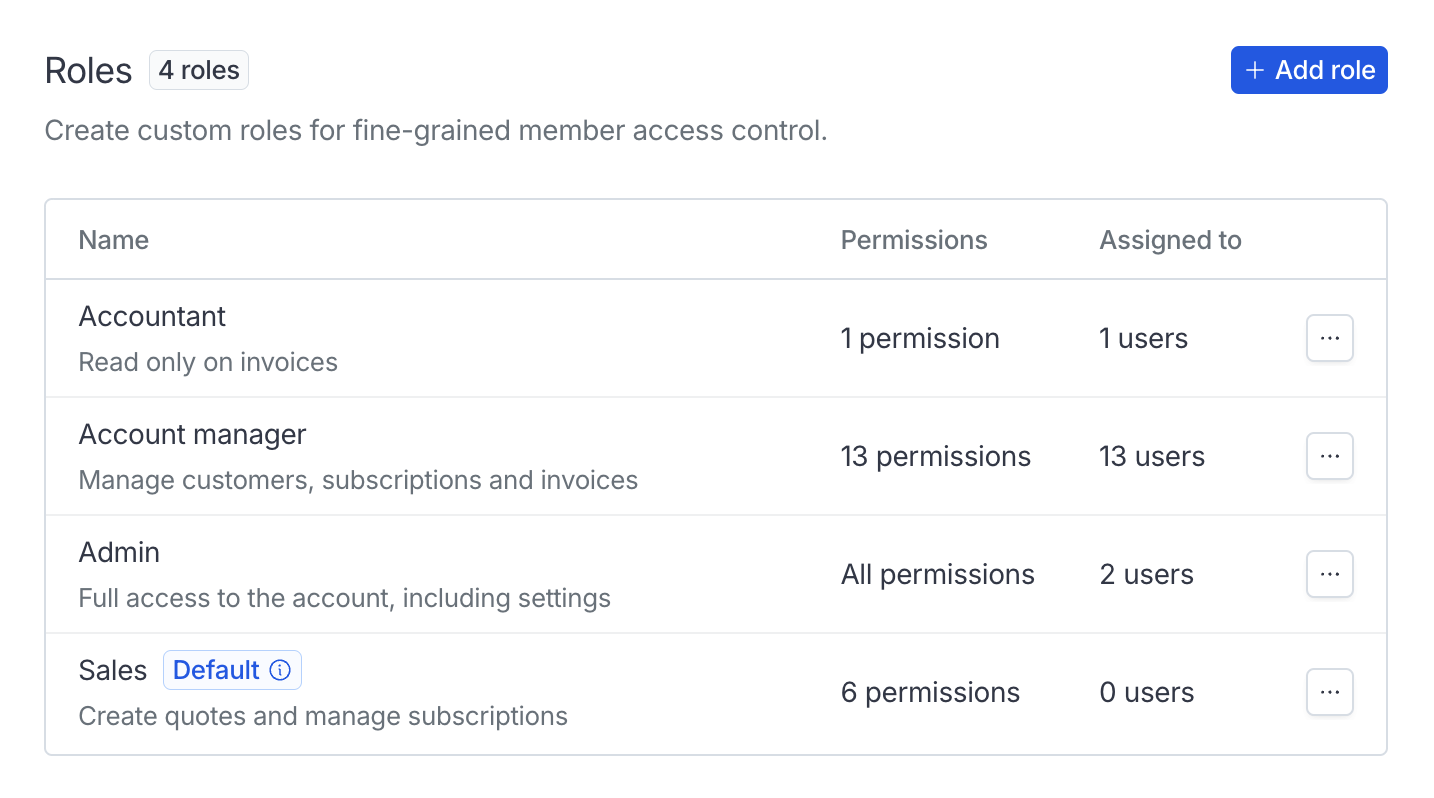 By default, two roles are created for you:
* **Admin**: full access to Hyperline, including the ability to manage products, plans, customers, subscriptions, and settings
* **Account Manager**: limited permissions and limited view on Hyperline, allowing them to manage customers, subscriptions, and invoices (ideal for account management teams)
Additionally, you can for example create roles for external accountants, finance team, product/tech teams, sales representatives, etc.
### Default role
One of the roles is designated as the default. This role will be automatically assigned to members created through a connected integration, such as a CRM.
Account Manager is the default role for each newly created Hyperline account. You can easily set the default role to another existing one.
By default, two roles are created for you:
* **Admin**: full access to Hyperline, including the ability to manage products, plans, customers, subscriptions, and settings
* **Account Manager**: limited permissions and limited view on Hyperline, allowing them to manage customers, subscriptions, and invoices (ideal for account management teams)
Additionally, you can for example create roles for external accountants, finance team, product/tech teams, sales representatives, etc.
### Default role
One of the roles is designated as the default. This role will be automatically assigned to members created through a connected integration, such as a CRM.
Account Manager is the default role for each newly created Hyperline account. You can easily set the default role to another existing one.
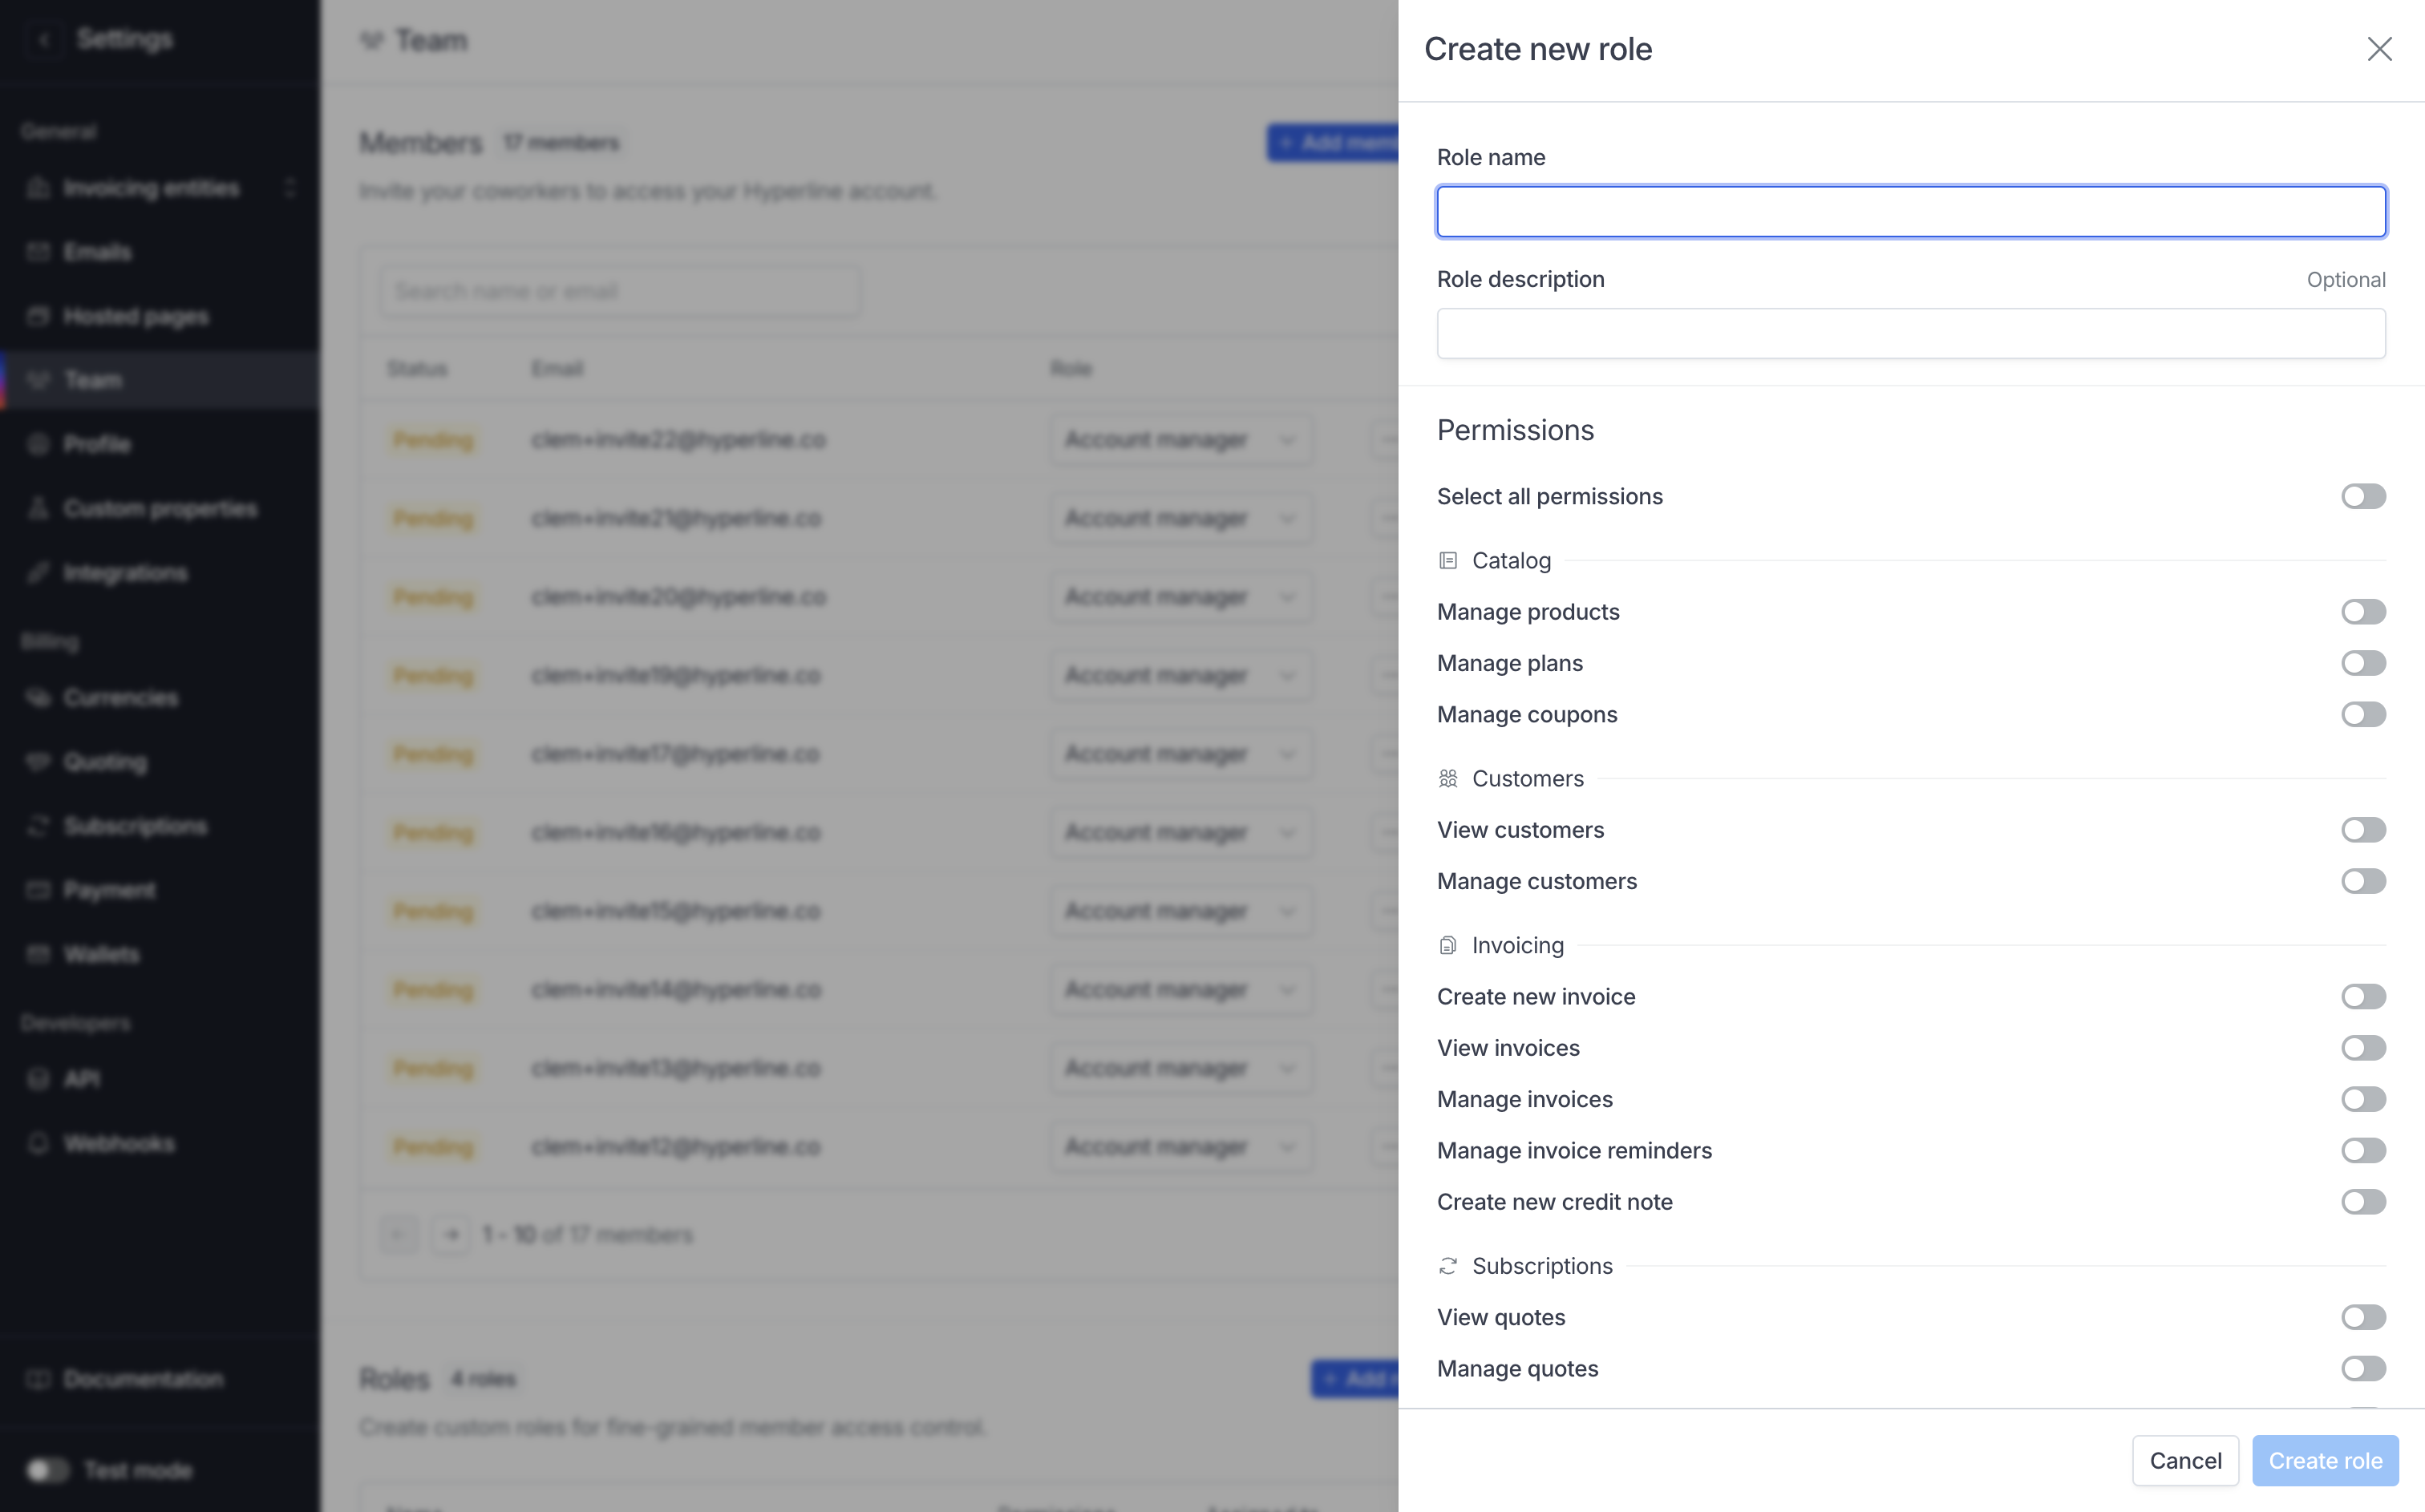
 ### Create new role