> ## Documentation Index
> Fetch the complete documentation index at: https://docs.hyperline.co/llms.txt
> Use this file to discover all available pages before exploring further.
# Set-up credits on your account
> Learn how to set-up customer credit ledgers
This page covers the full credit product lifecycle: catalog setup, customer balances, plan and subscription integration, expiration, and auto-topup. For an introduction to credits as a product type and where they sit in the catalog, see [Products and prices](/docs/products/overview#credit).
**Prerequisite**
To configure credits, you will need to have connected events first so usage data can be detected.
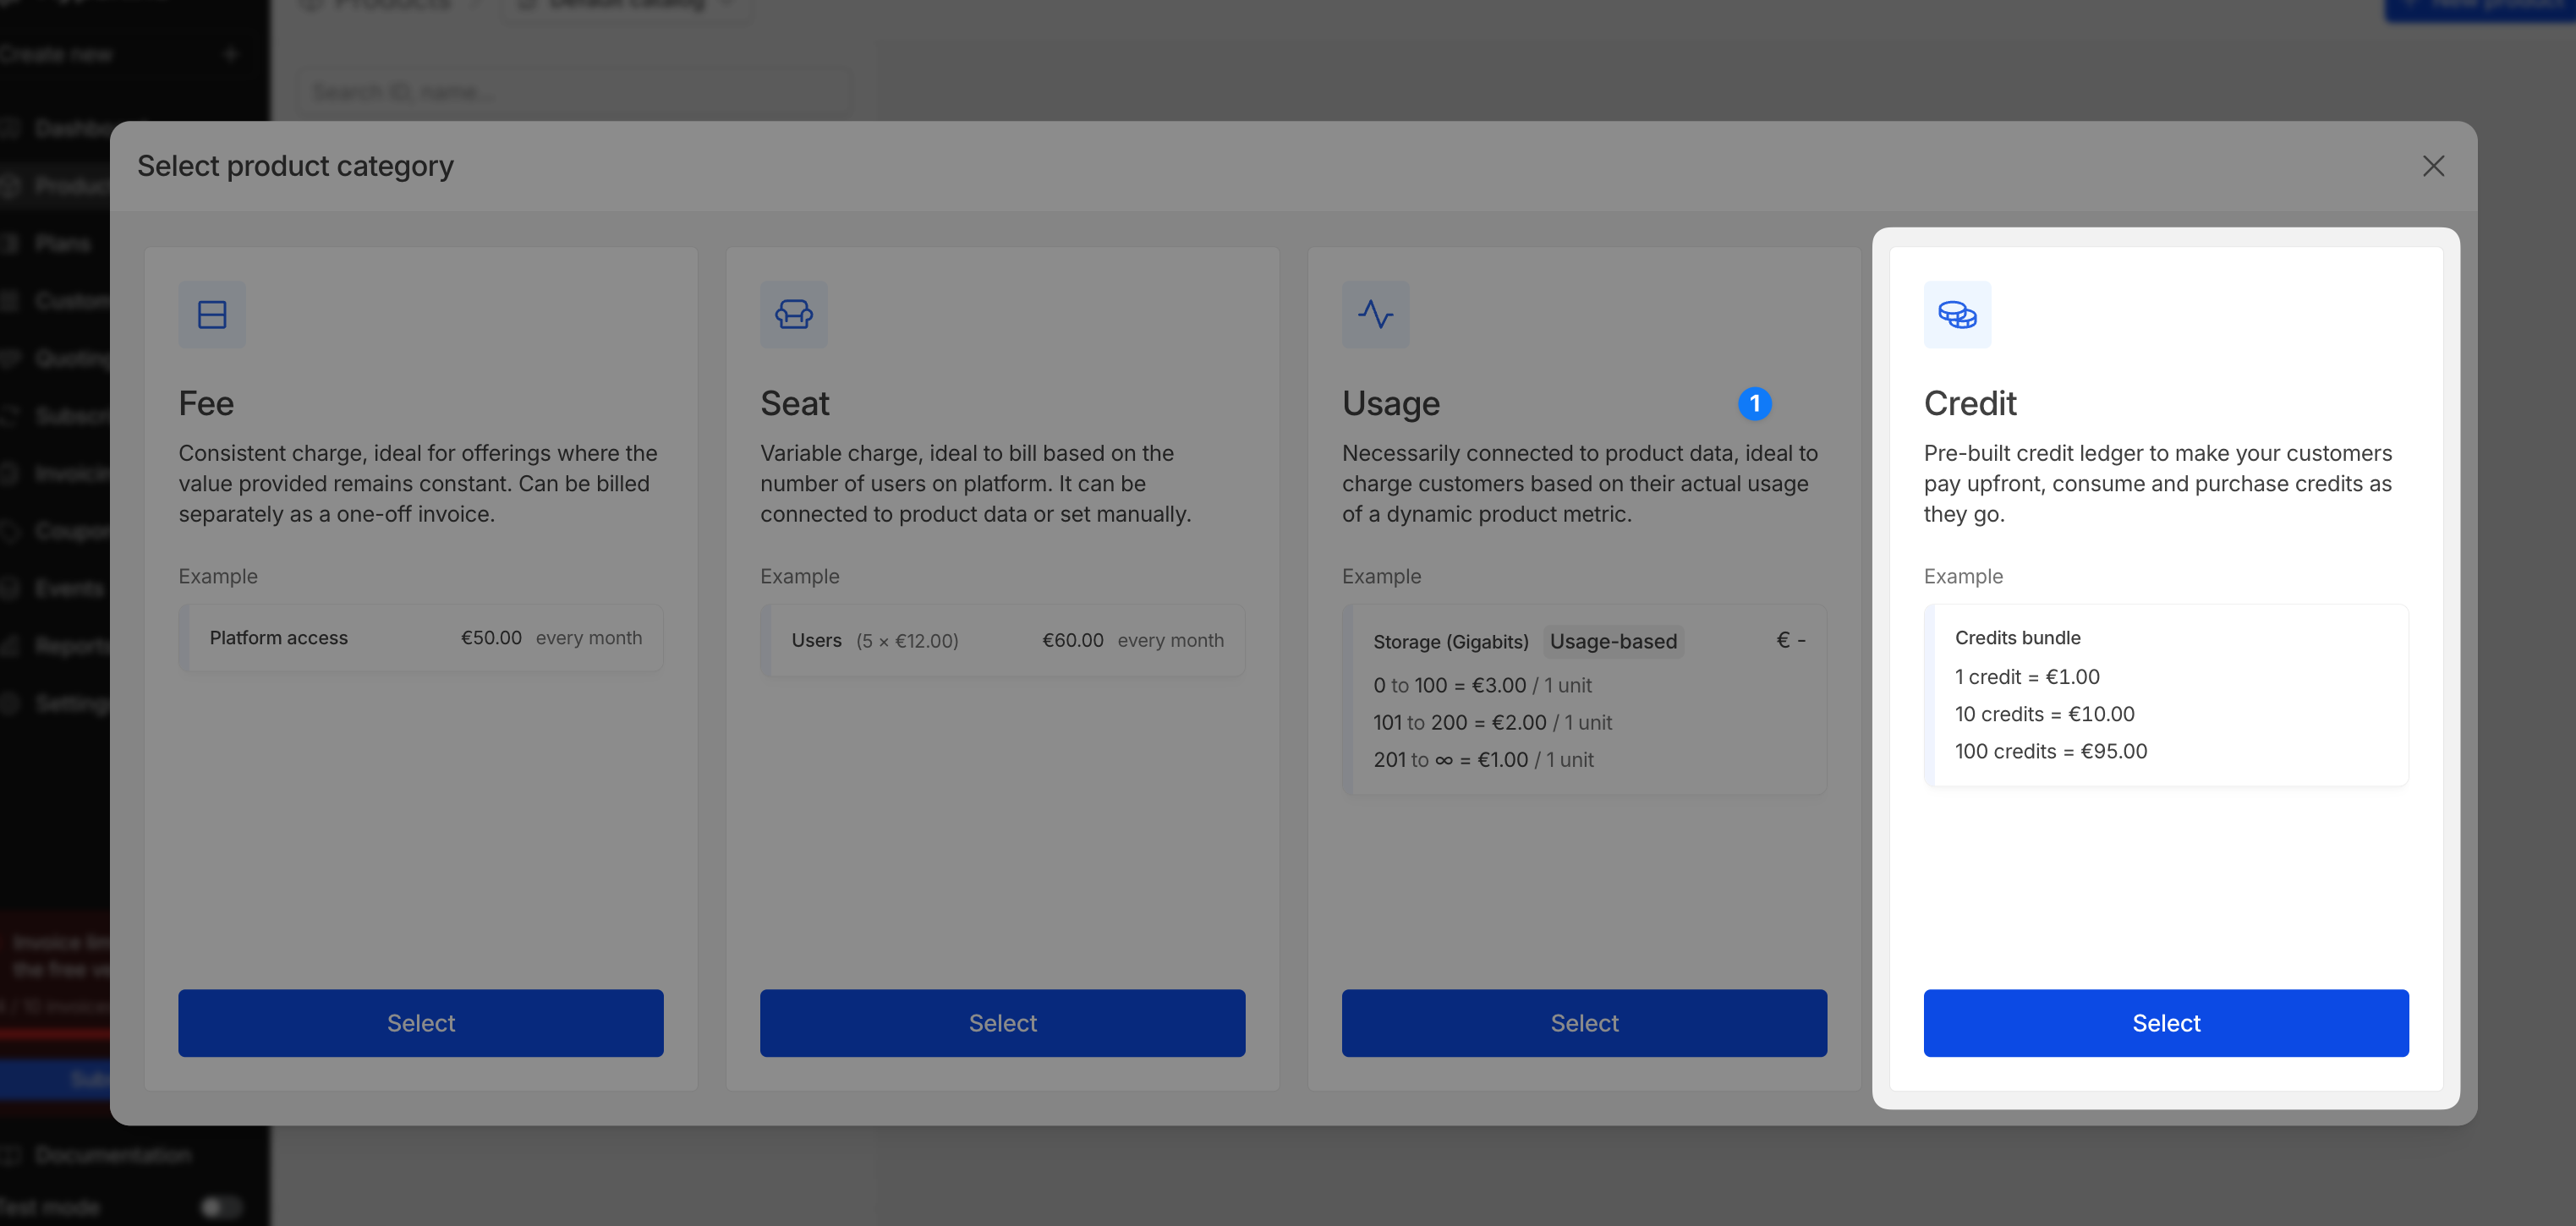
## Create a credit product
To get started with credits, you should create a credit product first in your catalog, where you will specify the events that rule the consumption. Usage of credits will be deducted automatically accordingly.
 Add one or more [aggregators](/docs/usage/aggregators) to define which events consume credits on the customer's balance. Each aggregator has a **weight** that determines how many credits are consumed per unit of usage.
You can add aggregators directly from this form — if you need a new one, click **Create aggregator** to set it up without leaving the page.
You can also configure display settings (public description) and set a low balance threshold to trigger warnings on the customer portal. The unit name shown to customers is inherited from the linked aggregator.
Add one or more [aggregators](/docs/usage/aggregators) to define which events consume credits on the customer's balance. Each aggregator has a **weight** that determines how many credits are consumed per unit of usage.
You can add aggregators directly from this form — if you need a new one, click **Create aggregator** to set it up without leaving the page.
You can also configure display settings (public description) and set a low balance threshold to trigger warnings on the customer portal. The unit name shown to customers is inherited from the linked aggregator.
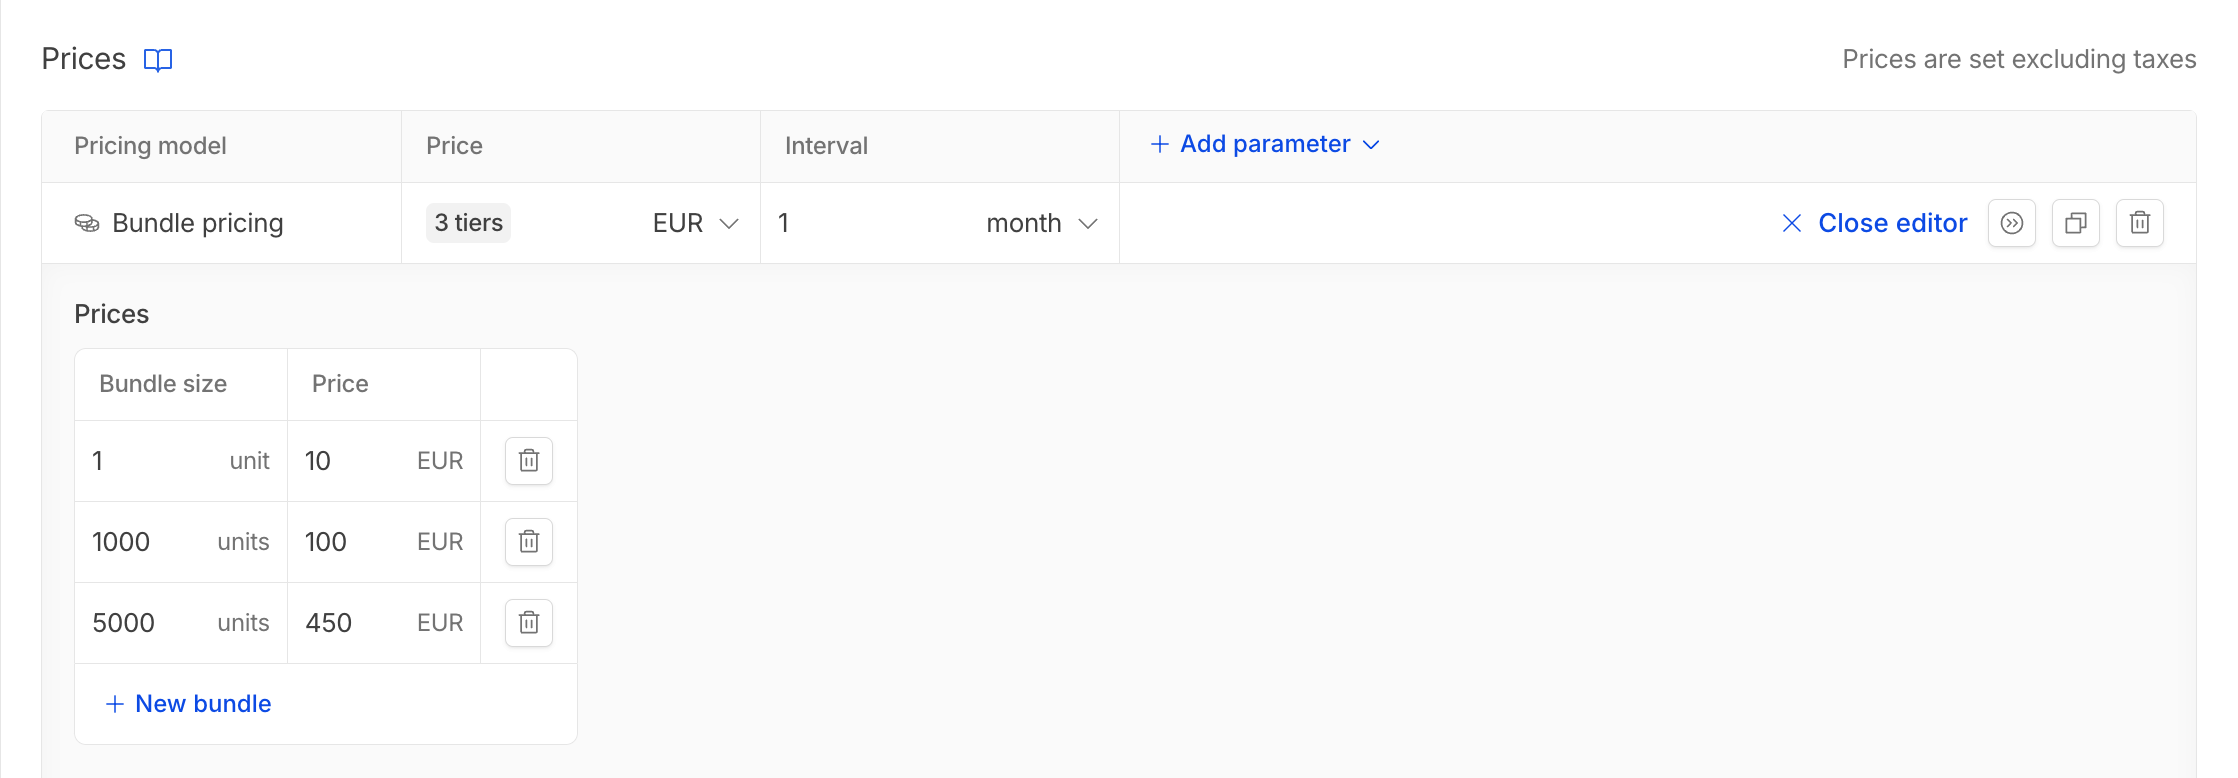
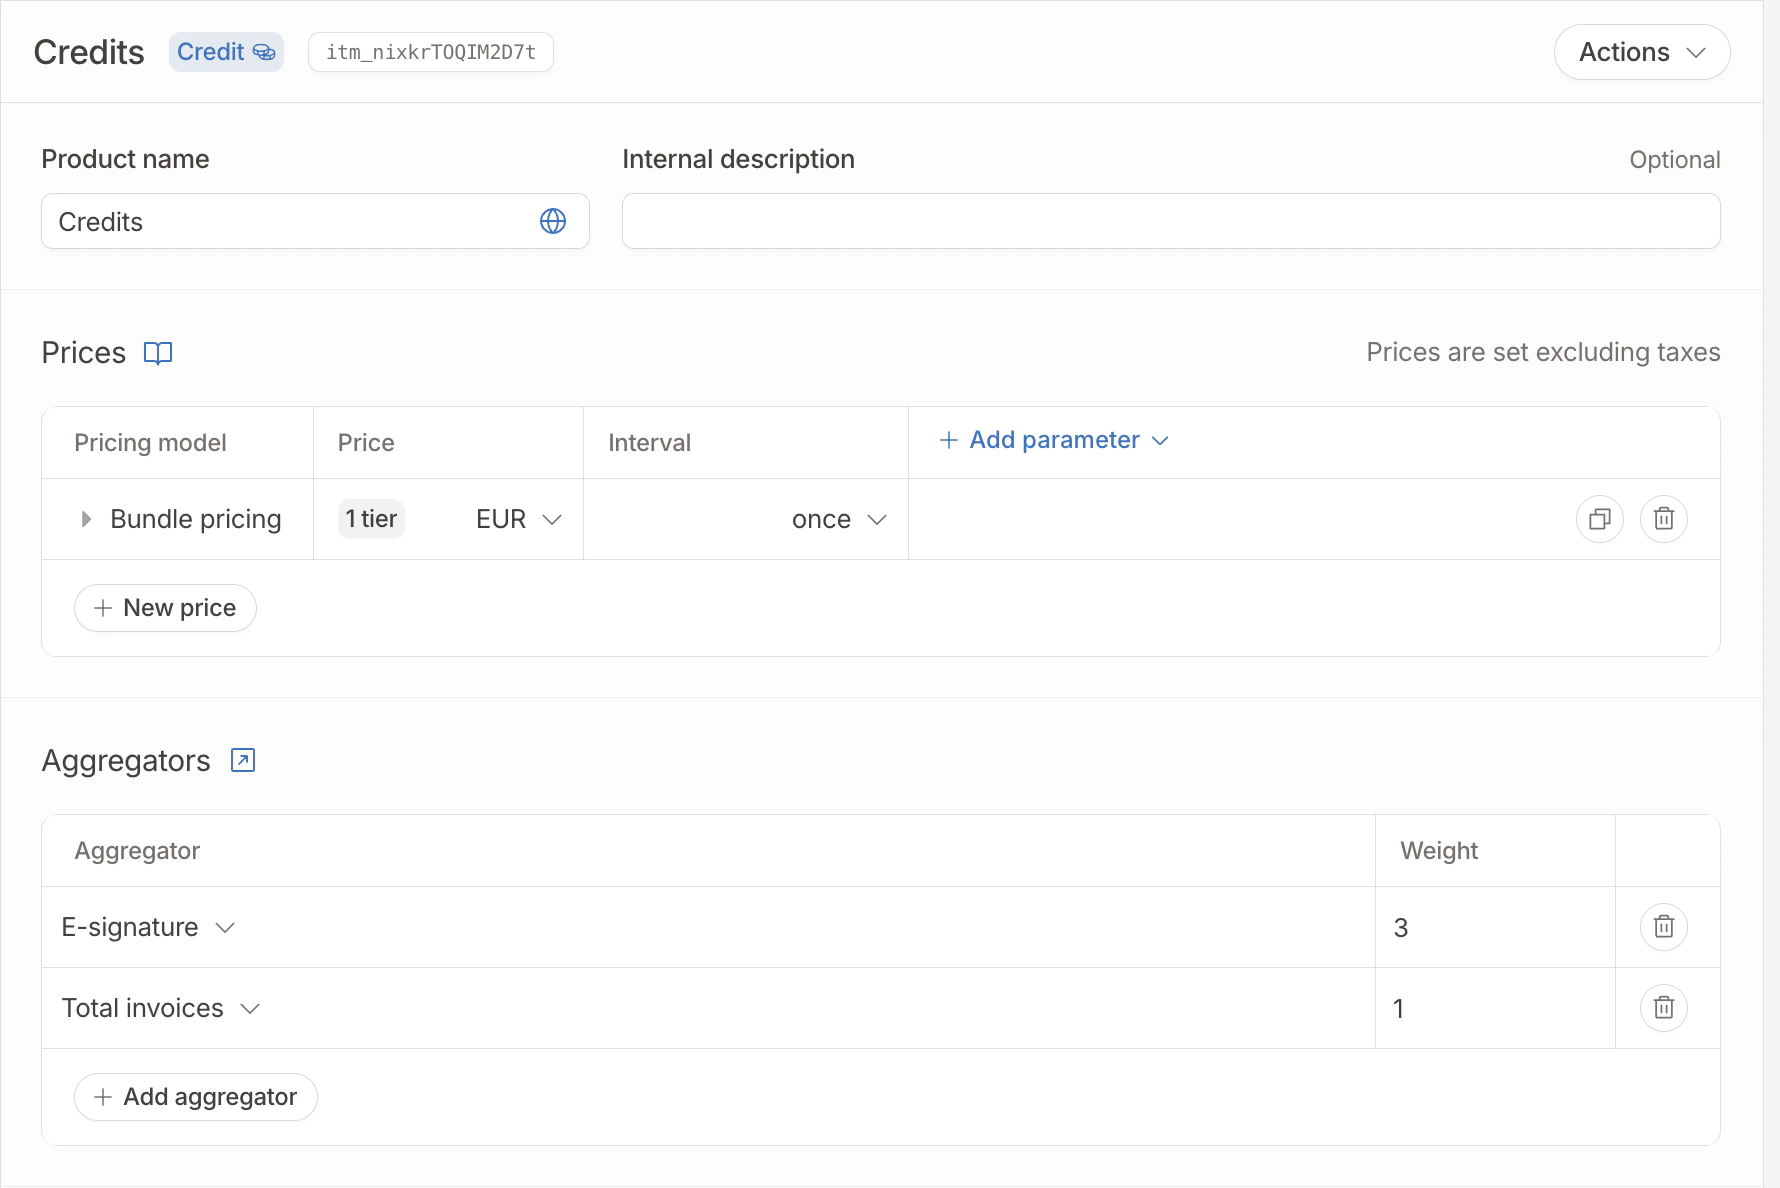 For credits, the pricing type is bundle pricing, a given price for a number of credits. You can also choose to display different purchase options on the customer's portal.
 ## Multiple aggregators with weights
A credit product can be linked to multiple aggregators, each with its own weight. All aggregators consume from a **single shared balance**, but at different rates.
The weight defines how many credits are deducted per unit of usage for that aggregator. For example, a weight of `3` means each unit of usage consumes 3 credits.
An AI platform sells credits that can be used across different models:
| Aggregator | Operation | Weight |
| ------------------ | --------- | ------ |
| `gpt4_requests` | count | 5 |
| `gpt3_requests` | count | 1 |
| `image_generation` | count | 10 |
A customer with 1,000 credits could use them for 200 GPT-4 requests, 1,000 GPT-3 requests, 100 image generations, or any combination.
If you only need a single aggregator, simply add one row with a weight of `1`. This works exactly like a standard credit product.
## Set up credits on a customer
Once your credit product is set up, you can enable a credit balance on your customer and link their credit usage immediately. Note that this can also be done via the API.
## Multiple aggregators with weights
A credit product can be linked to multiple aggregators, each with its own weight. All aggregators consume from a **single shared balance**, but at different rates.
The weight defines how many credits are deducted per unit of usage for that aggregator. For example, a weight of `3` means each unit of usage consumes 3 credits.
An AI platform sells credits that can be used across different models:
| Aggregator | Operation | Weight |
| ------------------ | --------- | ------ |
| `gpt4_requests` | count | 5 |
| `gpt3_requests` | count | 1 |
| `image_generation` | count | 10 |
A customer with 1,000 credits could use them for 200 GPT-4 requests, 1,000 GPT-3 requests, 100 image generations, or any combination.
If you only need a single aggregator, simply add one row with a weight of `1`. This works exactly like a standard credit product.
## Set up credits on a customer
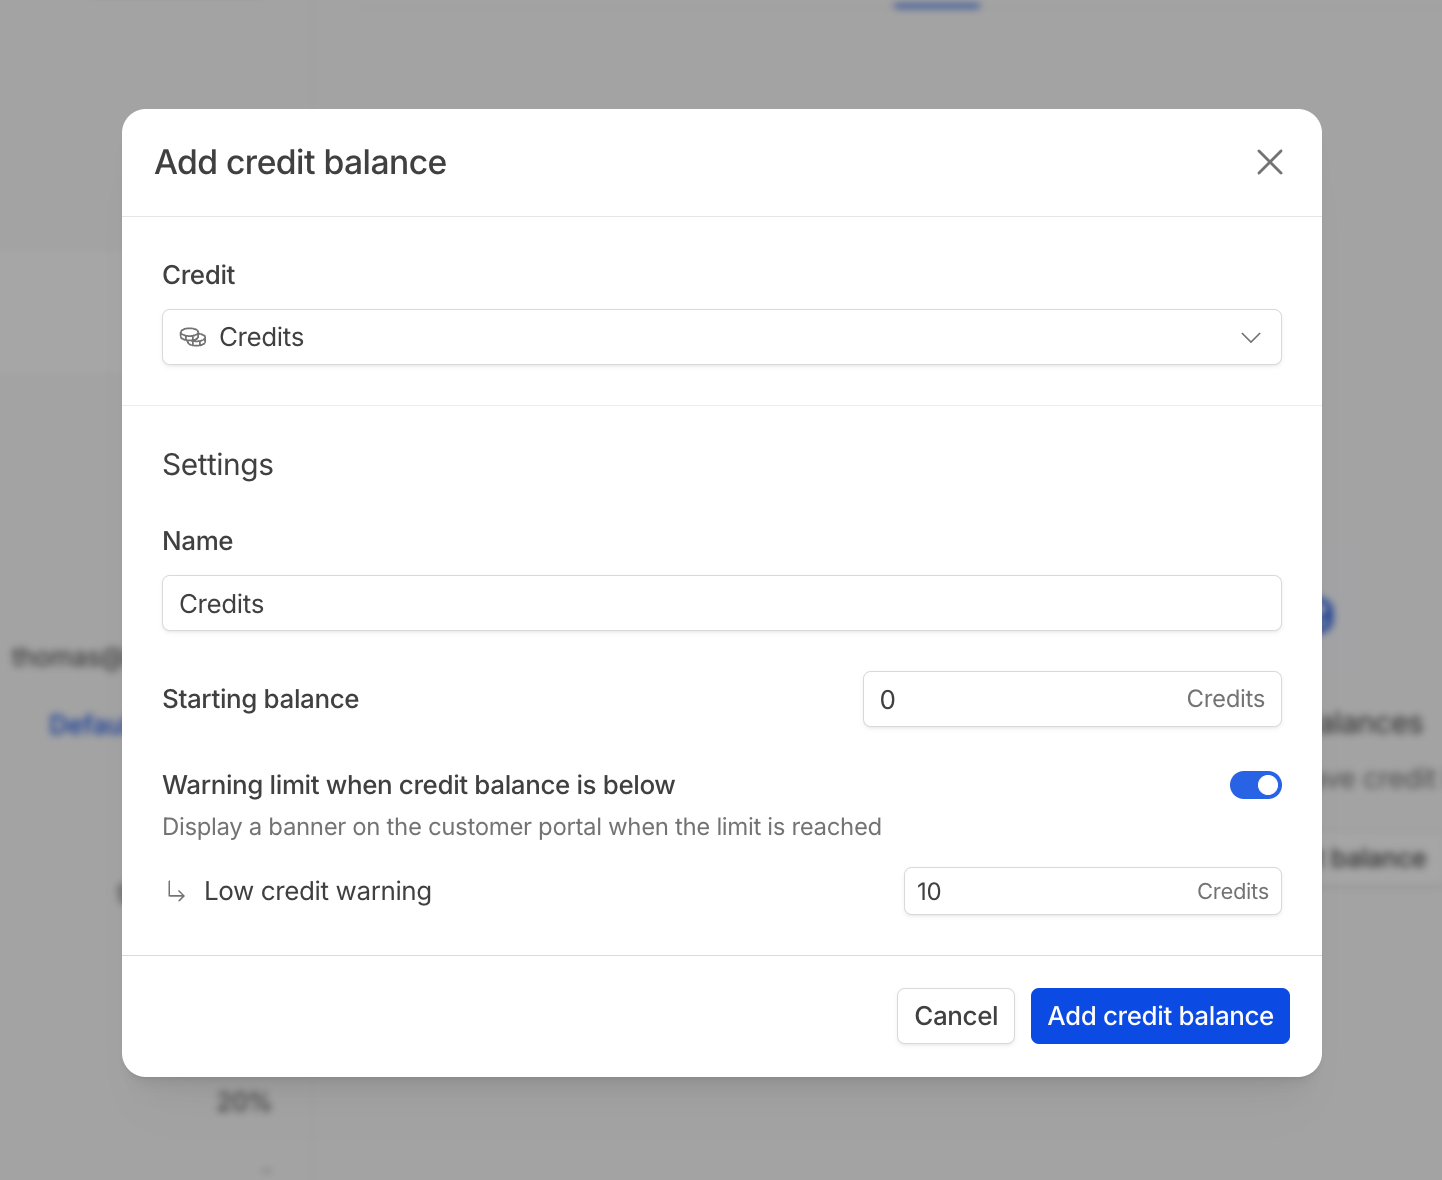
Once your credit product is set up, you can enable a credit balance on your customer and link their credit usage immediately. Note that this can also be done via the API.
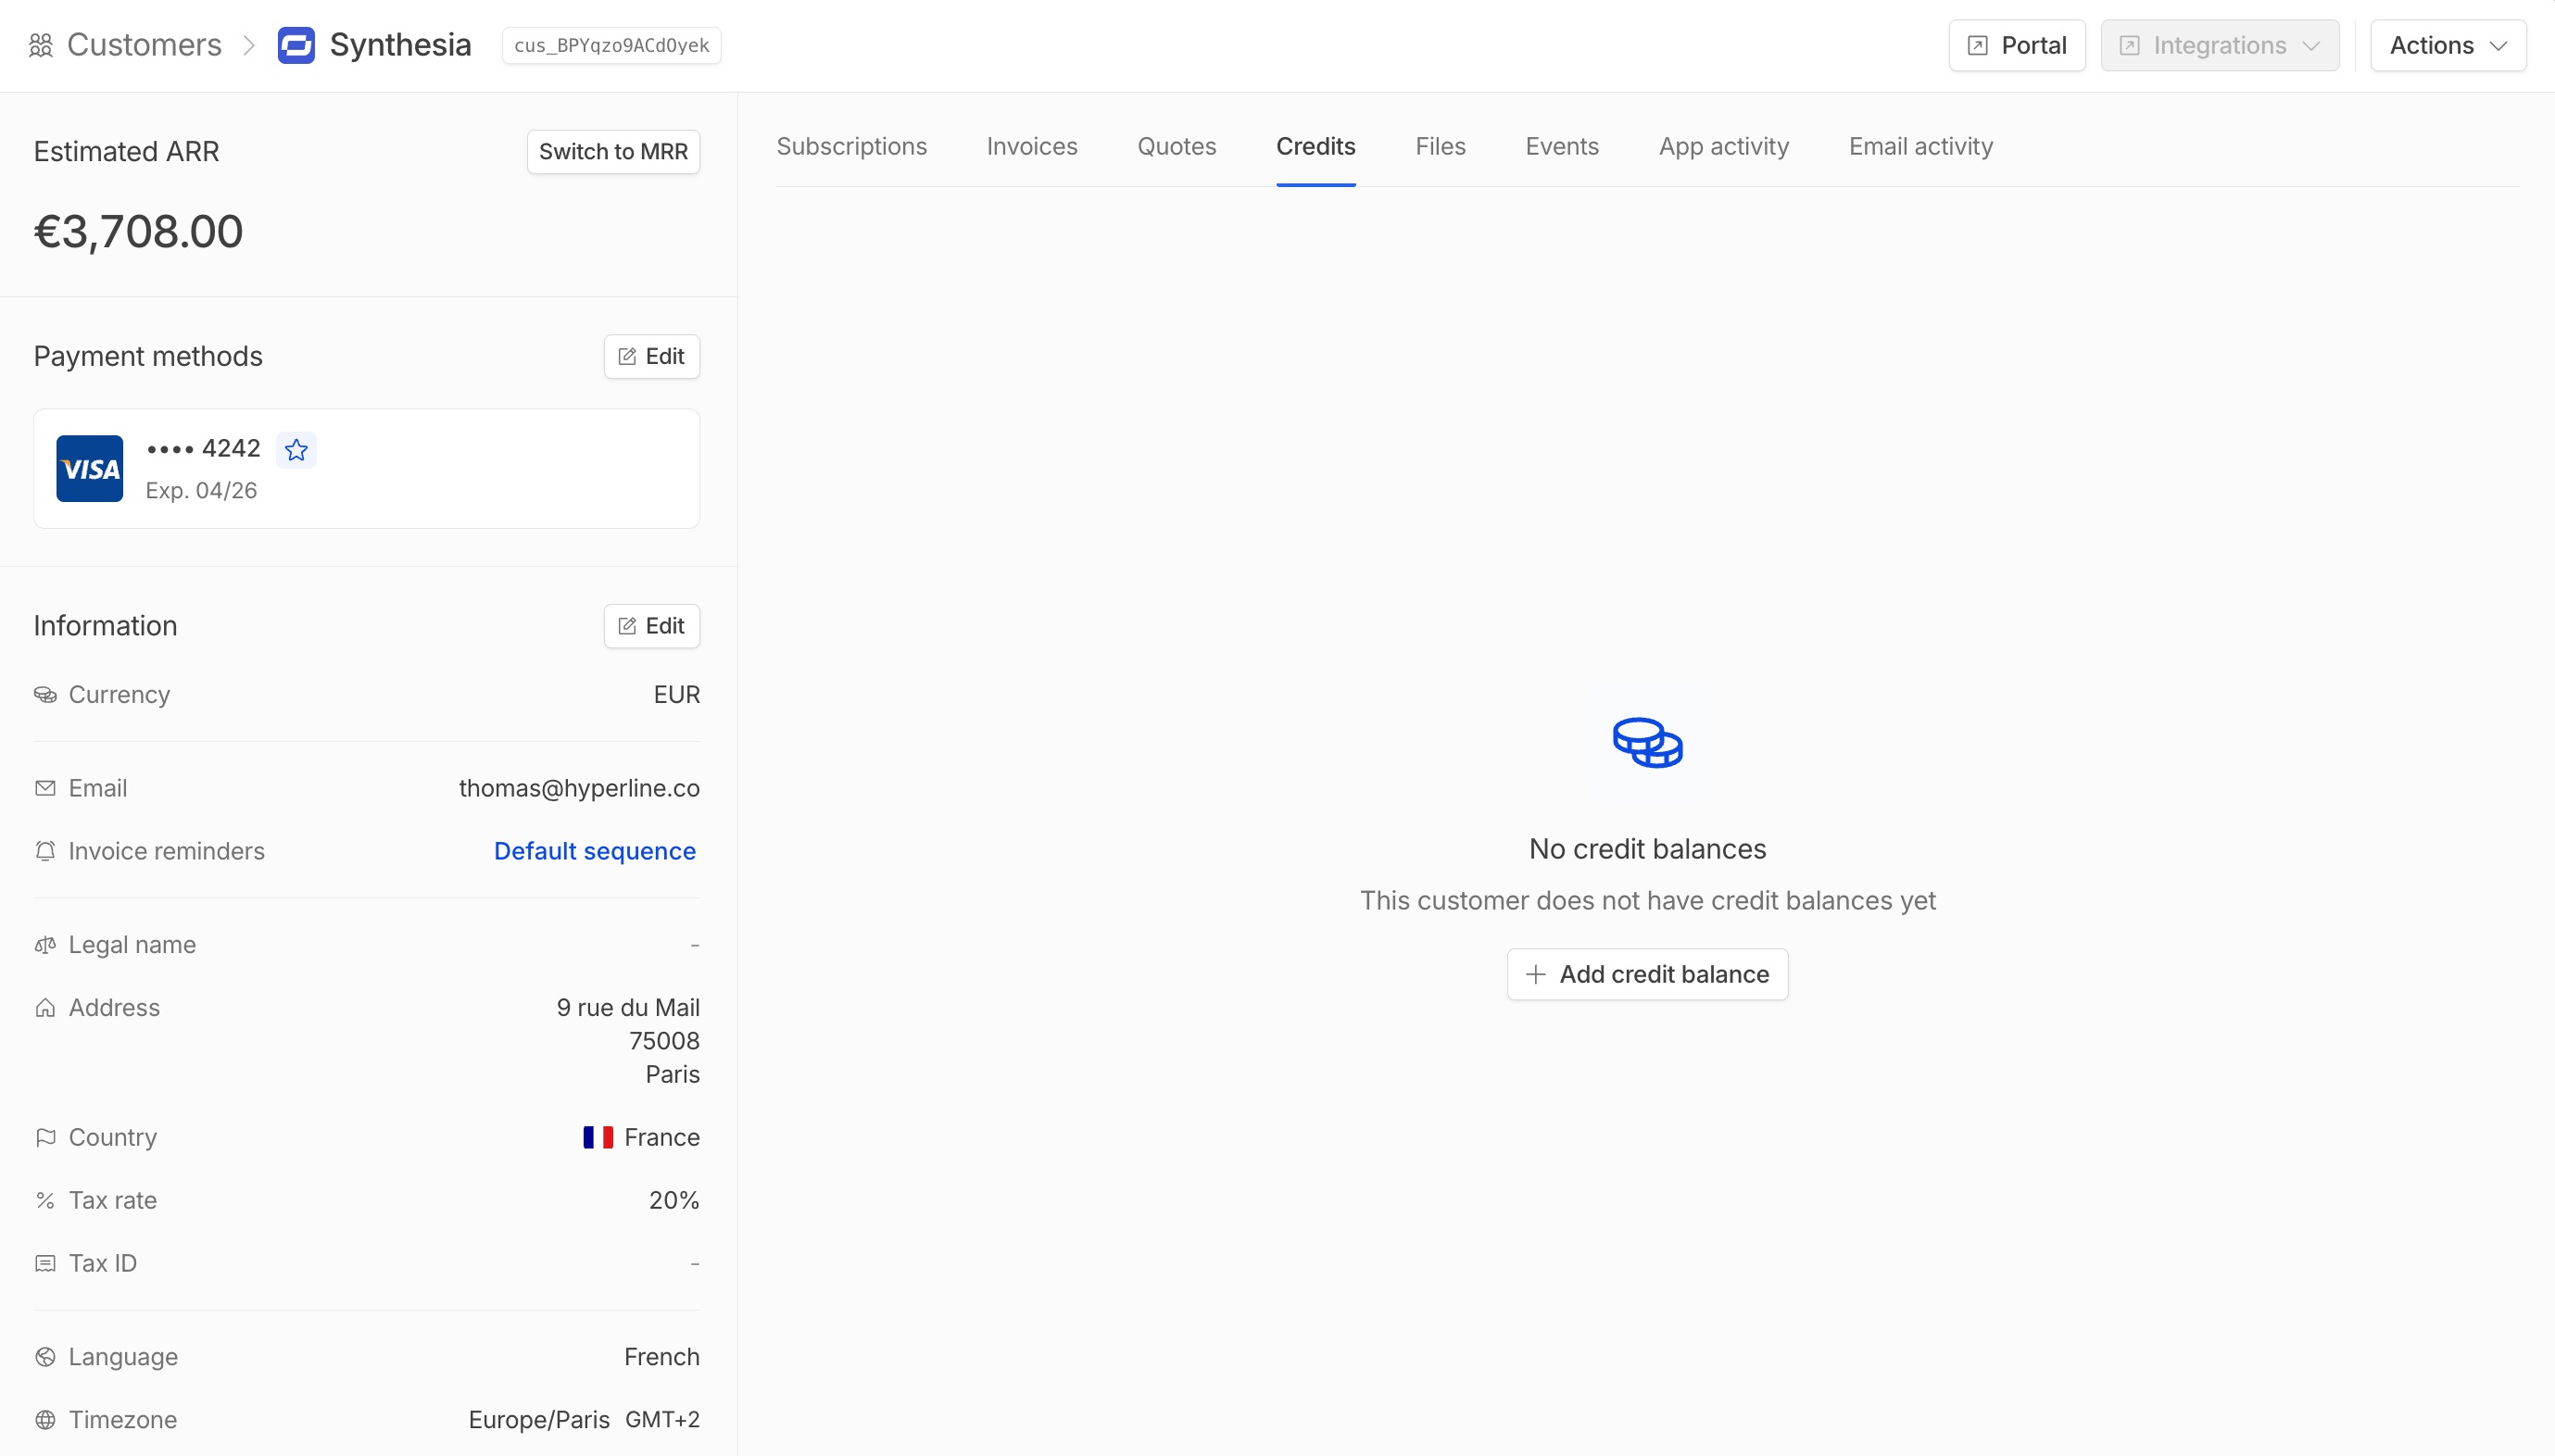 Here, you can also change the name, choose the starting balance, and set the credit warning limit. This won't override the values previously set in your product catalog, but will be specific to the customer.
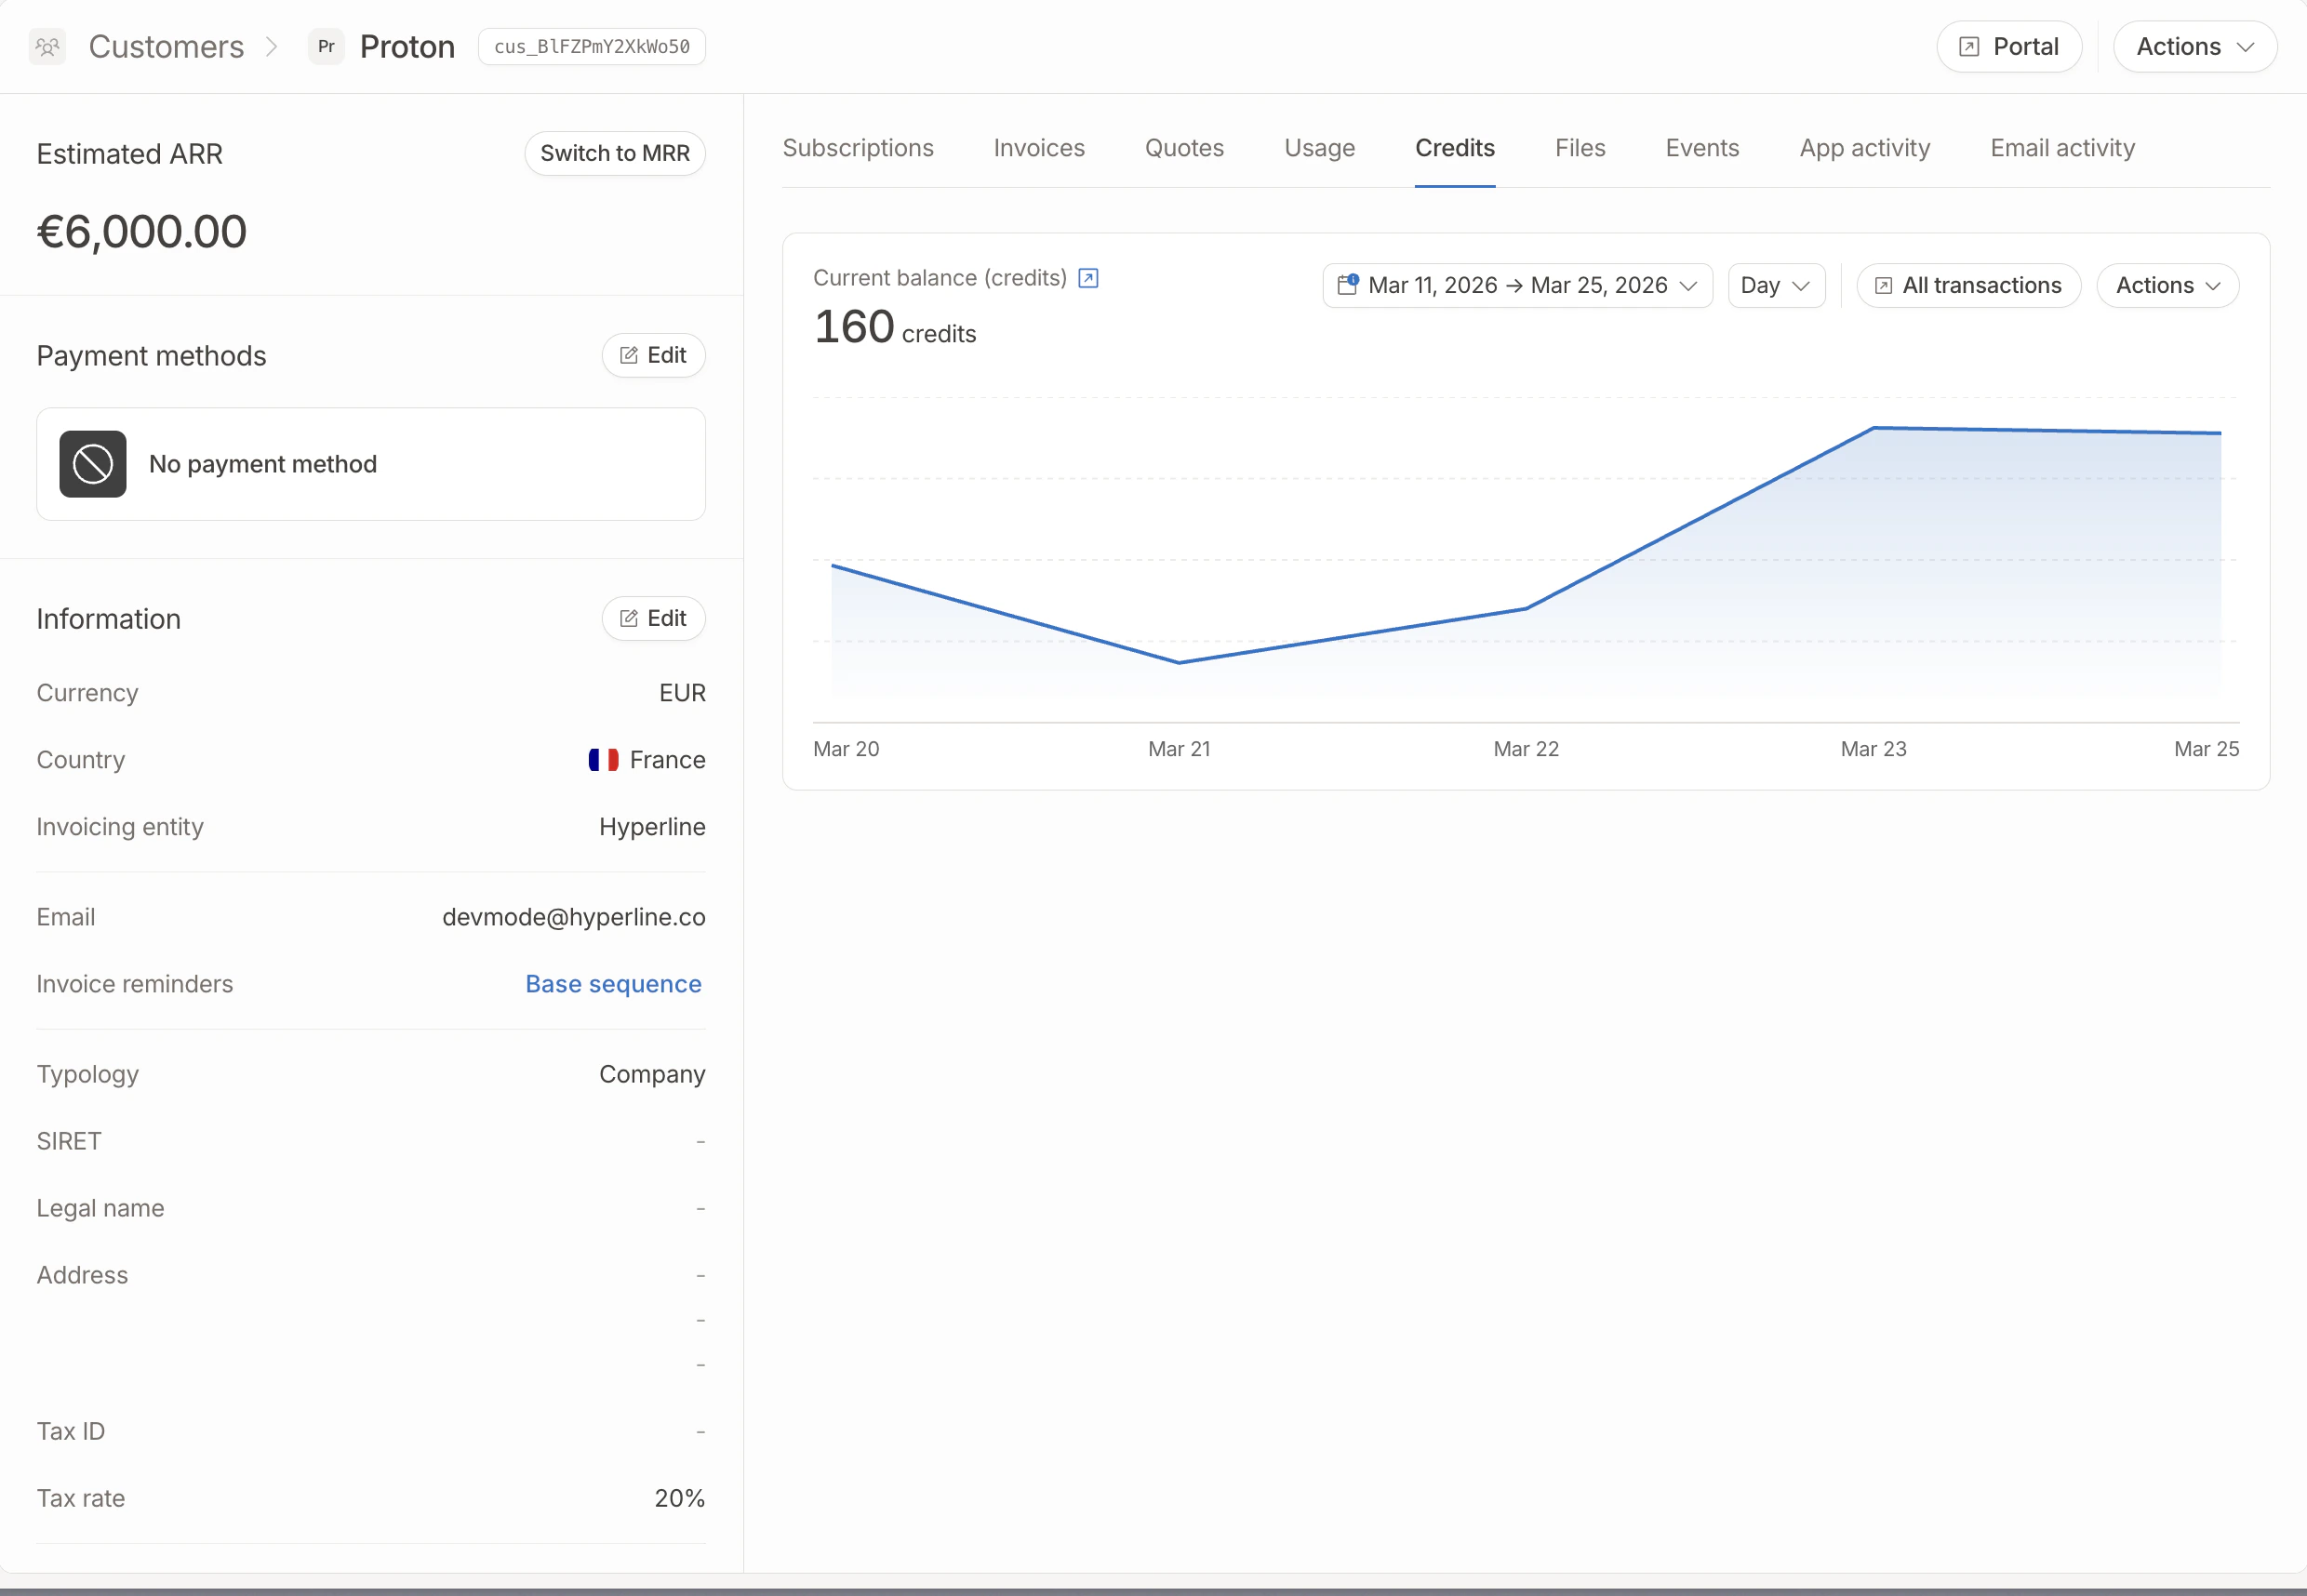
 Once the balance is created, a **credits chart** shows balance evolution over time. You can adjust the date range and granularity (daily, weekly, monthly) to analyze consumption patterns.
Below the chart, the **transactions table** lists all credit movements (top-ups, usage, expirations). For products with multiple aggregators, an **Aggregator** column indicates which aggregator triggered each usage transaction. You can click on a usage transaction to inspect and export the underlying consumption events.
You can also manually top up or remove credits via the **Actions** menu.
Once the balance is created, a **credits chart** shows balance evolution over time. You can adjust the date range and granularity (daily, weekly, monthly) to analyze consumption patterns.
Below the chart, the **transactions table** lists all credit movements (top-ups, usage, expirations). For products with multiple aggregators, an **Aggregator** column indicates which aggregator triggered each usage transaction. You can click on a usage transaction to inspect and export the underlying consumption events.
You can also manually top up or remove credits via the **Actions** menu.
 ## Add credit products in plan and subscription
Credit products created in the product catalog can be added to predefined billing plans and subscriptions like any other product.
Options for this product can also be changed at the customer/subscription level, allowing full customization without altering your catalog configuration.
## Consumption order
A customer's credit balance is a single shared pool. When usage is reported (via events or via `POST /v1/customers/{id}/credits/{productId}/usage`), it is deducted from that pool.
For accounting and expiration purposes, the deducted amount is attributed to individual top-ups in **FIFO order by top-up creation date** — the oldest top-up is drained first, the most recent one last. This applies regardless of whether a top-up has an expiration date or is permanent.
Consumption order is based on **when each top-up was created**, not on its expiration date. A permanent top-up created before a time-limited top-up will be drained first.
If you want a "free" allowance (e.g. a plan-included monthly allowance) to be consumed before paid top-ups, make sure the allowance top-up is credited to the balance **before** any paid top-up on the same credit product. For recurring allowances tied to a subscription, the allowance is credited at the start of each billing period, so as long as paid top-ups happen after that point, the allowance will be consumed first.
## Credit expiration
Credits can be configured to expire automatically, ensuring that unused credits don't remain on customer balances indefinitely. There are two ways to set up credit expiration:
### Expiration after a fixed number of days
Set a specific number of days after which credits will expire. This is useful for promotional credits or time-limited offers.
When configuring a credit product on a subscription, you can specify how many days after the topup the credits will expire.
### Expiration at the end of the billing period
Credits can be configured to expire at the end of each billing period. This is useful for monthly or annual credit allowances that should not roll over.
When configuring a credit product on a subscription, you can enable this option. Credits will automatically expire when the billing period ends, and new credits will be added at the start of the next period.
When credits expire, an expiration transaction is automatically created in the credit ledger, and the customer's balance is reduced accordingly. The oldest credits expire first.
## Auto-topup
Auto-topup allows you to automatically replenish a customer's credit balance when it falls below a specified threshold. This ensures uninterrupted service for your customers and reduces manual intervention.
### How auto-topup works
When a customer's credit balance drops below the configured low balance threshold, Hyperline can automatically:
1. Create an invoice for the topup amount
2. Charge the customer's payment method
3. Add the credits to their balance
### Configuration options
Auto-topup can be configured in two ways:
**Custom amount**: Specify a fixed amount to charge and the number of credits to add when the threshold is reached.
**Bundle pricing**: Use an existing bundle price from your product catalog. The system will automatically calculate the correct amount based on the bundle pricing.
If you want to add 200 credits and your bundle is 50 credits for €400, the system will charge €1,600 for 4 bundles.
### Setting up auto-topup
When creating or updating a credit balance for a customer, you can configure:
* The balance threshold that triggers auto-topup
* The number of credits to add when triggered
* Either a custom amount to charge, or select a bundle price from your catalog
Auto-topup requires the customer to have a valid payment method on file. If the payment fails, the topup will not be processed and the balance will remain unchanged.
## Add credit products in plan and subscription
Credit products created in the product catalog can be added to predefined billing plans and subscriptions like any other product.
Options for this product can also be changed at the customer/subscription level, allowing full customization without altering your catalog configuration.
## Consumption order
A customer's credit balance is a single shared pool. When usage is reported (via events or via `POST /v1/customers/{id}/credits/{productId}/usage`), it is deducted from that pool.
For accounting and expiration purposes, the deducted amount is attributed to individual top-ups in **FIFO order by top-up creation date** — the oldest top-up is drained first, the most recent one last. This applies regardless of whether a top-up has an expiration date or is permanent.
Consumption order is based on **when each top-up was created**, not on its expiration date. A permanent top-up created before a time-limited top-up will be drained first.
If you want a "free" allowance (e.g. a plan-included monthly allowance) to be consumed before paid top-ups, make sure the allowance top-up is credited to the balance **before** any paid top-up on the same credit product. For recurring allowances tied to a subscription, the allowance is credited at the start of each billing period, so as long as paid top-ups happen after that point, the allowance will be consumed first.
## Credit expiration
Credits can be configured to expire automatically, ensuring that unused credits don't remain on customer balances indefinitely. There are two ways to set up credit expiration:
### Expiration after a fixed number of days
Set a specific number of days after which credits will expire. This is useful for promotional credits or time-limited offers.
When configuring a credit product on a subscription, you can specify how many days after the topup the credits will expire.
### Expiration at the end of the billing period
Credits can be configured to expire at the end of each billing period. This is useful for monthly or annual credit allowances that should not roll over.
When configuring a credit product on a subscription, you can enable this option. Credits will automatically expire when the billing period ends, and new credits will be added at the start of the next period.
When credits expire, an expiration transaction is automatically created in the credit ledger, and the customer's balance is reduced accordingly. The oldest credits expire first.
## Auto-topup
Auto-topup allows you to automatically replenish a customer's credit balance when it falls below a specified threshold. This ensures uninterrupted service for your customers and reduces manual intervention.
### How auto-topup works
When a customer's credit balance drops below the configured low balance threshold, Hyperline can automatically:
1. Create an invoice for the topup amount
2. Charge the customer's payment method
3. Add the credits to their balance
### Configuration options
Auto-topup can be configured in two ways:
**Custom amount**: Specify a fixed amount to charge and the number of credits to add when the threshold is reached.
**Bundle pricing**: Use an existing bundle price from your product catalog. The system will automatically calculate the correct amount based on the bundle pricing.
If you want to add 200 credits and your bundle is 50 credits for €400, the system will charge €1,600 for 4 bundles.
### Setting up auto-topup
When creating or updating a credit balance for a customer, you can configure:
* The balance threshold that triggers auto-topup
* The number of credits to add when triggered
* Either a custom amount to charge, or select a bundle price from your catalog
Auto-topup requires the customer to have a valid payment method on file. If the payment fails, the topup will not be processed and the balance will remain unchanged.