> ## Documentation Index
> Fetch the complete documentation index at: https://docs.hyperline.co/llms.txt
> Use this file to discover all available pages before exploring further.
# React components
> Embed Hyperline checkout, customer portal, and payment method components directly in your React application with the official React SDK.
Hyperline provides built-in React components to:
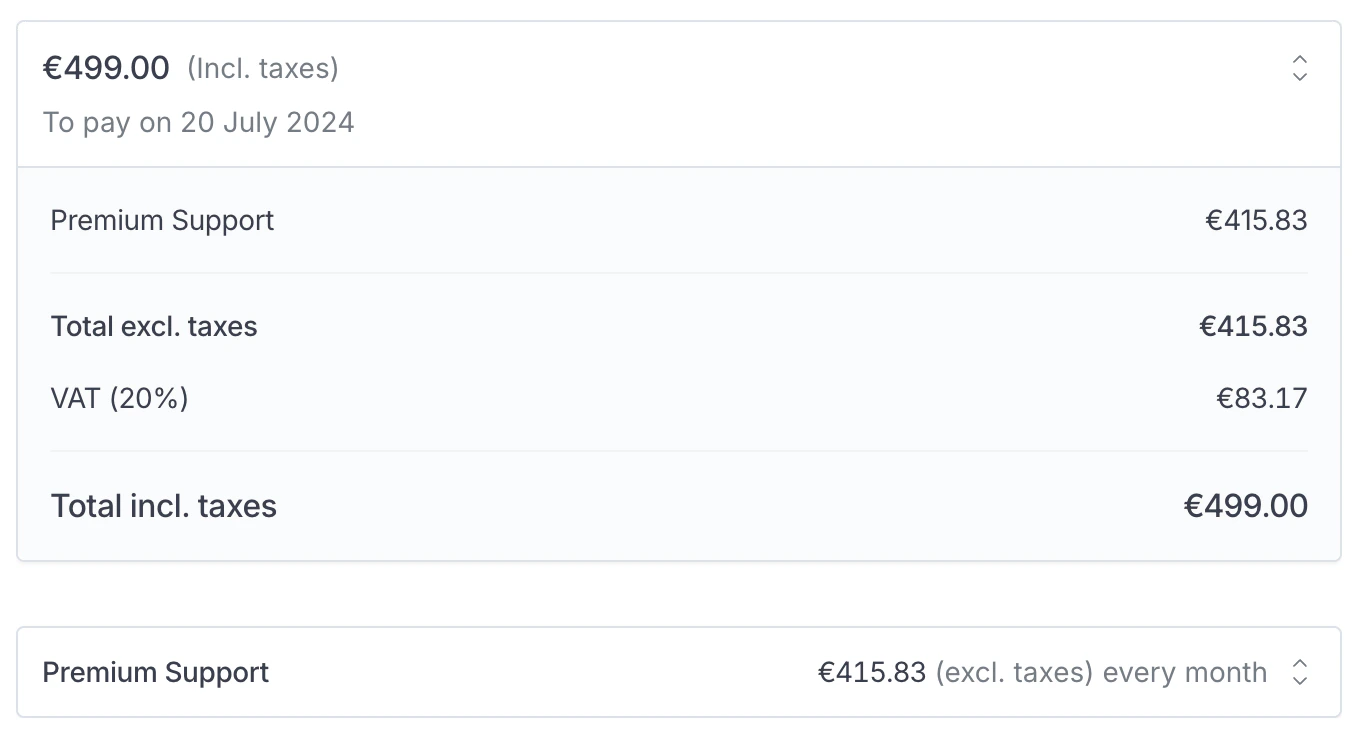
* Display a customer's subscriptions
* Preview and update the payment method
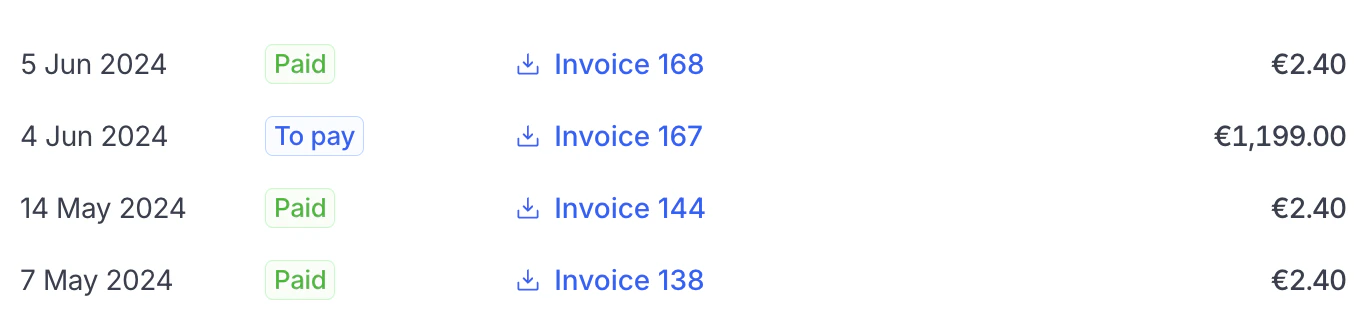
* List and download invoices
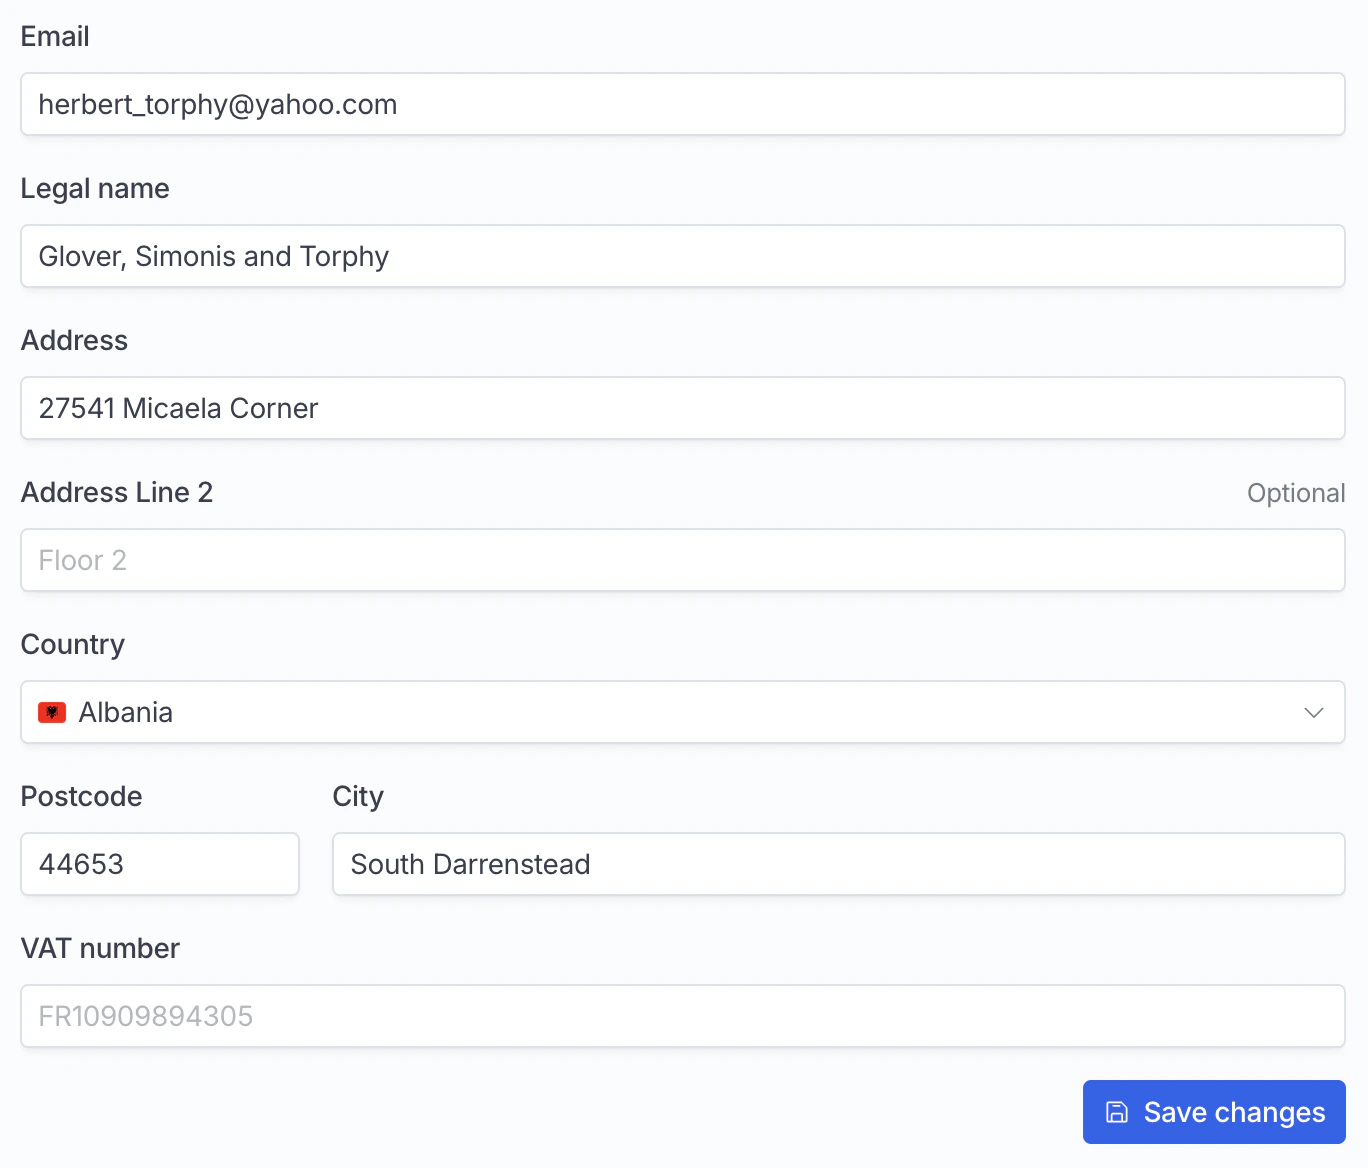
* List and update billing information
 This page assumes that you already have a basic working knowledge of [React](https://react.dev/) and that you have already set up a React project.
## Getting started
Install the `@hyperline/react-components` NPM package.
```sh Install the package theme={null}
npm install @hyperline/react-components
```
To allow a customer to see their Hyperline data, you need to generate a unique authentication token on your server side. You can use the Hyperline API and the [create auth token endpoint](/api-reference/endpoints/integrations/create-component-token) for this.
```sh cURL theme={null}
curl -X POST 'https://api.hyperline.co/v1/integrations/components/token' \
-H 'Content-Type: application/json' \
-H 'Authorization: Bearer ' \ # You can create an [api key here](https://app.hyperline.co/app/settings/api)
-d '{ "customer_id": "" }'
```
Then, integrate the React components. You will most likely generate a new token every time your customer accesses the page.
```ts theme={null}
import { Subscriptions, PaymentMethod } from "@hyperline/react-components";
export default function HyperlineSubscriptions() {
return (
",
mode: "production" // if you're using our sandbox, set "sandbox" here
locale: "en" // optional
}}
/>
);
}
export default function HyperlinePaymentMethod() {
return (
",
mode: "production" // if you're using our sandbox, set "sandbox" here
locale: "en" // optional
}}
onPaymentMethodCreated={() => do something} // optional, from 0.2.20
onPaymentMethodDeleted={() => do something} // optional, from 0.2.20
/>
);
}
```
This page assumes that you already have a basic working knowledge of [React](https://react.dev/) and that you have already set up a React project.
## Getting started
Install the `@hyperline/react-components` NPM package.
```sh Install the package theme={null}
npm install @hyperline/react-components
```
To allow a customer to see their Hyperline data, you need to generate a unique authentication token on your server side. You can use the Hyperline API and the [create auth token endpoint](/api-reference/endpoints/integrations/create-component-token) for this.
```sh cURL theme={null}
curl -X POST 'https://api.hyperline.co/v1/integrations/components/token' \
-H 'Content-Type: application/json' \
-H 'Authorization: Bearer ' \ # You can create an [api key here](https://app.hyperline.co/app/settings/api)
-d '{ "customer_id": "" }'
```
Then, integrate the React components. You will most likely generate a new token every time your customer accesses the page.
```ts theme={null}
import { Subscriptions, PaymentMethod } from "@hyperline/react-components";
export default function HyperlineSubscriptions() {
return (
",
mode: "production" // if you're using our sandbox, set "sandbox" here
locale: "en" // optional
}}
/>
);
}
export default function HyperlinePaymentMethod() {
return (
",
mode: "production" // if you're using our sandbox, set "sandbox" here
locale: "en" // optional
}}
onPaymentMethodCreated={() => do something} // optional, from 0.2.20
onPaymentMethodDeleted={() => do something} // optional, from 0.2.20
/>
);
}
```
 ## Components
### Subscriptions
List all active subscriptions
```tsx theme={null}
"
}}
/>
```
### Subscription
Display a subscription by ID
```tsx theme={null}
"
}}
/>
```
### InvoicesList
List and download all invoices and refunds
```tsx theme={null}
"
}}
/>
```
### PaymentMethod
Display the current payment method, delete it if allowed, or add a new payment method
```tsx theme={null}
"
}}
/>
```
### CustomerBillingInfoForm
Display a form with all billing info, with an optional callback when the form has been successfully saved.
```tsx theme={null}
{}}
options={{
token: ""
}}
/>
```
## Component options
When using the components, provide an `options` prop with the following parameters:
| Name | Description | Type | Default value | Required |
| - | - | - | - | - |
| token | The token specific to your customer | string | | ☑️ |
| mode | The Hyperline environment you are using | production \| sandbox | production | |
| appearance | Customize the appearance of the component | Object | | |
### Appearance
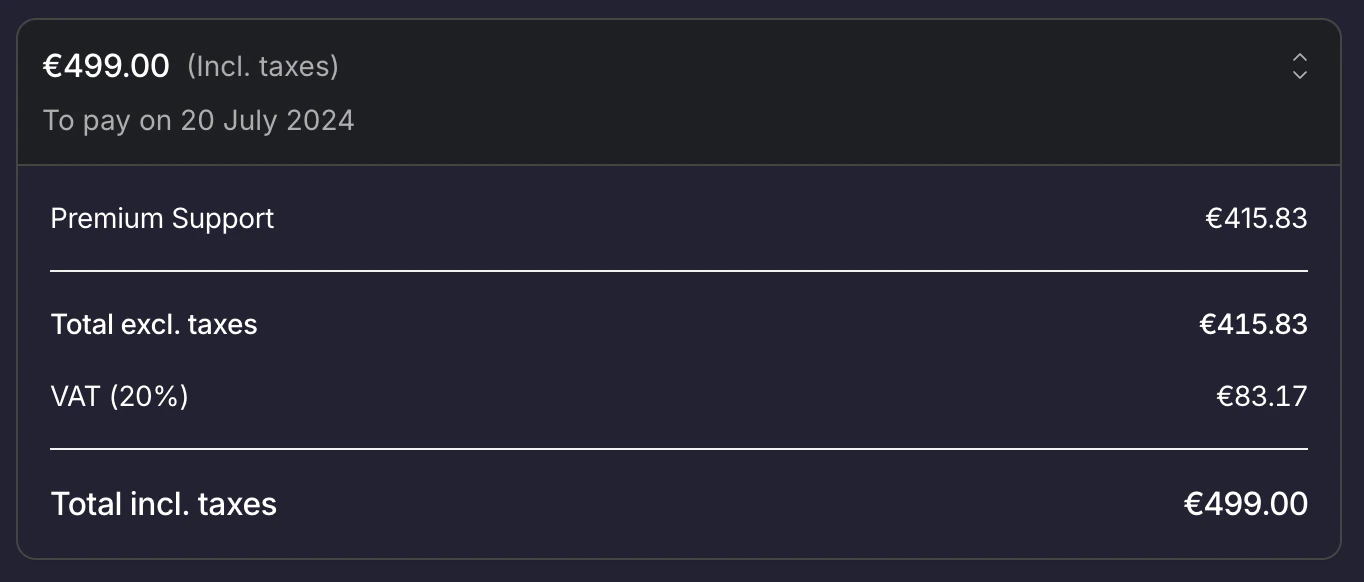
You can change the colors and fonts of the component.
```tsx theme={null}
",
appearance: {
variables: {
borderRadius: "10px",
colorBackground: "#000000",
colorPrimary: "#e1e2f3",
colorPrimaryHover: "#d0d1e5",
colorPrimaryDisabled: "#667",
colorBorder: "#445",
colorText: "#f1f2f3",
colorTextSecondary: "#dededf",
fontFamily: "sacramento"
},
fonts: [
{
src: "url(https://fonts.gstatic.com/s/sacramento/v13/buEzpo6gcdjy0EiZMBUG4C0f_f5Iai0.woff2)",
family: "sacramento"
}
]
}
}}
/>
```
## Components
### Subscriptions
List all active subscriptions
```tsx theme={null}
"
}}
/>
```
### Subscription
Display a subscription by ID
```tsx theme={null}
"
}}
/>
```
### InvoicesList
List and download all invoices and refunds
```tsx theme={null}
"
}}
/>
```
### PaymentMethod
Display the current payment method, delete it if allowed, or add a new payment method
```tsx theme={null}
"
}}
/>
```
### CustomerBillingInfoForm
Display a form with all billing info, with an optional callback when the form has been successfully saved.
```tsx theme={null}
{}}
options={{
token: ""
}}
/>
```
## Component options
When using the components, provide an `options` prop with the following parameters:
| Name | Description | Type | Default value | Required |
| - | - | - | - | - |
| token | The token specific to your customer | string | | ☑️ |
| mode | The Hyperline environment you are using | production \| sandbox | production | |
| appearance | Customize the appearance of the component | Object | | |
### Appearance
You can change the colors and fonts of the component.
```tsx theme={null}
",
appearance: {
variables: {
borderRadius: "10px",
colorBackground: "#000000",
colorPrimary: "#e1e2f3",
colorPrimaryHover: "#d0d1e5",
colorPrimaryDisabled: "#667",
colorBorder: "#445",
colorText: "#f1f2f3",
colorTextSecondary: "#dededf",
fontFamily: "sacramento"
},
fonts: [
{
src: "url(https://fonts.gstatic.com/s/sacramento/v13/buEzpo6gcdjy0EiZMBUG4C0f_f5Iai0.woff2)",
family: "sacramento"
}
]
}
}}
/>
```
 ### Variables
Use variables to customize all elements at once.
| Variable name | Description |
| - | - |
| `borderRadius` | Change the roundness of the elements: Buttons, tables, ... |
| `colorBackground` | Most elements have a transparent background. In other cases, you can customize the background color of the element |
| `colorPrimary` | Color used for buttons and accent text |
| `colorPrimaryHover` | Hover color for buttons |
| `colorPrimaryDisabled` | Color of disabled buttons |
| `colorBorder` | The color of all our regular borders |
| `colorText` | Default text color |
| `colorTextSecondary` | Text color of secondary text |
| `fontFamily` | Font used. If you need to import a font, see the next section |
### Fonts
Set your application's font.
* `src` Url of the font file
* `family` Name of the font. This is the name you'll use for the `fontFamily` variable
```ts theme={null}
```
This documentation is built and hosted on [Mintlify](https://mintlify.com), a developer documentation platform.
### Variables
Use variables to customize all elements at once.
| Variable name | Description |
| - | - |
| `borderRadius` | Change the roundness of the elements: Buttons, tables, ... |
| `colorBackground` | Most elements have a transparent background. In other cases, you can customize the background color of the element |
| `colorPrimary` | Color used for buttons and accent text |
| `colorPrimaryHover` | Hover color for buttons |
| `colorPrimaryDisabled` | Color of disabled buttons |
| `colorBorder` | The color of all our regular borders |
| `colorText` | Default text color |
| `colorTextSecondary` | Text color of secondary text |
| `fontFamily` | Font used. If you need to import a font, see the next section |
### Fonts
Set your application's font.
* `src` Url of the font file
* `family` Name of the font. This is the name you'll use for the `fontFamily` variable
```ts theme={null}
```
This documentation is built and hosted on [Mintlify](https://mintlify.com), a developer documentation platform.